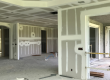
Smooth Walls Through Professional Drywall Installation Techniques
If you are planning an interior paint refresh in Allen, TX, you might be dealing with seams, dents, or uneven spots that show up the moment the walls get light. This guide explains how drywall installation and finishing choices affect what your finished paint will look like, and what to ask for so your walls stay smooth instead of “wavy.”
You run your hand along the wall and it feels mostly fine, but the trouble appears after primer and paint. In Allen, TX homes, that is a common surprise when seams, patch edges, or drywall “waves” catch the light from ceiling fixtures.
Before you spend time choosing a color, you want the surface to be right. This article helps you understand what professional drywall installation and finishing should do for your walls, how to spot red flags, and how to plan the next steps for Interior Painting that looks crisp instead of patchy.
Quick Answer
For smooth walls, professional drywall installation and finishing matter as much as the paint. The key is getting the board layout aligned, fastening consistent, and seams treated with the right drywall patching, taping, and drywall finishing steps so edges do not telegraph through. If you are seeing bumps, seam lines, or uneven reflections now, address the drywall first, then prime and paint. A practical next step is to review your wall’s problem areas in daylight and ask your painter or drywall provider how they will prepare and finish the seams before color work begins.
What to Check First
Before you schedule paint or cabinet updates, take a careful walk-through. Most “smooth wall” issues come from drywall that was installed or patched without a consistent plan for seams, transitions, and surface prep.
Professional observation: Smooth walls start at the joints. If the seams are not flattened and blended during drywall finishing, paint will highlight them instead of hiding them.
Here is what to check in your Allen, TX home:
- Seam lines and nail/screw pops: Look for thin ridges or tiny dots that move under light.
- Corner transitions: Pay attention to inside corners, around door frames, and where drywall meets trim.
- Patch boundaries: If you see a rectangle or “halo” shape, the drywall patching edges may not be fully blended.
- Flatness under lighting: Turn on a few lights and stand back. Uneven drywall often shows up as subtle waves.
- Moisture or bubbling: If bubbling or soft spots exist, installation and surface prep may need extra attention before finishing.
Main Things Customers Should Understand
Drywall installation is not just hanging panels. The smooth look you want depends on the details that happen before any paint touches the surface. Below are the practical factors that typically separate “okay” walls from walls that look professionally finished.
1) Layout and alignment
Board placement affects seam locations and how easy it is to keep surfaces flat. When seams are planned well and boards align correctly, fewer transitions show through later.
2) Fastening and consistency
Fasteners placed too shallow or inconsistent can create bumps that become visible after primer. Consistent fastening supports uniform drywall finishing.
3) Taping and blending
Seams need more than coverage. Proper taping, drywall patching technique, and sanding help blend edges so paint reads as one continuous surface.
When drywall is installed and finished with care, it also makes other work look better. For example, if you are doing Trim Painting, Door Painting, or Window Frame Painting, clean drywall edges reduce the “halo” effect where paint meets trim.
If you have multiple rooms or mixed surfaces, consider coordinating surface prep across the project. That includes caulking and sealing at transitions, priming services where needed, and matching the finishing approach so you do not end up with different wall textures in the same space.
Quick decision tip: If you already know you will paint, treat drywall finishing as the foundation step. Painting can improve the look, but it cannot fix a seam that is still raised or uneven.
Why This Matters in Allen, TX
Allen, TX homes often include a mix of older drywall sections and newer additions or repairs. That is where texture and flatness differences show up most. Even if two walls look fine while you are walking around, overhead lighting and bright natural light can reveal differences in seam blending, patch edges, and drywall finishing quality.
Another local factor is the way people use indoor spaces. Kitchens, hallways, and entry areas see more traffic, doors opening and closing, and occasional scuffs. That means repairs happen. When repairs are done without a plan for how the patch will be finished and sanded, the “spot” can stand out forever after you repaint.
If you are also planning surface updates like wallpaper or removal work, drywall quality becomes even more critical. Inconsistent wall texture can affect how wallpaper installation sits and how wallpaper removal leaves behind surface variations.
For related work in your area, MJ Workforce Solutions can support with drywall services and help you plan what comes before wallpaper installation or after wallpaper removal.
Get a surface plan before you pick a paint color
Bring MJ Workforce Solutions your wall concerns. We can help you connect drywall installation and drywall repair steps to the smooth finish you want for your Allen, TX interior project.
Schedule drywall supportCommon Mistakes to Avoid
When homeowners rush to paint, they sometimes skip the steps that prevent “telegraphing.” Here are common mistakes that lead to visible seams, uneven sheen, or roughness that looks worse after painting.
Common mistake: Painting over seams that were not fully flattened. Primer may cover color differences, but it does not reliably correct ridges or patch edges.
- Assuming patch coverage equals smoothness: Drywall patching is about blending the transition, not just filling a spot.
- Skipping proper priming services: Different surfaces can absorb paint differently, making uneven areas stand out.
- Not addressing transitions: Areas around trim, doors, and window frames often need caulking and sealing so paint lines look clean.
- Under-sanding after finishing: If drywall finishing is not sanded evenly, the wall texture becomes visible under light.
- Choosing paint before the surface is stable: If the wall still needs drywall repair or texture matching, selecting a finish coat too early can lock in the problem.
Customer Checklist
Before drywall finishing and paint begin, confirm these points:
- We walk the room in multiple lighting conditions to locate seam lines, patch edges, and flatness issues.
- Drywall installation and drywall repair areas are planned so seams and transitions are minimized where they show.
- Seams and patch boundaries are taped, filled, blended, and sanded to reduce telegraphing.
- Priming services are included where they support an even, consistent finish.
- Caulking and sealing are used at trim and doorway transitions for clean paint lines.
- We coordinate the drywall finishing schedule with your interior painting timeline for the smoothest result.
Representative scenario: Allen homeowner preparing an interior refresh
A homeowner in Allen, TX notices a faint seam line running through a hallway after a previous repair. The area looks okay up close, but under the hallway light it creates a shadow. MJ Workforce Solutions reviews the wall, identifies the seam and patch transition as the likely cause, and focuses on flattening and blending the drywall finishing steps first. After the surface is consistent, the painting process produces a smoother visual line across the hallway instead of highlighting the repair spot.
Frequently Asked Questions
How do drywall seams end up showing after painting?
Drywall seams often telegraph when the joint compound is not flattened and blended during drywall finishing. Even if the seam is filled, a raised ridge, uneven sanding, or inconsistent primer coverage can create a visible line once the final coat is applied. Lighting is usually what reveals it most, especially in hallways and around doors where light angles are less forgiving. Addressing seam prep first helps ensure the wall reads as one smooth surface.
Should I repair drywall first or repaint first?
Repair drywall first. If you paint over ridges, patch boundaries, or uneven flatness, paint will typically highlight the problem rather than conceal it. A better approach is to confirm whether you need drywall repair, drywall patching, or drywall finishing adjustments, then move to priming services and interior painting. This order also helps you evaluate the surface accurately before committing to a final color or sheen.
What should I look for to tell if a patch was finished well?
Look for consistency under light and from different angles. A well-finished patch should not create a “halo” or rectangle shape, and it should feel level when you run your hand gently across the repaired area. In addition, seam lines should not cast a shadow when lights are on. If you see a boundary or feel a step, the drywall finishing may need additional blending and sanding before painting.
Does caulking and sealing affect the smooth wall look?
Yes. Caulking and sealing help close small gaps at transitions where drywall meets trim, doors, and window frames. When those gaps are left unaddressed, paint can seep into the opening or shrink back slightly, leaving uneven lines. Clean transitions also make the overall finish look more uniform, especially when you are doing trim painting, door painting, or window frame painting alongside interior painting.
Can drywall finishing affect wallpaper installation and removal results?
It can. Wallpaper installation usually looks best on a wall that is consistent in texture and flatness. If the drywall finishing around seams or patches is uneven, wallpaper may show the differences after it is installed. Similarly, wallpaper removal can leave behind surface variations that may require drywall patching and finishing before repainting or re-papering. If you are planning both, it is helpful to coordinate the order of work so the wall surface is ready for the next step.
Ready to get smooth walls in Allen, TX?
If your seams, patches, or wall texture are showing through, MJ Workforce Solutions can help with drywall services that support a clean, professional interior finish.
Call (945) 253-0961