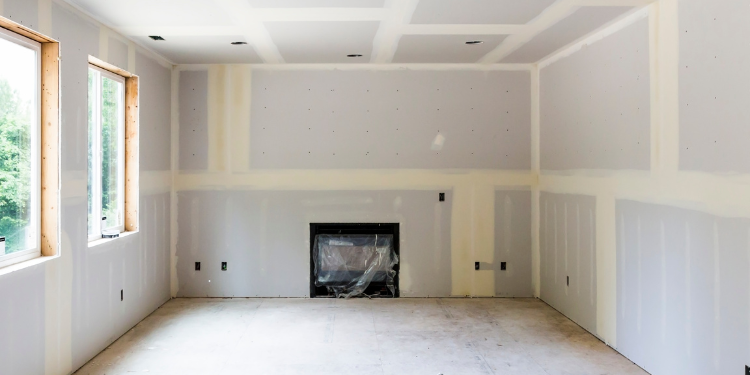
If a wall has a hole, a sagging section, or patchwork that keeps showing through, the fix is usually more than “adding drywall.” This guide explains how drywall installation, repair, and finishing work together so your walls look even and ready for paint in Allen, TX.
After a plumbing repair or a door replacement, homeowners in Allen, TX often notice the same problem: the wall looks fine from a distance, but up close the texture is uneven and the paint does not lay the same.
Even worse, a quick patch can shrink or crack, and then you end up repainting the whole room to hide the seams. If you are facing drywall damage and want a clean, consistent finish, this walkthrough will help you understand what should happen before paint ever touches the wall.
By the end, you will know what to check, the most common mistakes to avoid, and how to plan a restoration that holds up after everyday life in a Texas home.
Quick Answer
For quick, clean wall restoration, drywall installation should start with correct framing and secure fastening, followed by proper joint tape and finishing that matches your existing wall texture. After the drywall is solid and smooth, surface prep and priming help the paint bond consistently, so seams do not telegraph. A practical next step is to ask your contractor whether they will match the wall texture and include priming for repaired areas, not just patch and paint. If you need a full look, plan for related work like drywall services so the whole wall system is handled together.
What to Check First
Before drywall installation begins, take a minute to identify what kind of damage you have. The right fix depends on whether the problem is a simple hole, a compromised section, or something structural behind the drywall.
Is the framing intact?
If the studs or backing are loose or damaged, the new drywall will not stay flat. That can lead to bumps, gaps, and cracking over time.
Are there signs of moisture?
Discoloration, soft spots, or a musty smell can mean the repair needs more than drywall replacement. Address the cause first.
How does the wall texture look?
Some walls have knockdown, swirl, or stipple patterns. If texture is not matched, the “patch” will always be visible after painting.
If you are dealing with a larger area or multiple damaged spots, it is often more efficient to bundle drywall work with finishing. For example, if you are planning paint refreshes, you can coordinate timing with exterior painting service areas in Allen when the project spans both interior and exterior surfaces.
Professional observation: A “seam” is usually a combo of three things: how the drywall was fastened, how the joints were finished, and how the final texture was matched. Fixing only one part often leaves the same seam visible after paint.
Main Things Customers Should Understand
Drywall installation is not just cutting and fitting board. The best results come from a controlled process that keeps the wall flat, the seams strong, and the surface paint-ready.
1) Clean edges and stable fastening
New drywall should be cut to remove weak material and create straight, workable edges. Then it needs secure attachment to backing or studs so the repaired section does not flex. When the board moves even slightly, the seam can reappear.
2) Joint tape and finishing that matches the wall
Proper tape and joint compound create the smooth transition between old and new drywall. Finishing should be built up in steps and sanded carefully so the surface is even. This is also where texture matching starts, because the final profile must blend with what is already on your walls.
3) Priming and surface preparation
Repaired drywall can absorb paint differently than the existing wall. Priming helps reduce flashing and helps the paint dry more uniformly. If you are also planning wallpaper installation later, prep quality matters because irregular surfaces can show through or cause lifting.
4) Drywall patching versus full installation
Small holes can often be patched, but larger sections may require full drywall replacement to keep the wall flat. The goal is not “the fastest fix.” The goal is a stable wall surface that stays consistent once paint, texture, or decorative finishes are applied.
Firsthand-style industry observation: In real projects, the most common “rework” happens after someone patches a hole without stabilizing the backing or without enough compound build-up. The wall looks okay for a short time, then sanding reveals ridges, and the sheen of paint makes the seam obvious.
Decision table: Patch, install, or bundle?
| Situation | What usually works best | What to ask for |
|---|---|---|
| Small holes (typical daily-life damage) | Drywall patching with proper tape and finishing | Texture matching and priming for the repaired area |
| Cracks near seams or repeated patch spots | Targeted drywall repair or wider installation for stability | How the backing is secured before finishing |
| Large damaged sections or removed drywall for access | Drywall installation to restore a full section | Joint finishing steps and sanding plan to blend |
| Wall prep plus new finishes planned | Bundle drywall finishing with your next wall surface step | Prep requirements if you are doing wallpaper or paint |
Why this matters in Allen, TX
Allen, TX homes often see seasonal swings that affect how materials behave. Even when damage starts elsewhere, the repaired wall has to handle normal expansion and contraction. That is why a stable fastening plan and consistent finishing matter. When the joint is not reinforced correctly or the surface is not prepped and primed, Allen homeowners typically notice it the moment they repaint, especially under bright indoor lighting.
If you are planning a broader refresh, you can also coordinate related surface work. For instance, if you have a project that includes walls and ceiling texture changes, you might need popcorn texture removal service areas in Allen so the texture approach stays consistent across the room.
Need a clean drywall restoration plan for your space?
If your wall already has patches or uneven texture, it helps to talk through what is behind the drywall and what kind of finish you want afterward. MJ Workforce Solutions can help you map the scope for a restoration that is ready for paint.
Contact MJ Workforce SolutionsCommon Mistakes to Avoid
Most drywall problems are not “mystery defects.” They come from predictable steps skipped or rushed. Here are the mistakes that most often turn a small repair into a bigger repainting job.
- Skipping stable backing: If the new drywall is not secured to studs or proper backing, the seam can crack or flex.
- Under-finishing the joint: Thin compound layers or uneven sanding often telegraph as ridges after paint.
- Not matching texture: Even a perfectly smooth seam can stand out if the surrounding wall has a knockdown, swirl, or stipple pattern.
- Painting without priming: Repaired drywall can absorb paint differently, causing flashing and uneven sheen.
- Forgetting adjacent surface prep: Dust and debris from sanding can ruin the look of the final coat if walls are not cleaned and prepped properly.
Customer Checklist
Use this checklist to keep your project moving toward a consistent finish. It is designed for homeowners, property managers, and anyone scheduling wall restoration in Allen.
- Confirm whether the damage requires patching or full drywall installation for a stable surface.
- Ask how the contractor will fasten the new drywall so it stays flat.
- Discuss tape and joint finishing steps, including sanding between coats.
- Plan for texture matching to blend repaired areas with existing walls.
- Request priming for repaired drywall before final paint.
- Coordinate timing if you also need related work like wallpaper removal service areas in Allen before finishing.
Representative Scenario: From Patch to Seamless Finish
A homeowner in Allen, TX had a section of drywall removed for access behind a wall. After the work behind the wall was completed, the visible patch area looked “almost right,” but the texture did not match and the seam showed under evening light.
In a proper restoration, the contractor replaces the damaged drywall section, secures it to stable backing, tapes and finishes the joints in layers, and then matches the wall texture before priming. Once that sequence is done, the final paint coat dries more uniformly, and the repaired area blends with the existing wall instead of standing out.
Frequently Asked Questions
How long does drywall installation and finishing usually take?
Project time depends on how much drywall is being replaced, how many seams need finishing, and whether texture matching is required. Joint compound typically needs multiple build-up and sanding steps for a smooth surface. Also, priming and final painting are separate steps that should not be rushed. If you are coordinating with other work in your Allen home, it helps to plan for the full sequence: installation, finishing, texture blending, priming, and then the paint coat.
Will a repaired seam show after paint?
A seam can show if the backing is not stable, the joint is not finished evenly, or the texture does not blend with the surrounding wall. Paint highlights differences in surface profile and sheen, so the repair process has to be consistent. The most practical approach is to confirm that the plan includes proper joint finishing, sanding, texture matching, and priming for repaired areas before painting. That combination reduces the chance of “flashing” or ridge lines.
Do I need to replace the entire wall section or just patch the hole?
Small holes can often be patched, but larger areas or repeated repairs may require drywall installation for a wider, more stable section. If the surrounding drywall is weak, cracked, or not securely fastened, patching over it can lead to reoccurring issues. A contractor should evaluate what is behind the damaged area and how it will be secured. That assessment helps you avoid paying for a repair that looks fine briefly but fails again after finishing.
Can I paint right after drywall repair?
In most cases, painting should wait until joint compound is fully finished, sanded, and ready for primer. Drywall repairs need time for compound to cure properly, and texture matching may require additional steps. Rushing can cause sanding marks, uneven absorption, or seams to show through the paint. A practical recommendation is to confirm the finishing and priming timeline before the final coat is scheduled, especially if your walls have a noticeable texture.
What if my walls have wallpaper now?
Wallpaper changes how you plan surface preparation. If you are removing wallpaper, repairs should be addressed so the wall is ready for what comes next. Uneven drywall finishing can show through even after wallpaper is removed, and dust from sanding can interfere with clean surface prep. If you are considering wallpaper removal in Allen, it helps to coordinate drywall work and prep so the final surface is consistent before installation of new finishes.
Ready to restore your walls the right way?
If your drywall repair needs texture blending and paint-ready prep, MJ Workforce Solutions can help you plan a clean restoration for your Allen, TX home. Start with a quick conversation about the damaged area and your finish goals.
(945) 253-0961