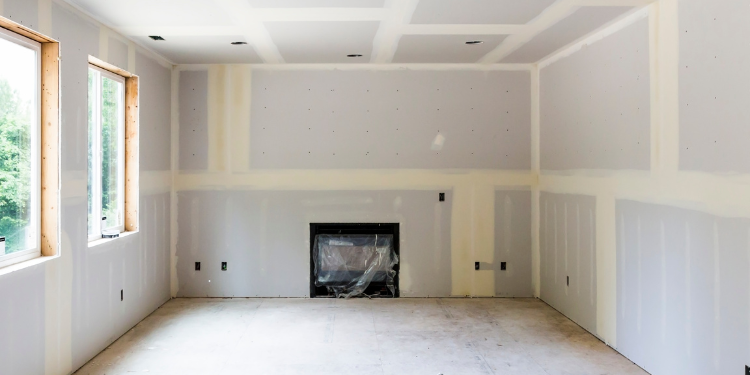
Drywall Installation for Strong Walls and Perfect Texture
If you’ve ever noticed a “shadow line” around a patch—where the repaired drywall looks slightly dull, rough, or the texture doesn’t match—you’re not imagining it. In many Allen, TX homes, those little texture differences show up fast because our weather swings can tighten and loosen finishes, especially around doors, corners, and areas that were previously repaired.
Drywall installation isn’t just about hanging sheets and calling it done. The real work is getting the substrate solid, flat, and correctly finished so the final texture and paint hold up for years—not months.
Quick Answer
For drywall installation that looks seamless, you need:
- Proper framing support (no flex)
- Correct sheet layout and fastener spacing
- Clean tape seams and proper joint compound build-up
- Texture matching (not just “close enough”)
- Paint-ready surface finishing with the right primers and sanding control
When these steps are skipped or rushed, homeowners typically see cracking seams, uneven texture, or patches that remain visible even after repainting.
Why Drywall Installation Matters for a “Real” Finish
We’ll usually hear one of these situations from homeowners:
- “We had water damage and the contractor replaced the drywall, but it still looks patchy.”
- “The wall feels bumpy in certain light.”
- “The seam cracked after we repainted.”
A firsthand contractor observation: the eye catches texture mismatch before it catches paint color mismatch. Even if the wall is the same color, a patch that’s slightly flatter, smoother, or thicker will cast light differently. That’s why drywall installation and drywall finishing have to be treated as one continuous system.
On the job, we look beyond the sheetrock itself:
- Does the wall move when you push on it?
- Are corners straight enough that joint compound won’t “roll”?
- Did the previous repair leave high spots that sanding can’t fully fix?
- Is the texture method consistent—spray, roller knockdown, orange peel, or skip trowel?
If the base is wrong, paint can’t fully correct it.
What We Commonly See in North Texas Homes
North Texas homes experience seasonal movement—expansion and contraction from heat, HVAC cycling, and humidity changes. In practice, that means:
- Hairline cracks can reappear if the underlying framing or seam prep wasn’t solid.
- Corners and transitions (like around windows and door trim) show defects first.
- Texture can look “off” because patches often cure and shrink differently than the surrounding wall.
In Allen specifically, we also see lots of suburban renovations—garage conversions, room additions, and interior updates that come with partial wall replacements. Those projects are where drywall installation quality matters most, because the “new” wall is competing against a mature, settled surface.
Common Mistakes That Lead to Premature Wear
Here are the mistakes we most often see homeowners (or rushed crews) make—especially when DIY patching turns into a bigger repair:
1. Using the wrong compound for the job
- Some compounds work for patching, but not for feathering and finishing. If you build too fast, you risk shrink lines and uneven texture.
2. Over-sanding or under-sanding
- Over-sanding can create thin “burn-through” areas that look worse after primer.
- Under-sanding leaves ridges that texture won’t hide.
3. Skipping primer on repaired drywall
- Unprimed patches can absorb paint unevenly, making texture and seam work look darker or shinier.
4. Not checking for flex
- If the wall has movement (loose fasteners, insufficient backing), seams will crack no matter how good the finishing is.
5. Texture matching without measuring the surrounding pattern
- “Same style” isn’t the same as “same look.” Orange peel, knockdown, and stipple each have different droplet/roller behavior. If the pattern scale is wrong, the patch stands out in sunlight and evening lamp light.
Preparation and Maintenance Checklist (Before and After Installation)
Great drywall work starts before the first screw goes in—and it keeps working after the wall is finished.
Preparation checklist (for a smooth install)
- Confirm the framing is secure (no loose studs, backing, or wobble).
- Use the right drywall thickness for the application (and follow local build standards).
- Plan sheet seams so they land where they’re easiest to finish cleanly (not randomly on the most visible wall).
- Ensure the area is dry and climate-stable before closing up walls.
- Protect floors and trim while installing and finishing.
Surface preparation checklist (for perfect texture)
- Tape seams with correct technique and consistent compound coverage.
- Build layers with feathering so you don’t create “edges” you can feel.
- Sand in controlled passes—check by hand and under raking light.
- Remove dust thoroughly (dust affects primer and texture adhesion).
- Prime repaired areas so paint sheen stays consistent across the wall.
Maintenance checklist (keep it looking new)
- Avoid blasting water or steam near repaired sections (especially around bathrooms).
- Keep indoor humidity stable when possible—rapid swings can stress finishes.
- If you notice a seam hairline forming, address it early (small repairs are easier than full-wall refinishing).
Material, Finish, and Surface-Prep Recommendation
For drywall installation aimed at a seamless texture match, we recommend treating the surface as a “system”:
- Joint compound selection: Use a compound appropriate for the stage—base/tape, intermediate build, and final smoothing. This reduces shrink lines.
- Sanding strategy: Finish sanding should aim for smooth-to-the-touch without flattening the surrounding texture pattern more than necessary.
- Primer choice: A quality primer stabilizes absorption and helps prevent flashing (where repaired areas look slightly different under certain lighting).
- Texture approach: Match the existing method (spray, roller, stomp, knockdown, or skim). When texture is sprayed, droplet size and pressure matter; when rolled, nap and technique matter.
A finish that looks perfect on day one can still fail early if the primer isn’t right or if the patch cures unevenly. We’ve seen it enough times to be picky here—because drywall work is one of the few trades where “it looks fine now” can still hide a future seam.
A Realistic Example: The “Visible Patch” After a Water Leak
Here’s a common, anonymized scenario we handle:
A homeowner in Allen had a small leak under a sink. The damaged drywall was cut out and replaced, then painted quickly. A month later, they noticed:
- the seam line reappeared,
- the repaired area felt slightly smoother than the rest of the wall,
- and the paint looked a touch darker when the overhead lights came on.
When we inspected it, the issue wasn’t the paint—it was the foundation:
- the new framing/backing had minor flex,
- the seam finish was sanded down too aggressively in one pass,
- and the texture was applied without replicating the existing pattern scale.
We addressed the wall stability first, then rebuilt the seam in layers, sanded to consistent feathering, matched the texture method, and primed before repainting. Once cured, the patched wall disappeared visually under both daylight and interior lighting.
Signs It’s Time to Repaint (or Refinish Drywall)
If you’re deciding whether to repaint now or wait, look for:
- seam lines that have returned after previous patching
- texture that looks “splotchy” or flatter in certain light
- areas with roughness you can feel with your fingertips
- discoloration near repaired regions (often from uneven absorption or moisture history)
If drywall is still moving or if the texture base isn’t stable, repainting will only make the inconsistencies more noticeable.
Quick Comparison: Skim/Fix vs. Full Reinstall
| Situation | Best Approach | Why |
|---|---|---|
| Small hole, clean edges | Drywall patch + feather + texture match | Efficient and usually seamless |
| Seam crack on a patch | Rework seam + stabilize backing | Cracks often signal movement or insufficient build |
| Water-damaged section with soft drywall | Remove to sound material + reinstall | Painting over weak material leads to repeat issues |
| Large area with mismatched texture | Refinish the entire plane if needed | Improves consistency and reduces “patchwork” look |
Allen or North Texas Relevance: Why Climate and Light Expose Imperfections
In North Texas, walls see constant HVAC cycling. Even when the structural movement is subtle, drywall and joint compound can react differently than the older surrounding wall. Add in bright morning sun and warm evening interior lighting, and you’ll see differences in texture and sheen faster than you’d expect.
That’s why we insist on:
- correct curing time before final texture,
- primer for consistent absorption,
- and raking-light checks during sanding and finishing.
What Homeowners Often Ask (and What We Recommend)
“Can’t I just repaint over the patch?”
Sometimes, but if the patch has uneven absorption, a seam edge, or texture mismatch, paint will highlight it rather than fix it. A properly finished drywall surface makes repainting look uniform.
“Why does the patch feel smoother than the rest of the wall?”
Usually because the compound build and sanding removed too much texture relief. If the surrounding wall has a specific texture profile, the repair must match its depth and pattern size.
“How do I know if the drywall is ready for texture?”
When the surface is stable, feathered, and primed. Texture applied over dust, uneven absorption, or unprimed repairs often looks blotchy or pulls away unevenly.
Preparation References and Industry Context
A couple of practical industry points guide how we finish drywall for long-term results:
- The U.S. Environmental Protection Agency (EPA) emphasizes proper surface preparation for coatings and contaminant removal, which applies directly to primer adhesion and consistent finish performance.
- The Painting and Decorating Contractors of America (PDCA) and other industry training resources consistently stress that surface preparation and proper priming are key drivers of durability and appearance—especially on repaired substrates.
- Joint compound and texture systems are designed around layer build-up and curing, and skipping steps leads to shrinkage and visible seam lines over time.
Ready to Refresh or Protect Your Home’s Surfaces?
If you’re dealing with a patch that won’t disappear, cracks returning after repairs, or a texture mismatch that shows up in every light, the fix usually starts with drywall installation and finishing done as a complete system.
About MJ Workforce Solutions
MJ Workforce Solutions provides interior painting, cabinet refinishing, drywall repair, exterior painting, floor coatings, wallpaper removal, and decorative finishing services throughout Allen, TX and surrounding North Texas communities. We focus on detailed craftsmanship, proper surface preparation, and long-lasting results—so your walls look smooth, consistent, and built to hold up through changing seasons.