Interior Painting with Modern Hues and Professional Detail
A couple of years after moving into their Allen, TX home, many homeowners notice the same pattern: the paint still looks “fine” from a distance, but up close you can see scuffs on hallways, dull spots near light switches, and tiny hairline cracks in corners that seem to “come back” after every fresh coat. Then you start browsing modern interior palettes—greige, warm whites, soft blues—and you wonder why the room never looks as crisp as the photos.
From what we see in North Texas, the problem usually isn’t the color. It’s what’s happening underneath: uneven drywall finishing, inconsistent primer coverage, poor surface prep, and coatings that weren’t chosen for the way the home is actually used.
Below is how we approach interior painting when homeowners want modern hues and a finish that stays looking sharp—without surprises a few months later.
Quick Answer
For a clean, modern interior look that lasts, focus on three things:
1) Surface preparation (patching, sanding, cleaning, and sealing stains),
2) Correct primer and paint selection (especially for drywall texture and high-touch areas), and
3) Proper technique (cut-in control, rolling pattern, and drying/curing time).
If your walls have cracks, prior patchwork, or stains, repainting without addressing those issues is the fastest way to get a “fresh coat” that fails early.
A Real-World Scenario: The “Fresh Paint, Still Visible” Problem
A homeowner recently called us after repainting their living room themselves. The color was exactly what they wanted—clean and modern. But two weeks later, they noticed:
- The patched areas looked slightly smoother than the rest of the wall.
- The corner cracks seemed more noticeable under the new lighting.
- Their hallway trim had tiny brush marks along the edges.
In cases like this, the paint is doing what it’s supposed to do: showing the surface differences. When drywall patches aren’t finished to match the surrounding texture, or when primer wasn’t used to unify absorption, the new coat will highlight those transitions.
A firsthand contractor observation we repeat often: paint is a “mirror” for surface work. If the wall isn’t level, if texture isn’t consistent, or if stains aren’t sealed, the final finish won’t look uniform no matter how great the color is.
Interior Painting That Actually Looks Modern: What We Target
When homeowners ask for modern hues, they’re usually aiming for two visual goals:
- Even color with no flashing or streaks
- Edges and trim that look crisp, not “hand-painted”
To get there, we build the job around the surfaces you can’t always see:
1) We start by assessing the wall system
Not every wall is the same. In North Texas homes, we commonly see:
- drywall installed and skim-finished at different times,
- older paint layers with varying sheen,
- areas repaired after minor impacts (door dings, furniture moves, kids’ sports),
- patches over time that were painted before fully cured.
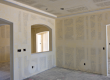
2) We unify the substrate before color goes on
That means cleaning, sanding, and then priming where it matters—especially on:
- new drywall,
- patched drywall,
- areas with stains,
- spots with sanding dust or shiny “burn-through” patches.
3) We choose sheen deliberately
Modern interiors often use eggshell for walls and semi-gloss or satin for trim. Higher sheen resists scrubbing better on doors and trim, but it also shows imperfections more clearly. We match sheen to the surface quality we’re working with and the cleaning habits of the household.
Material/Finish Recommendation: The “Right Product for the Job” Approach
A big reason DIY repainting can look uneven is paint selection and how it behaves on different surfaces.
Here’s how we typically think about it:
- Walls (living rooms, bedrooms, hallways):
A quality interior acrylic latex in eggshell is usually the best balance of cleanability and visual softness.
- Trim, doors, and window frames:
Satin or semi-gloss helps with wipe-ability and gives crisp edges under modern lighting.
- Stains or water marks:
We recommend a stain-blocking primer rather than relying on topcoat paint alone. If the stain is still “active,” it can bleed through months later.
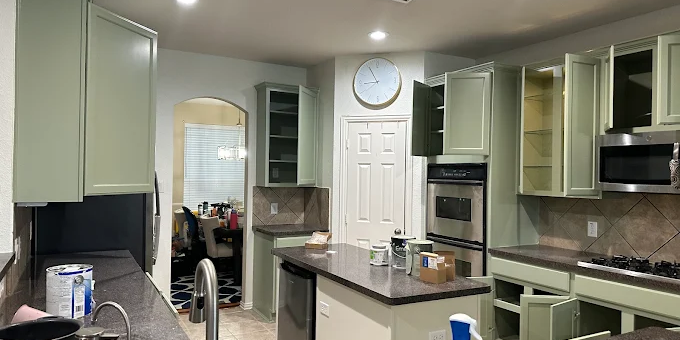
And if you’re changing cabinet colors as part of the same refresh, separate surfaces matter too. For homeowners who want the whole kitchen to feel “new” alongside the wall color, we often recommend pairing interior painting with cabinet refinishing solutions so the kitchen palette looks intentional rather than piecemeal.
What Homeowners Often Overlook
Most repaint projects fail early for reasons that have nothing to do with the paint can.
1) Skipping drywall prep (or not finishing patches correctly)
A patch can feel smooth to the hand but still dry with a different texture “profile” than the surrounding wall. Under angled light, that difference becomes obvious.
2) Painting over dust or residue
Even a light layer of sanding dust or cooking residue can prevent proper adhesion and cause uneven sheen.
3) Underestimating primer coverage
Some homeowners think primer is “just extra steps.” In reality, primer is what evens out:
- how the wall absorbs paint,
- how previous colors influence the new modern hue,
- and how stains block from showing through.
4) Ignoring humidity and drying conditions
North Texas humidity swings can slow dry time and affect how the paint levels out. If you rush coats or apply too thick, you can end up with texture differences and flashing.
Common Mistakes That Lead to Premature Wear
Here are the mistakes we see most often—especially in high-traffic areas like hallways and around doors.
Common mistake #1: Painting right over cracked seams
If you see hairline cracks at corners, around outlets, or along trim edges, the crack often needs more than paint. Sometimes it needs proper drywall patching, sometimes it needs caulking and sealing, and sometimes it needs a better finish system.
Common mistake #2: Using the wrong compound or skipping sanding steps
Different drywall finishing levels exist for a reason. When patching isn’t finished to match the existing wall level and texture, the new coat highlights the repair.
If your walls need repair before paint, we can help with drywall repair support—especially when seams and patches keep reappearing after repainting.
Common mistake #3: Choosing a color without checking undertones
“Modern hues” can look great in the store and completely different in your room. Warm whites can pull yellow; cool greiges can look gray under certain lighting. A quick test patch on your actual wall (with your lighting conditions) saves a lot of rework.
Common mistake #4: Not controlling trim edges
Brush marks and uneven cut lines are often caused by rushing the “cut-in” phase, not by the paint itself. Clean edges come from consistent technique and the right masking strategy—not speed.
Preparation, Coating, and Maintenance Checklist
If you want a pro-looking interior repaint, use this checklist as your “quality control” guide—whether you’re hiring out or overseeing a project.
Surface Preparation Checklist
- Clear the area: Protect floors, baseboards, and fixtures.
- Clean the walls: Remove oils, dust, and residue (especially kitchens and entryways).
- Inspect for damage: Mark cracks, dents, stains, and uneven patches.
- Repair drywall properly:
- drywall patching where needed,
- drywall finishing to match the surrounding surface,
- sanding until repairs blend visually.
- Seal stains and high-risk areas: Use appropriate stain-blocking primer.
- Caulk and seal: Address gaps at trim edges and where different materials meet.
- Prime unified surfaces: Especially new drywall, sanded areas, and repairs.
- Use correct application technique:
- consistent rolling pattern,
- proper cut-in control,
- avoid overworking wet paint.
- Allow drying and cure time: Don’t rush coats or heavy cleaning.
Allen and North Texas Relevance: Why Local Conditions Matter
In Allen and throughout North Texas, interior repainting doesn’t happen in a vacuum. Seasonal temperature swings and humidity changes affect:
- how fast paint dries and levels,
- how drywall and spackle behave,
- and whether previously sealed areas stay sealed.
We often see older homes with mixed finishes—some walls repainted years apart, some patched after minor repairs—so uniform primer and consistent surface prep become even more important. Under Texas light (especially near large windows), sheen differences and patch transitions are easier to spot.
Also, if you have kids, pets, or frequent entertaining, hallway wear is real. Choosing the right wall sheen and protecting trim finishes is what keeps modern paint looking “fresh” longer.
Our Experience With Painting Projects in Texas Homes (Case Example)
Here’s an anonymized case that matches what we see locally:
Project: Living room repaint in a home with older drywall patches near a previous TV location.
Goal: A modern, warm-neutral wall color with clean trim lines.
What we found: The patch looked smooth, but it had a slightly different texture density than the surrounding wall. There were also small stains around the patch area from prior anchor holes and sanding dust that wasn’t fully cleared.
What we did differently:
- repaired and finished the drywall so it matched the wall profile,
- sanded and cleaned thoroughly before priming,
- used a primer that unified absorption so the new color applied evenly.
Result: The room looked uniform, even under angled evening light, and the patched area disappeared visually instead of becoming a “spot” that drew attention.
That’s the difference between “covering” and finishing.
What to Consider If You’re Also Updating Your Walls with Wallpaper
Modern interiors sometimes include wallpaper accents—either a feature wall or a powder-room upgrade. If you’re planning wallpaper installation, plan your paint approach around it.
The key is surface readiness:
- wallpaper needs stable, properly prepared substrate,
- paint needs uniform absorption near the edges,
- and removal later should be planned with drywall protection in mind.
If you’re removing existing wallpaper first, we can discuss safe methods and how to protect drywall so you’re not left with rough paper damage. For homeowners currently dealing with removal, you may also want wallpaper removal assistance to avoid accidental drywall gouges.
Quick Comparison: Paint vs. Stain (When Walls, Trim, or Wood Are Involved)
| Surface | Best Approach | Common Reason People Get It Wrong |
|---|---|---|
| Drywall walls | Interior paint (primer + topcoat) | Skipping primer on repairs/stains |
| Trim/doors/woodwork | Paint (often satin/semi-gloss) | Not prepping edges or using the wrong sheen |
| Bare wood features (selected cases) | Stain + clear topcoat | Overlooking sanding and moisture control |
| Cabinets (kitchen) | Cabinet refinishing or specialized systems | Treating them like regular trim painting |
If you’re working around wood elements—like stair rails, doors, or built-ins—we can recommend the right system so the finish looks intentional and resists wear where hands touch most.
Signs It’s Time to Repaint
You don’t need to wait until the walls look “bad.” Consider repainting when you notice:
- scuffs that won’t wipe clean,
- patchwork that keeps standing out after previous repainting,
- uneven sheen (shiny spots and dull spots),
- cracks expanding along seams or corners,
- stains that bleed or reappear.
A fresh coat is only part of the answer—getting the wall system correct is what prevents repeat work.
Preparation and Maintenance for Longevity
After the job is done, a little maintenance helps modern hues stay crisp:
- Wait for full cure time before heavy cleaning.
- Use gentle cleaners for eggshell walls—avoid aggressive scrubbing on the first month.
- Touch up small scuffs with matching paint (label the original batch if possible).
- Keep humidity stable when you can, especially in rooms with large windows.
Paint vs. Texture: Where Drywall Finishing Makes the Difference
One of the biggest “contractor tells” is how a wall feels and looks across different angles. If your walls have inconsistent texture from repairs, paint won’t hide it.
If you’re seeing unevenness, cracking, or areas that never fully blend after repairs, it’s often a drywall finishing question. For homeowners who need the right sequence—repair first, then finish—we can coordinate drywall installation and patching so the repaint looks consistent from day one.
FAQ
How often should interior paint be redone in Texas?
In many Allen homes, interior paint lasts anywhere from 5 to 10 years depending on sheen choice, cleaning habits, and how much wear high-traffic rooms get. Hallways and around doors often need earlier refreshes. If you’re seeing scuffs that don’t wipe, uneven sheen, or cracks growing, it’s usually time to repaint—ideally after addressing the underlying prep issues.
Is cabinet refinishing worth it compared to replacement?
For many kitchens, cabinet refinishing is worth it when the boxes are structurally sound and the existing doors/drawers are salvageable. It’s also a faster way to achieve a cabinet color change without full demolition. The key is proper sanding, priming, and curing time so the finish holds up to daily use.
What causes drywall cracks to reappear after painting?
Reappearing cracks often come from movement, incomplete prep, or patching that didn’t match the surrounding finish. If the crack is at a seam or corner, it may need caulking and sealing or a more appropriate drywall repair approach—not just paint over it.
Does wallpaper removal damage drywall?
It can, especially if the previous wallpaper was installed over weak surfaces or if it’s removed aggressively. The risk is higher when paper-backed wallpaper has been painted multiple times. Safe removal usually involves controlled methods and readiness to repair and finish drywall before repainting.
Ready to Refresh or Protect Your Home’s Surfaces?
If you’re updating your interior with modern hues and you want the finish to stay clean—especially in hallways, around trim, and in rooms with strong Texas light—start with the prep and finishing details that make the difference.
About MJ Workforce Solutions
MJ Workforce Solutions provides interior painting, cabinet refinishing, drywall repair, exterior painting, floor coatings, wallpaper removal, and decorative finishing services throughout Allen, TX and surrounding North Texas communities. We focus on detailed craftsmanship, long-lasting finishes, proper surface preparation, and practical guidance so your home looks great today and holds up through everyday wear.