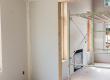
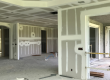
Drywall Installation Done Right for Lasting Beauty
A lot of homeowners in Allen, TX don’t realize drywall problems can start long before they show up as ugly cracks or soft spots. You might notice it after a season change—doors don’t close quite the same, a corner looks slightly wavy, or a hairline crack “reappears” after you patch it. In North Texas, those small shifts can be the difference between a finish that looks crisp for years and one that starts to telegraph every imperfection after the paint dries.
Whether you’re finishing a new room, replacing water-damaged sections, or smoothing out a wall from previous repairs, drywall installation quality matters. If the base isn’t solid and properly finished, even the most expensive paint won’t hide the problem for long.
Quick Answer
Drywall installation holds up when the framing is solid, the board is hung correctly, seams are treated with the right compound and tape method, and the surface is finished to a consistent texture before paint. In Allen/North Texas homes, seasonal movement and humidity swings make good fastening, seam treatment, and thorough drying time especially important. For the longest-lasting results, prioritize surface preparation, proper priming, and drywall finishing that matches your final paint sheen.
Why Drywall Installation Quality Determines How Your Paint Looks
Here’s a firsthand observation from the field: the most common “mystery” defects we see aren’t caused by the paint at all—they’re caused by the drywall system beneath it.
When drywall is installed with inconsistent fastener spacing, slight board misalignment, or seams that aren’t flattened and feathered, the wall ends up with micro-ridges. Under bright interior lighting (especially near windows), those ridges cast tiny shadows. Homeowners often think, “We’ll just repaint it,” but repainting only makes the shadow lines more noticeable because fresh paint reflects light more evenly.
A professional drywall finish is essentially about controlling how the wall transitions:
- from joint to field
- from patch area to existing drywall
- from primer to topcoat
- from one sheen to another
If those transitions aren’t smooth, the final finish won’t look “done right”—no matter how carefully you choose color.
A realistic homeowner scenario (what we commonly see)
A family in Allen had a small plumbing leak behind a bathroom vanity. They replaced the damaged drywall and used a store-bought patch kit to “blend it in.” The wall looked fine for a few months—until the next seasonal temperature swing. Then the joint line started showing again, and the paint began to look slightly uneven at the seam.
The issue wasn’t just the patch—it was the combination of:
- the board being fastened slightly differently than the original wall
- the seam not being fully flattened (or not built up in the right layers)
- the wall not getting the right primer/surface sealing step before topcoat
That’s why we treat drywall finishing as a system, not a one-time patch.
What Homeowners Often Overlook
Most homeowners focus on the visible part—paint color, cabinet color, accent wall ideas—while drywall finishing is the foundation. Here are the things that get missed most often:
1. Framing and fastening aren’t checked
If the studs or backing aren’t secure, the drywall can flex later, and seams crack even after they’re “repaired.”
2. Seam treatment is rushed
Joint compound shrinks as it dries. If you sand and coat before it fully cures, the seam can “ghost” back later.
3. Texture mismatch
Even a perfectly smoothed patch can look wrong if the surrounding drywall texture isn’t matched closely enough.
4. Priming is treated like an optional step
Primer isn’t just for adhesion—it helps create uniform absorption so the topcoat doesn’t flash or look blotchy.
Common Mistakes That Lead to Premature Wear
Mistake #1: “Screw pops” and loose board edges
Homeowners sometimes replace drywall without reviewing fastening patterns. If fasteners are too deep, too shallow, or spaced inconsistently, you can get movement at the seam or around the perimeter. That movement eventually shows up as cracks.
Contractor reality: In older North Texas builds, some studs may not be as true as they should be, and corners can be slightly out of plumb. We address that during installation so the finish doesn’t fight the structure.
Mistake #2: One-layer patching
A seam typically needs a build-up approach—especially where the new board meets old board. One thick layer is tempting because it’s faster, but it’s harder to flatten and more likely to shrink.
Mistake #3: Skipping caulking where it matters
Drywall meets trim, corners, and openings—areas that expand and contract. If you caulk incorrectly (or not at all), the topcoat can crack along edges even when drywall seams are perfect.
Mistake #4: Painting over dust and uneven sanding
Drywall dust is fine, and it interferes with adhesion. It also affects how primer and paint flow, which can cause uneven sheen and patchiness.
Surface Preparation Checklist for Drywall Installation and Repairs
Use this checklist to understand what a quality crew will do—and what you can ask about before work starts.
Before installation
- Confirm framing/backing is solid and straight enough for the drywall to sit flat
- Measure for board layout to minimize small “filler” joints
- Plan for outlets, switches, and corners so edges aren’t forced or stressed
- Protect floors and nearby finishes (dust control matters)
During installation
- Use correct drywall thickness for the application (walls vs. areas that need extra durability)
- Fasten at appropriate spacing and depth (no dimpling, no loose edges)
- Stagger seams when possible to reduce long joint lines
- Maintain consistent gaps at edges so joint compound can bridge properly
During finishing
- Treat seams with the correct tape method (paper tape vs. mesh depending on the situation)
- Apply joint compound in layers, allowing full dry/cure time between coats
- Sand progressively to flatten the transitions without gouging
- Prime after finishing—especially if you’re moving from repaired drywall to existing surfaces
Before topcoat paint
- Vacuum/sweep all drywall dust thoroughly
- Wipe down lightly if your process calls for it (some crews use tack cloth methods)
- Verify surfaces feel uniform by touch—not just visually
If you’re also dealing with other wall updates (like wallpaper removal or texture changes), preparation becomes even more critical. For example, when wallpaper comes off, the drywall surface can be uneven or damaged—so drywall finishing needs to be done with that in mind. If that’s your situation, you may want support with wallpaper removal assistance in Allen so the wall is ready for a clean, long-lasting finish.
Recommended Materials and Finishes for a Smooth, Durable Result
The “best” drywall materials aren’t universal—they depend on what the wall will be used for and what finish you want.
A practical recommendation we use often
- Primer selection: Use a primer designed for drywall and repaired areas to help equalize absorption.
- Finish approach: If you’re painting with a higher sheen (semi-gloss), treat the finish level as non-negotiable—imperfections show more at sheen.
- Compound strategy: Use the right compound for each stage (base coat vs. finish coat). This reduces shrink and helps the final sanding stay consistent.
Texture matching matters more than most people expect
If your existing walls have a light orange peel or a specific knockdown pattern, you can’t just “smooth everything.” We match texture so the wall reads uniform under natural and indoor lighting.
That’s also why we often pair drywall finishing with other wall surface services when homeowners want a full “reset,” including wallpaper installation where the substrate quality determines how clean the seams and pattern alignment look over time.
What We Commonly See in North Texas Homes
Allen sits in a part of Texas where you’ll see:
- significant temperature swings through the year
- UV-heavy sunlight that changes how quickly surfaces dry and cure
- moisture variation (especially around bathrooms, kitchens, and exterior-facing walls)
Firsthand contractor note: We’ve found that drywall repairs can look “perfect” on a warm day, then reveal themselves after the next seasonal shift—because the wall experiences movement and the joint compound continues to settle. That’s one reason we emphasize proper drying time and consistent priming before topcoat.
Also, many Allen homes have modern interior updates mixed with older wall systems. It’s common to see:
- patched drywall beside original drywall
- earlier repairs done with different texture systems
- paint layers that were applied over uneven absorption
Those differences are exactly what show up as flashing, shadow lines, and early wear.
Our Experience With Painting Projects in Texas Homes
Drywall work is rarely isolated. It’s usually part of a larger refresh—new paint, updated trim, and sometimes cabinet refinishing or surface restoration.
A common pattern we see: homeowners start with drywall because they want the room to look “new,” then they notice the same wall defects once everything else is updated. For example, if you’re doing interior painting alongside cabinet painting in Allen, you’ll often be using brighter colors or cleaner sheens. Those choices can make drywall seams more visible if the substrate isn’t finished to the same standard.
When we coordinate drywall finishing with painting plans, we aim for uniformity:
- consistent texture level
- consistent primer coverage
- consistent sheen across the room
That’s how you get a finish that looks intentional rather than “patchy in places.”
An Example Case: Smoother Walls After a Seasonal Crack
Here’s an anonymized project example based on work we’ve handled:
The situation: A homeowner had a recurring crack near a living room corner. They’d patched it once, painted over it, and it looked fine briefly. After another few temperature changes, the crack returned.
What we found: The corner had minor movement due to backing/fastening inconsistencies and a previous patch that didn’t address seam transitions across the board edges.
What we did:
- corrected fastening where needed
- reworked the seam/patch area with proper layered finishing
- sanded to flatten transitions
- primed repaired drywall with a drywall-appropriate primer before repainting
Result: The crack line no longer telegraphed after the next seasonal change, and the wall looked uniform under both natural light and nighttime lighting.
The takeaway is simple: cracks usually aren’t just “cosmetic.” They’re often signaling movement and preparation gaps.
Quick Reference: Drywall Installation vs. Drywall Repair
| Situation | What’s usually best | Why |
|---|---|---|
| New wall build or full replacement | New drywall installation + full finishing | You control framing, seams, and texture from the start |
| Small hole, impact damage, or localized water area | Drywall repair + finishing | Focus on seam transitions and matching texture/finish level |
| Recurring seam cracks or multiple patches in one area | Rework of affected sections | Prevents repeated “patch-and-paint” cycles |
In practice, the right path depends on how much movement and how many layers the existing drywall already has.
Allen or North Texas Relevance: Why Timing and Drying Time Matter Here
In North Texas, indoor conditions can swing enough that materials respond differently than homeowners expect. Even when the wall looks dry to the touch, joint compound and primer may still be equalizing moisture and curing.
That’s why we plan sequencing carefully:
- allow joint compound to fully dry between coats
- avoid trapping moisture under paint
- confirm surface readiness before topcoat
This is especially relevant when repairs are near exterior-facing walls, bathrooms, or areas that get strong sun exposure during the day.
Surface Prep and Maintenance Checklist (So the Finish Stays Beautiful)
Once your drywall and paint are done, a little maintenance prevents a lot of repeat work:
- Keep indoor humidity stable when possible (bath fans help)
- Fix leaks quickly—drywall is porous and damage can creep
- Avoid slamming doors near freshly finished areas (corner stress adds up)
- For minor scuffs, use gentle cleaning methods rather than aggressive sanding
- Touch up only after the surface is fully clean and dry
Paint vs. Stain Comparison (Helpful When Walls Are Part of a Bigger Project)
Drywall is typically painted, not stained. Stain is for porous wood or certain masonry surfaces where you’re aiming for grain or mineral tone.
- Paint is ideal for drywall because it creates a consistent, sealed surface.
- Stain is generally used for wood refinishing and deck/fence surfaces—not interior drywall.
If your project also includes wood elements—like railings, trim, or furniture—our process can include wood finishing recommendations too. For example, if you’re doing refinishing beyond the drywall, we also support refinishing and color changes across surfaces in the home.
Signs It’s Time to Repaint (or Refinish the Wall Base)
Consider repainting and/or revisiting drywall finishing if you notice:
- seam lines that reappear after touch-ups
- peeling or blistering paint near moisture sources
- rough patches that feel different from the surrounding wall
- uneven sheen or “flashing” where repaired areas were painted
- cracks that widen when the seasons change
When those signs show up, it’s usually a cue to address the drywall base and surface prep—not just the topcoat.
FAQ
How long should drywall repair take before painting?
Most drywall finishing work follows a layered schedule. Joint compound needs time to dry and cure between coats, and sanding creates dust that must be cleaned before primer. In many cases, homeowners should plan for several days, depending on thickness of repairs, ventilation, and product type. Rushing the timeline is one of the fastest ways to get seam lines back after painting.
Why do drywall cracks come back after repainting?
Cracks return when the underlying movement wasn’t corrected—like loose backing, inconsistent fastening, or a seam that wasn’t flattened and finished in layers. Seasonal expansion/contraction can also reveal a weak joint if the finishing process didn’t fully stabilize the transition.
Should I prime patched drywall before topcoat paint?
Yes. Primer helps repaired drywall and older drywall absorb paint more uniformly. Skipping primer often leads to flashing (uneven color) and faster wear in patched areas.
Can texture be matched exactly?
Texture matching is possible, but it takes skill and careful observation of your existing wall finish. If the current texture is subtle, matching is easier; heavy knockdown or inconsistent textures can require targeted adjustments.
Ready to Refresh or Protect Your Home’s Surfaces?
If your drywall work is part of a larger interior refresh—or if you’re dealing with recurring cracks, seam lines, or texture mismatches—starting with the right installation and finishing approach is the difference between a wall that looks great today and one that stays beautiful through North Texas seasons.
About MJ Workforce Solutions
MJ Workforce Solutions provides interior painting, cabinet refinishing, drywall repair, exterior painting, floor coatings, wallpaper removal, and decorative finishing services throughout Allen, TX and surrounding North Texas communities. The company focuses on detailed craftsmanship, long-lasting finishes, proper surface preparation, and helping homeowners improve and protect their properties through professional painting and refinishing solutions.