Color-Accurate, Clean Coverage
If your walls look uneven after touch-ups or your sample color never matches the finished room, you are not alone. This guide walks you through how interior painting should be planned and executed for clean edges, consistent coverage, and a true color result in Allen, TX homes.
You pick a paint color you love, start seeing progress, and then the room starts to look “off.” Maybe the sheen looks different on one wall. Maybe the coverage shows through near baseboards. Or perhaps the color looks right in the store, but once it is on your walls in the afternoon light, it turns noticeably warmer or cooler.
That is usually not a mystery. Most color problems come down to preparation, product choices, and how surfaces are built up before paint ever touches the wall. This guide helps you understand what to check before, during, and after interior painting so the result looks clean and intentional.
Quick Answer
For color-accurate interior painting with clean coverage, the best starting point is surface preparation and a consistent system: correct primers for the wall condition, proper caulking and sealing, and multiple coats applied evenly with attention to edges and sheen. Before work begins, confirm the exact paint line and finish, and ask how MJ Workforce Solutions will address drywall repair, patching, and any texture differences. A practical recommendation: request a small test area in the same lighting conditions as the room, then match the final approach to what you see.
What to Check First
If you want the finished room to look right, start with the things that impact how paint reflects light and how it bonds to the surface.
1) Wall condition
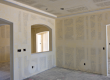
Cracks, nail pops, and uneven patch areas can show through even the best paint. If you have drywall issues, get them corrected before painting.
Drywall services can help ensure the wall surface is ready for a smooth, even finish.
2) Color and finish match
Paint samples can look different once applied. The final result also depends on sheen. For example, gloss and eggshell reflect light differently.
Cabinet painting in Allen is a good example of how color changes can be managed when prep and product selection are done right.
3) Surface prep details
Clean coverage requires more than rolling paint. Surface preparation, priming services, and caulking and sealing help minimize flashing and unevenness.
Wallpaper installation matters if you are changing how your walls are finished before repainting.
Professional observation: The cleanest-looking interior paint jobs usually show up after the prep work is done well. If your walls have patch marks, texture variation, or older paint that was not stabilized, the new color can reveal it faster than you expect.
Main Things Customers Should Understand
Interior painting looks simple until you pay attention to the details. Here are the core factors that control color accuracy and clean coverage, especially around trim, doors, and drywall patch points.
1) Priming services for the right job
Different wall conditions need different primers. New drywall, repaired areas, stained surfaces, and areas that have been patched all behave differently. A correct primer helps paint look consistent and reduces the chance of flashing or uneven absorption.
2) Drywall repair, drywall patching, and drywall finishing
Even small differences in patch thickness can create visible texture after painting. Proper drywall repair, careful drywall patching, and smooth drywall finishing help the wall accept paint evenly.
If you are also dealing with ceiling issues, consider pairing your interior paint plan with an update to any problematic wall surfaces first. For situations involving older ceilings or irregular texture, popcorn texture removal in Allen may be part of the preparation strategy.
3) Caulking and sealing for sharp lines
Clean edges are not just about careful cutting. Caulking and sealing along trim lines, baseboards, and around door frames helps the paint system look crisp and intentional. It also reduces gaps that can collect dirt or show light through.
4) Trim painting and door painting choices
Trim and doors often get overlooked until they look mismatched. If you want a cohesive interior, plan trim painting and door painting alongside your wall color so sheen and undertone stay consistent.
| Situation | What it usually affects | What to ask for | Best next step |
|---|---|---|---|
| Newly repaired drywall | Uneven sheen and color absorption | Primer over repairs + smooth drywall finishing | Confirm drywall repair plan before painting |
| Dark-to-light color change | Flashing through the new coat | Correct primer and coat schedule | Request a test area in the room |
| Different wall textures | Visible ridges after paint | Texture matching approach and consistent application | Address texture differences prior to final coats |
| Walls near kitchens or high-traffic areas | Adhesion issues and uneven coverage | Surface preparation and proper priming services | Plan surface prep time in your schedule |
Why This Matters in Allen, TX
Allen, TX homes see a mix of bright daylight and changing indoor lighting throughout the day. That matters because paint color accuracy is not just about the hue. It is also about how light hits the walls and how sheen reflects it.
In many Allen-area homes, you may also run into older wall finishes, previous patch work, or areas that were touched up over time. Those conditions can make color matching harder if the surface is not prepared consistently across the whole room. A professional approach in Allen, TX focuses on stabilizing the surface, blending repaired areas, and keeping the coating system uniform so your interior painting result looks clean and even.
Middle CTA: Keep your color plan on track
Ready to plan a clean, color-accurate interior paint job?
If you want your walls to look consistent from wall to wall, contact MJ Workforce Solutions in Allen, TX & surrounding areas.
(945) 253-0961Common Mistakes to Avoid
These are the most common reasons interior painting does not look right after the job is done. Avoiding them helps you protect your investment and your finished look.
Common mistake: Painting over uneven repairs without confirming the drywall finishing level.
What happens: patch edges and texture differences show up under different lighting, even after multiple coats.
Common mistake: Skipping or mismatching priming services.
What happens: the paint absorbs differently across the room, leading to flashing or blotchy coverage.
Common mistake: Choosing a paint color based only on a sample in store lighting.
What happens: the finished color can shift, especially near windows and in rooms with strong daylight.
Customer Checklist
Use this checklist to keep your interior painting process organized. Bring it to your conversation so you get clarity on the details that drive clean coverage.
- Confirm the exact paint line and finish you want for walls (and trim, if applicable).
- Identify problem areas: drywall patching points, nail pops, cracks, or uneven texture.
- Ask how repaired surfaces will be primed before painting.
- Discuss caulking and sealing locations for crisp edges around trim, baseboards, and door frames.
- Request a small test area (especially for cabinet painting, kitchen cabinet staining, or a major color change across a room).
- Plan for consistent application so coverage stays even from corner to corner.
- If wallpaper has been used or removed, confirm how the wall surface will be prepped before new paint.
A representative scenario (Allen home)
Picture an Allen, TX homeowner who repainted their living room after adding a small drywall patch near a doorway. The patch looked fine during the day, but at night the wall showed a slightly different tone and sheen. The room also had a visible line where the baseboard met the wall.
In a clean, color-accurate approach, the fix is usually not “more paint.” It is correcting the prep sequence: ensuring the drywall repair and drywall finishing were smooth, applying the right primer over the patched area, sealing gaps where trim meets the wall, and maintaining consistent coat coverage across the affected walls. Once that foundation is right, the color looks uniform under both daylight and evening interior lighting.
Frequently Asked Questions
How do I know if my walls need drywall repair before interior painting?
If you see cracks, nail pops, soft spots, or noticeable patch lines, it is a strong sign the wall needs drywall repair or drywall patching first. Even when the damage is small, uneven texture and absorption can show through after paint. A practical way to check is to run your hand gently over the surface and look at it from an angle under light. If you suspect patch points, prioritize drywall finishing and priming services before the color goes on.
Why does my paint color look different once it is on the wall?
Paint samples are usually tested in different lighting than your room. Daylight, window direction, and even the sheen you choose can change how the same color reads. Coverage and the condition of the surface also matter. For the most reliable result, confirm the exact paint line and finish, and consider a small test area in the room’s lighting. If the wall condition is uneven, priming services help make the finish look consistent.
Can interior painting fix uneven wall texture?
Paint can hide minor imperfections, but it cannot fully “erase” texture differences. If one area has been patched thicker or has a different surface profile, the new coating can highlight that variation. The cleanest results usually come from correcting the wall condition first through drywall repair, drywall patching, and drywall finishing. Then the paint system can be applied evenly for clean coverage and a more uniform look.
Should I paint trim and doors at the same time as the walls?
Painting trim painting and door painting alongside your walls often leads to a more cohesive interior. It helps you keep sheen and undertone consistent across the room. It also reduces the risk of touch-ups later, which can create visible differences around edges. If your trim and doors already look good, you can still discuss whether they need refresh work based on how your new wall color will interact with them.
What if my home had wallpaper before?
If wallpaper was installed, removed, or partially left behind, the wall surface can behave differently than bare drywall. Adhesive residue and uneven texture can affect adhesion and coverage. A careful process may include wallpaper removal, followed by thorough surface preparation and priming services before interior painting. If you are planning a repaint after a wallpaper change, it helps to coordinate the order of work so the final color looks clean and consistent.
Final CTA: Talk to a local painting team in Allen, TX
Get the clean, even interior look you are aiming for
MJ Workforce Solutions serves Allen, TX and nearby areas. If you want color-accurate results with clean coverage, contact us and we will help you plan the prep and coating approach.
Contact MJ Workforce SolutionsPrefer a specific service? Explore exterior house painting in Allen if your project includes both interior and exterior updates.