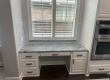
Kitchen Cabinet Staining for Rich, Warm Character
Your kitchen can look “almost right” for years—until the cabinets start to look tired. Maybe the current finish is too cool-toned, showing brush marks you can’t unsee, or the stain has gone blotchy around the edges where hands and cleaning products hit most. In Allen and across North Texas, that wear shows up fast because kitchens live hard: heat from cooking, humidity swings from season to season, and constant cleaning. If you’re considering kitchen cabinet staining to bring back warmth and character, the finish you get will depend less on the color you pick and more on what’s happening underneath the surface.
We see homeowners who want that “rich, warm wood” look—without the mess and cost of full cabinet replacement. That’s possible, but only if the cabinets are prepped correctly and the right products are matched to the wood and the existing finish.
Quick Answer
Kitchen cabinet staining works best when:
- the cabinets are stripped or fully deglossed and sanded to a uniform surface
- stains are applied in thin, controlled coats to prevent blotching
- a durable topcoat (often a water-resistant clear) is installed to handle daily kitchen use
If your cabinets are currently painted, previously stained, or have a heavy clear coat, staining may still be an option—but cabinet refinishing usually requires more preparation than homeowners expect.
Why Cabinet Staining Is Worth It (When It’s Done Right)
Stain can be a beautiful way to highlight natural grain and add warmth—especially on species like oak, alder, and maple where the texture takes well to the right prep. But there’s a contractor reality that matters:
Stain doesn’t “cover” problems—it reveals the surface.
If your cabinets have uneven sheen, old waxy residue, sanding scratches, or filler that wasn’t sealed properly, stain will telegraph those issues within the first coat.
Here’s a firsthand observation from our work: even when cabinets look clean, many have a subtle film from prior finishes and degreasers. In kitchens, that film often comes from years of cooking vapors and cleaning agents. When that residue isn’t removed, stain can look patchy—lighter in some areas, darker in others—even if you’re using an expensive product.
A realistic homeowner scenario
One Allen homeowner reached out after seeing uneven tone around the cabinet doors and a slightly “muddy” color on the drawer fronts. They’d tried sanding themselves, but they stopped once the surface looked dull. That’s usually where the problem begins: sanding through glossy areas doesn’t mean you’ve created a uniform surface. We ended up doing an additional round of surface prep, spot-sealing problem areas, and then staining with controlled application. The difference was night-and-day—grain looked intentional instead of accidental.
What Homeowners Often Overlook
Most people focus on stain color swatches. That’s normal. But the bigger drivers of a great result are often overlooked:
- Existing finish type: Painted cabinets generally don’t stain the way raw wood does. Sometimes you can stain after proper stripping, but not every painted surface is a good candidate without full prep.
- Wood porosity differences: Maple, for example, can blotch if you don’t address porosity before staining.
- Kitchen moisture and cleaning: A stain alone isn’t enough. The topcoat is what stands up to daily life—wiping, spills, and humidity swings.
- Hardware removal and edge work: If edges and interiors aren’t prepped and finished uniformly, the “warm character” look breaks down quickly.
Common Mistakes That Lead to Premature Wear
1) Skipping proper degreasing
Kitchen cabinets collect oils in the grain and along edges. If grease isn’t fully removed, stain can repel in spots and topcoats can fail to bond cleanly.
2) Rushing sanding and “thinking it’s even”
Sanding to a uniform dullness matters, but it’s not the same as sanding to a consistent surface profile. We often find old sanding scratches or gloss pockets that only show after staining.
3) Using the wrong topcoat for a kitchen
A clear coat that looks great in a showroom may not hold up to wiping and humidity. For kitchen cabinets, durability and adhesion are not optional.
4) Applying stain too thick
Thick coats look rich at first, but they dry unevenly and can feel sticky or look blotchy as they cure.
5) Not allowing enough cure time before reassembly
Even if the finish looks dry, it may not be cured. Handling too soon can leave marks or affect how the clear coat withstands cleaning later.
Preparation & Coating Checklist (What We Actually Plan For)
If you want rich, warm character that lasts, preparation is the job. Here’s a practical checklist you can use to understand the workflow and timelines.
Surface Preparation Checklist
- Remove doors, drawers, and hardware (label placement so reinstallation is accurate)
- Deep degrease all surfaces, including edges and profiles
- Assess the current finish (painted vs. previously stained vs. clear-coated)
- Sand for uniform adhesion (target an even surface profile, not just “dull”)
- Spot-seal problem areas (especially for blotch-prone woods or repaired sections)
- Fill and level any dents, chips, or uneven repairs
- Clean dust thoroughly before staining (dust is the enemy of smooth topcoats)
Coating & Finishing Steps (Typical Approach)
- Stain application in controlled coats to build tone evenly
- Wipe-off timing consistent with the stain system (dry time and flash time matter)
- Seal coat if recommended for your stain/topcoat system
- Topcoat designed for kitchen durability, applied evenly
- Cure time respected before reassembly and heavy use
Material/Finish Recommendation
For a warm, natural look, many homeowners love a stain system paired with a clear protective topcoat that resists moisture and everyday cleaning. We generally recommend matching the stain and topcoat from the same system family (or ensuring compatibility) so you get predictable adhesion and sheen. If you want a more dramatic grain, a slightly higher-viscosity stain can help—when the prep is already uniform.
If you’re also dealing with cabinets that have older repairs, we’ll often coordinate with drywall finishing efforts in adjacent areas so the kitchen refresh looks intentional all the way around. If you need support there, you can review drywall services for the kind of prep that keeps transitions looking clean.
Allen / North Texas Relevance: Why Cabinets Behave Differently Here
North Texas kitchens experience noticeable seasonal swings. In summer, heat and indoor humidity increase—especially near windows and kitchens with active cooking. In winter, indoor air often dries out, and wood can react slightly to those changes.
That matters because cabinet finishes are a film system: stain + sealer + clear coat. If the surface prep isn’t right, or if the topcoat isn’t built for the environment, you’re more likely to see:
- uneven sheen over time
- faster wear around handles and edges
- premature failure where moisture has touched the coating
We also see more “micro-warping” risk when cabinets are exposed to heat cycles without consistent climate control. A quality topcoat helps, but it’s the prep and curing process that determines whether the finish stays stable.
Paint vs. Stain Comparison (Quick Decision Guide)
| Goal | Better Option | Why |
|---|---|---|
| Warm wood grain, natural character | Kitchen cabinet staining | Highlights texture and depth |
| Consistent color with minimal visual grain | Cabinet painting | Easier to achieve uniform tone |
| Existing finish is glossy or uneven | Usually cabinet refinishing prep first | Staining reveals unevenness |
| You want a dramatic color change (dark-to-light or vice versa) | Often cabinet refacing or refinishing | Prep may be extensive depending on substrate |
If your end goal is a full tone shift, it may be more efficient to think about kitchen cabinet staining only after we evaluate what’s on the doors today. In some cases, a cabinet color change through staining is possible, but the prep required to avoid blotches and uneven tone is the difference between “wow” and “why does it look patchy?”
Our Experience With Cabinet Projects in Texas Homes
In Texas homes, the biggest success factor isn’t the stain color—it’s whether the cabinet surface is ready to accept the stain evenly. We’ve worked on kitchens where the doors looked “fine” until the first coat went on. The stain immediately highlighted:
- old cleaning residue
- sanding inconsistencies
- areas where previous repairs didn’t seal the same way as the surrounding wood
We address this with targeted prep and, when needed, selective sealing. That approach keeps the final tone consistent across doors and drawers—so you don’t end up with a patchwork of lighter and darker panels.
For homeowners who are also updating the look of the room around the cabinets, it helps to plan in sequence. If your walls need attention too, addressing surface preparation and patch areas early supports a smoother, more uniform finish experience. You may even need drywall work before paint or stain draws attention to imperfections.
If you’re planning broader updates while the kitchen is “open,” it can be worth checking wallpaper installation for adjacent dining or kitchen niches where texture and color coordination matter.
An Anonymized Case Example (What Made the Finish Work)
A homeowner in the Allen area wanted stained cabinets to match the warmth of their hardwood floors. The cabinet doors had been previously refinished, and the tone looked inconsistent—darker around edges and lighter in centers. They also had minor scratches near the bottom rails.
We handled it like a refinishing system, not a one-day staining job:
1. Degreased thoroughly and corrected the surface profile with sanding.
2. Sealed areas that were prone to blotching so the stain would absorb consistently.
3. Applied stain in controlled coats, checking tone as it developed.
4. Finished with a durable protective topcoat designed for kitchen use.
5. Allowed full cure time before reinstalling hardware and using the drawers heavily.
The result was a cohesive warm tone that looked like it belonged with the rest of the home—no patchiness, no “ringing” around edges, and a finish that felt smooth instead of fragile.
Signs It’s Time to Refinish or Stain
Consider cabinet refinishing (including staining) if you notice:
- worn areas around handles, hinges, and drawer rails
- uneven sheen or dull spots from years of cleaning
- visible scratches that catch light differently
- a finish that no longer matches your kitchen’s updated lighting or flooring
- you’re craving a warmer tone without replacing cabinets
Quick Maintenance Tips After Staining
Once your cabinets are stained and cleared, maintenance becomes the final layer of protection.
- Wipe spills quickly—especially oils and acidic cleaners
- Use non-abrasive cleaners to avoid dulling the topcoat
- Avoid soaking wet cloths on cabinet edges
- Use coasters or protectors near heat sources
- For stubborn spots, test a gentle cleaner in a hidden area first
FAQ
Can you stain cabinets that were previously painted?
Sometimes, but it depends on what’s currently on the surface and how well it’s prepped. Painted cabinets usually require stripping or thorough deglossing and sanding to create a consistent base. Even then, stain behavior can vary. A test on one door is the fastest way to know whether you’ll get the warm, even tone you want.
Will staining hide scratches and dents?
Not reliably. Staining can highlight surface flaws because it follows the texture and absorption of the wood. Minor dents may disappear after sanding and leveling, but deeper damage usually needs repair and proper sealing first.
How long does a stained cabinet finish last in a kitchen?
With the right prep and a durable kitchen-rated topcoat, stained cabinets can hold up for years. The exact lifespan depends on cleaning habits, exposure to heat/moisture, and how soon the finish is cured before heavy use.
Do I need to replace hardware after refinishing?
Not always. Many homeowners reuse existing hardware, but if the finish changes tone significantly, new hardware can complement the updated warmth. Either way, we recommend planning for proper reinstallation and careful handling during cure time.
Ready to Refresh or Protect Your Home’s Surfaces?
If you’re aiming for rich, warm cabinet character, the best results come from treating staining as a full refinishing system—prep, stain control, and a kitchen-ready clear coat. If you want, we can evaluate your current cabinet finish and help you map out the safest path to the tone you’re after.
About MJ Workforce Solutions
MJ Workforce Solutions provides interior painting, cabinet refinishing, drywall repair, exterior painting, floor coatings, wallpaper removal, and decorative finishing services throughout Allen, TX and surrounding North Texas communities. We focus on detailed craftsmanship, proper surface preparation, and durable finishes that hold up to real everyday use—because a great cabinet finish starts long before the first coat is applied.