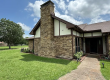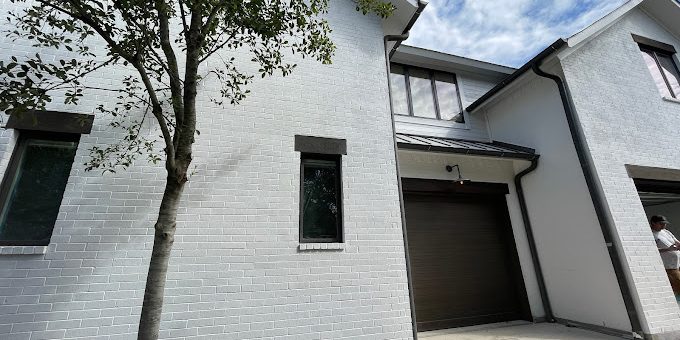
Upgrade Curb Appeal with Exterior Painting Brilliance
Your front elevation can look great right up until you notice the “soft” problems: hairline peeling near trim, chalky color fading on sun-facing walls, or that dull, uneven sheen where old paint has been patched but never truly blended. In Allen, TX, those issues don’t stay small for long. UV intensity and our seasonal temperature swings push coatings to expand and contract, and moisture that’s trapped under failing paint finds its way into the next layer.
One of the most common homeowner scenarios we see is this: a couple schedules a weekend “touch-up,” but the problem keeps growing—peeling edges lift, caulk lines start to separate, and the patchwork becomes more obvious than the original wear. The fix usually isn’t “more paint.” It’s restoring the surface system: prep, priming, caulking, and a finish that matches what the exterior is actually doing.
Quick Answer
For standout curb appeal that lasts, focus on these steps before the first coat: proper surface preparation (cleaning, scraping, sanding), correct priming for bare or weathered areas, tight caulking and sealing at joints, and choosing an exterior paint finish suited for Texas sun and temperature changes. If you’re dealing with peeling, chalking, or failing caulk, the job needs to address the cause—not just cover the symptoms.
What Homeowners Often Overlook
Homeowners tend to think exterior painting is mainly about color and choosing a “good paint.” In practice, the difference between a paint job that looks sharp for years and one that fails early is usually buried in the prep work.
Here’s what gets overlooked most often:
- Caulk and sealant failure at joints: When caulk dries out or pulls away, water finds a path behind trim and into siding edges.
- Paint chalking and surface oxidation: Sun exposure can create a chalky layer that prevents paint from bonding cleanly.
- Loose paint left in place: If peeling edges aren’t fully scraped back to sound paint, the new coat can lift again.
- Skipping pressure washing—or washing the wrong way: Water intrusion and residue can interfere with adhesion.
- Priming only “where it looks bare”: Weathered areas often need primer even if they aren’t fully scraped to bare substrate.
Why Some Paint Jobs Fail Early
A firsthand observation from the field: we’ll often see paint that looks fine from the street for a season, then starts to bubble or peel at the same spots where water collects—under eaves, around downspouts, or along trim seams. The reason is usually one of these:
1. Moisture is still present in the wall assembly
Even if the exterior “dries out” on the surface, moisture can remain behind compromised coatings or at micro-gaps.
2. Inadequate surface prep
A smooth-looking wall can still have failing edges or contaminants that prevent adhesion.
3. Wrong primer over the wrong condition
Using the wrong primer system over chalky paint, old stains, or repaired areas can lead to premature breakdown.
4. Temperature timing
Painting in conditions that are too hot too fast can affect how the coating lays down and cures, especially early in the day when surfaces are still actively heating.
Common Mistake Homeowners Make: Treating Peeling Like a Cosmetic Issue
The classic mistake is painting over peeling paint without fully removing the loose edges. Homeowners will scuff-sand a few spots, apply caulk where it “seems” separated, and roll on a finish coat. But paint doesn’t fail only where it’s peeling—it fails where adhesion was compromised. If the old layer is lifting, the new layer becomes part of the same failing system.
Instead, we look for the boundary between “sound” and “unsound” paint and work from there. That’s why prep can feel more labor-intensive than painting—it’s also what protects the finish you’ll see every day.
Preparation & Maintenance Checklist (What We Do Before Painting)
A clean, durable exterior finish is built in layers. Here’s a practical checklist homeowners can use to understand the process (and to prep along with your contractor if needed):
Surface Preparation Checklist
- Inspect for failure patterns
- Peeling edges, blistering, chalking, mold/mildew, and caulk separation.
- Remove loose material
- Scrape back to sound paint where lifting occurs.
- Clean thoroughly
- Wash to remove dirt, pollen residue, and sunscreen-like grime from sun exposure.
- Address mildew
- Use appropriate cleaning methods so you’re not just painting over biological growth.
- Sand and feather edges
- Smooth transitions where old paint meets repaired areas.
- Prime correctly
- Prime bare wood, patched areas, and weathered surfaces as needed for adhesion and uniformity.
- Caulk and seal
- Replace failing caulk at trim joints, siding seams, and window/door edges.
- Prime again if required
- Some repairs need additional spot priming after caulk sets.
- Choose the right finish
- Exterior finish affects how well the wall resists scuffs, moisture, and UV.
Maintenance That Keeps the Finish Looking Fresh
- Rinse siding periodically if you’re near trees or have heavy pollen.
- Check caulk every year around windows, doors, and trim lines.
- Keep gutters functioning so water doesn’t splash onto siding and foundation areas.
- Touch up small chips promptly to prevent moisture intrusion behind the coating.
Material / Finish Recommendation (Built for North Texas Conditions)
For Allen homes, we typically recommend thinking in terms of “coating system,” not a single can of paint. The most durable results usually come from matching the primer and finish to what the exterior is exposed to—sun, temperature swings, and moisture at seams.
Finish choice guidance (general, homeowner-friendly):
- Siding and large wall areas: A finish with good cleanability and UV resistance is ideal. Many homeowners prefer an exterior satin/eggshell range for better wash resistance than flat finishes.
- Trim and doors: A slightly higher sheen (often semi-gloss or trim-appropriate finishes) can help resist scuffs and makes edges look crisp.
- Wood details: Use a coating system that’s compatible with wood and properly sealed at end grain and joints.
A Real Project Example (Anonymized Case)
We worked with a homeowner in North Texas who wanted to “just brighten up” the front elevation. The siding looked okay from a distance, but up close there were repeating issues:
- paint chalking on sun-facing sections,
- peeling at trim edges near a porch roof line,
- and caulk separation around a front window.
Instead of focusing on color alone, we treated it as a surface system repair. We scraped back failing paint, cleaned thoroughly, and spot-primed weathered areas so the new finish coat could bond uniformly. After caulk replacement and seam sealing, the exterior paint went on with a consistent application pattern to even out sheen and texture.
The biggest difference the homeowner noticed wasn’t only the new color—it was the way the trim edges stayed tight and the finish resisted that “patchy” look that usually appears when weathered areas aren’t primed properly.
What Actually Improves Long-Term Results
If you want curb appeal that still looks clean after the first year of Texas weather, prioritize these elements:
- Surface preparation that reaches the real problem area
- Sound paint + clean substrate = adhesion you can trust.
- Proper priming for adhesion and uniformity
- Prevents early failure and helps the finish look even.
- Caulking and sealing at the right joints
- Exterior paint isn’t waterproof by itself. Joints are where water gets in.
- Correct timing
- Avoid painting when surfaces are too hot or when rain/humidity might interfere with cure.
- Coating compatibility
- New coatings should be compatible with what’s already there. When unsure, test spots matter.
Quick Comparison: Paint vs. Stain (When Homeowners Mix Them Up)
| Situation | Paint | Stain |
|---|---|---|
| Siding + trim refresh | Often best for full coverage and seam protection | Can work, but needs proper prep and can wear unevenly |
| Wood decks/railings | Not always the top choice for horizontal wear | Usually preferred for wood aesthetic, if maintained |
| Peeling/failed coating layers | Better suited when the system is prepped and primed correctly | Requires careful prep to avoid blotchiness and premature wear |
Allen or North Texas Relevance: Why This Matters Here
Allen sits in a climate where UV exposure is relentless, and the freeze/thaw cycle isn’t as extreme as far north—but temperature swings and moisture still drive expansion and contraction. That movement is especially noticeable at:
- trim corners,
- window and door perimeters,
- porch ceilings and edges under eaves,
- and areas where sprinklers or runoff hit siding.
That’s also why we stress sealing joints and priming weathered surfaces. A “pretty coat” that’s missing adhesion and seam protection won’t hold up as well in North Texas conditions.
For broader context, the durability of exterior coatings hinges on adhesion and surface preparation. Industry guidance consistently emphasizes proper cleaning, scraping, and priming before painting—because paint is only as strong as the surface it bonds to (reference: ASTM standards and coating-industry preparation guidance).
What Homeowners Should Know (Before You Pick a Color)
Color is personal, but the finish performance is technical. Before committing, homeowners should think about:
- How much sun exposure the area gets
- Lighter colors often show less fading contrast than darker shades over time, but all colors need UV-resistant performance.
- How visible the trim lines are
- Crisp trim depends on prep and correct caulking, not just a steady brush.
- Surface condition history
- If you’ve had patchwork repairs, the wall may need more priming than you expect to avoid blotches.
If you’re unsure, a color consultation paired with an exterior inspection is the fastest way to avoid repainting sooner than planned.
Surface Preparation: A Contractor-Style Checklist You Can Save
Use this as a quick “walk-around” guide before work begins:
- Identify peeling or bubbling areas and mark the boundaries
- Check caulk lines around windows, doors, and trim
- Look for chalking (powder on gloves/fingers)
- Inspect for mildew in shaded zones
- Confirm that downspouts/gutters aren’t directing water at walls
- Make sure the plan includes cleaning, scraping, sanding, priming, and caulking
- Discuss finish sheen choices for walls vs. trim
References (Trustworthy Industry Notes)
- The American Society for Testing and Materials (ASTM) emphasizes that surface preparation and adhesion are central to coating performance (e.g., adhesion and surface preparation testing practices).
- Coating manufacturers and industry bodies consistently stress that exterior paint longevity depends on correct cleaning, scraping, sanding, and priming—especially where weathering and chalking exist.
- The U.S. Environmental Protection Agency (EPA) provides guidance on proper paint handling and surface prep practices when dealing with coatings and contaminants (useful for understanding why prep matters).
(Your contractor should be able to explain how their prep steps align with the coating system they’re using.)
Ready to Refresh or Protect Your Home’s Surfaces?
If you want exterior painting that looks sharp on day one and holds up through Texas weather, start with inspection and prep—not just color. MJ Workforce Solutions focuses on craftsmanship, surface prep, and building a coating system that performs.
About MJ Workforce Solutions
MJ Workforce Solutions provides interior painting, cabinet refinishing, drywall repair, exterior painting, floor coatings, wallpaper removal, and decorative finishing services throughout Allen, TX and surrounding North Texas communities. The company focuses on detailed craftsmanship, long-lasting finishes, proper surface preparation, and helping homeowners improve and protect their properties through professional painting and refinishing solutions.
Helpful Next Steps (Related Services)
If you’re planning a full exterior refresh, many homeowners also improve the surrounding details at the same time. You can explore:
- Exterior house painting in Allen for a full curb-appeal plan
- Paint removal in Allen when old coatings need to be stripped or scraped back properly
- Fence painting for North Texas weather to match your outdoor look
- Deck staining and sealing so your outdoor spaces stay protected
FAQ
How often should exterior paint be repainted in Allen, TX?
A typical exterior paint cycle is often around 5–10 years, but it depends on sunlight exposure, moisture exposure at seams, and whether prep was thorough. If caulk lines fail or peeling areas weren’t scraped back to sound paint, repainting can be needed sooner. Homes with heavier shade, tree pollen, or frequent water runoff may also see earlier wear.
Why does my exterior paint keep peeling near trim?
Peeling near trim is usually tied to two things: water intrusion at joints (failed caulk/sealant) and poor adhesion due to weathered or chalky surfaces not being properly prepped and primed. If the underlying issue isn’t corrected, the new paint layer can release again.
Can you paint over chalky exterior paint?
You can sometimes repaint over weathered paint, but chalking often indicates oxidation and weak adhesion. In most cases, proper cleaning and sanding are required, and priming may be necessary to ensure the new coating bonds and cures evenly.
Should I pressure wash before painting?
Pressure washing is commonly part of prep, but it must be done carefully—too much pressure or improper technique can drive water into seams and create adhesion problems. A contractor should manage cleaning strength, dwell time, and drying conditions before painting.
Is higher-sheen paint better for exterior trim?
Higher-sheen finishes often resist scuffs and wash better, which is helpful for doors, trim, and areas that get touched frequently. However, the right choice depends on the substrate condition and prep quality—sheen won’t fix adhesion problems, but it can improve performance and appearance when the surface system is done correctly.