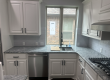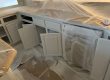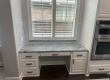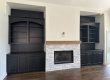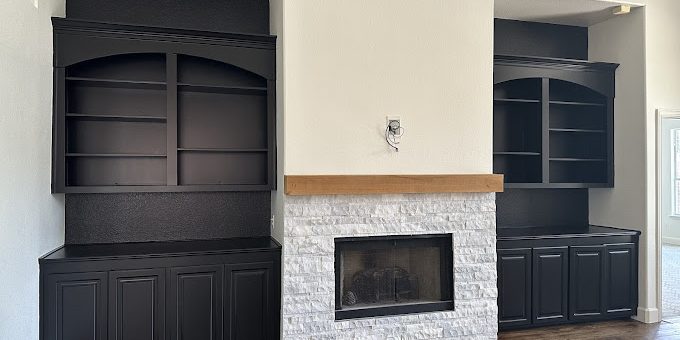
Cabinet Painting That Looks Professionally Finished
The cabinets in your kitchen can take a beating without you realizing it—grease mist from cooking, steam from dishwashing, and constant hand contact at the doors and drawer fronts. If you’re in Allen, TX, you’ve also likely noticed how seasonal swings and the Texas sun can affect indoor humidity and airflow. Even if your kitchen feels “fine,” cabinet finishes can still dull, chip at the edges, or develop tiny bubbles if the surface prep wasn’t right.
A homeowner scenario we see a lot: someone paints over their existing cabinet finish to “freshen things up,” but after a few months the sheen looks uneven, the doors feel slightly tacky, and the paint starts to wear first around the hardware and corners. That’s usually not a color problem—it’s a surface preparation and coating system problem.
Quick Answer
For professionally finished cabinet painting, the biggest difference is this: cabinets must be cleaned to remove grease, stripped or deglossed so new paint can mechanically bond, repaired where needed, primed with the right bonding primer, and then sprayed or carefully rolled with controlled drying conditions. In North Texas, managing humidity and cure time matters just as much as the paint itself. If you skip prep or rush the cure, you’ll often get peeling, chipping, or a finish that looks “painted,” not finished.
Why Cabinet “Paint” Fails (Even When the Color Looks Good)
Cabinets aren’t like walls. They’re touched constantly, cleaned often, and exposed to kitchen residue that normal interior painting doesn’t have to handle.
A firsthand observation from our finishing work: when we open up a “painted before” cabinet job, the failure point is usually consistent—paint adhesion is weakest at:
- the hinge areas and door edges (where oils and abrasion collect)
- glossy surfaces that weren’t properly deglossed
- spots where old caulk or filler was painted over without sealing
- areas that weren’t degreased before priming
If the existing finish is glossy, the new coating can sit on top instead of bonding. Then, even a small amount of grease or moisture finds its way to the interface and starts breaking the bond.
The coating system matters more than the brand-name paint
You can use a great topcoat and still end up with a disappointing finish if the primer isn’t compatible with the substrate or if the prep didn’t remove contamination. For cabinet refinishing, we plan the job as a system: cleaning → sanding/deglossing → repairs → priming → topcoat → cure.
Cabinet Refinishing: Paint vs. Refacing vs. Staining
Not every cabinet project should be treated the same way. Here’s a practical way to choose:
| Project Goal | Best Approach | Why |
|---|---|---|
| Change color to a smooth painted look | Cabinet Painting / Cabinet Refinishing | Paint hides wear and updates the style quickly |
| Keep visible wood character | Kitchen Cabinet Staining | Stain requires clean, even absorption and solid surface prep |
| Replace the look without altering boxes much | Cabinet Refacing | Useful when doors/face frames are the issue |
| Modernize while covering damage | Cabinet Color Change with refinishing | Repairing dings and repainting can restore a uniform finish |
If your goal is a stained wood look, start with preparation and surface uniformity first. For homeowners considering a wood finish, you may find this helpful: Kitchen Cabinet Staining.
Common Mistakes That Lead to Premature Wear
1) Painting over grease and kitchen residue
Cabinet surfaces collect oils that normal wall cleaner doesn’t fully remove. When that contamination remains, primer and topcoat can fail from the inside out.
2) Skipping deglossing (or sanding “just enough”)
If the existing finish is glossy, you need to dull it so the primer can bite. We often see homeowners lightly scuff the surface and assume “it’ll hold.” In practice, adhesion needs consistent mechanical bonding across the whole door and drawer.
3) Using the wrong product for the substrate
Some primers are made for drywall or bare wood and won’t perform the same way on previously finished cabinet surfaces. Compatibility is a big deal for adhesion and long-term toughness.
4) Not letting coats cure before reinstalling and using the cabinets
A cabinet can be dry to the touch but not fully cured. Rushing that timeline leads to fingerprints, soft spots, and chips at edges.
5) Reusing hardware without cleaning behind it
The area around hinges and pulls is often where grease and grime collect. If you don’t clean and prep those zones thoroughly, you’re essentially painting over contaminants.
Surface Preparation Checklist (What We Actually Do Before Coating)
Preparation is where “DIY-looking” finishes are won or lost. Here’s a realistic checklist you can use to understand the process and spot gaps if you’re comparing quotes.
Step 1: Remove doors, drawers, and hardware
Label everything so hinges and alignment go back correctly. This avoids uneven gaps and saves time during reassembly.
Step 2: Degrease thoroughly
We use degreasers designed for coatings and adhesion. Cabinets need a clean surface, not just a “wiped-down” surface.
Step 3: Sand and degloss consistently
- Sand to scuff the finish and smooth imperfections
- Focus on edges, corners, and transition areas
- Remove sanding dust completely
Step 4: Repair dents, chips, and damaged edges
Fillers work best when they’re sanded flat and sealed properly before primer. If the repair area isn’t sealed, it can “telegraph” later or create adhesion weak points.
Step 5: Prime with a bonding primer
Priming prevents stain or darkness bleed-through and improves adhesion. On older cabinets, we pay extra attention to whether there are repairs, stains, or uneven sheen.
Step 6: Apply topcoat with controlled technique
Cabinet finishes benefit from a consistent film build—especially on doors and drawer fronts. Whether sprayed or carefully rolled, the goal is an even, smooth appearance with minimal texture.
Step 7: Allow proper cure time before heavy use
This is where many DIY projects fall behind. We build the schedule around curing so the finish can harden and resist fingerprints, cleaning abrasion, and edge wear.
If your cabinet project includes wall surfaces that need freshening too, you may also want to consider Drywall Services—because visible cracks or uneven patches make cabinet finishes look “off” even if the cabinets are perfect.
Material & Finish Recommendation for a Professional-Looking Result
For most kitchens aiming for a durable painted finish, we typically recommend:
- a quality bonding primer compatible with the existing cabinet surface
- a cabinet-grade enamel or conversion-style coating system (depending on the condition and desired durability)
- a satin or semi-gloss sheen for practical cleanability
Finish choice matters: satin hides minor surface imperfections better than high gloss, but still cleans well. Semi-gloss is often favored for a crisp, showroom-like look—just remember it reveals flaws more readily.
Also, watch the environment. In North Texas, indoor humidity and temperature swings can affect drying and leveling. Controlled airflow and consistent conditions help the paint lay down smoothly.
A Realistic Project Example (Anonymized)
We worked with a homeowner in an older Allen-area home where the cabinets looked “okay” from a distance, but up close the finish was tired:
- worn edges near pulls
- uneven sheen where previous touch-ups had been made
- small chips around hinge points
- a couple of wall cracks nearby that distracted attention
The homeowner wanted a cabinet color change without replacing everything. Our approach was:
1) deep degreasing and full deglossing across doors and drawer fronts
2) repair of chips and edge wear
3) bonding primer to unify adhesion and prevent uneven topcoat
4) careful topcoat application with attention to consistency across every door style
When the doors went back on, the cabinets looked intentionally finished—uniform sheen, clean edges, and no “patchy” areas near hardware. The best part wasn’t just how it looked on day one; it stayed that way through normal kitchen cleaning because the prep and coating system were built for real use.
What We Commonly See in North Texas Homes
In North Texas, kitchens often sit near HVAC vents, open windows, and high-traffic areas where humidity and temperature shift. That doesn’t mean you can’t paint cabinets—but it does mean you should plan for:
- stable indoor temperatures during application
- adequate cure time before reassembly and daily use
- ventilation that doesn’t dry the coating unevenly
A contractor observation: the cabinet job that “fails early” usually fails the fastest at the spots people touch and clean most—edges, corners, and around hardware—because those areas see abrasion and residue buildup. Better prep and a proper cure timeline address that reality directly.
Allen / North Texas Relevance: Why Timing and Surface Prep Matter
Allen homeowners are often balancing indoor comfort with outdoor conditions. Even if your kitchen feels comfortable, the finishing process is sensitive to moisture and airflow. In the same week, you can see bright sun, dry heat, and then higher humidity—especially as seasons shift.
That’s why we emphasize:
- surface preparation and degreasing before any coating goes on
- consistent application conditions
- giving the finish time to cure, not just dry
If your goal is also to refresh adjacent trim or doors, make sure you’re not treating them like walls. Trim painting and door painting generally require the same level of prep discipline as cabinets to avoid flashing, uneven sheen, and early wear. If you’re planning broader interior work, you can coordinate timing with Exterior Painting Service Areas in Allen for a full-house schedule—especially if you’re working under an HOA appearance deadline.
Preparation or Maintenance Checklist (After the Job)
Once your cabinets are professionally finished, a little maintenance protects the investment:
- Use gentle cleaners for the first few weeks (avoid harsh degreasers immediately after curing)
- Wipe spills promptly—especially sticky or oily residue
- Use felt pads under small items to reduce scratching
- Avoid abrasive scrubbers on edges and corners
- Re-tighten hardware if doors begin to shift (misalignment increases stress at edges)
If your home has older textures or wall finishes nearby, consider how you prep the surrounding surfaces too. A smooth cabinet finish looks best when walls are stable and clean. If you’re dealing with older popcorn textures, you might need Popcorn Texture Removal before repainting nearby walls so you don’t end up with ceiling dust contaminating freshly coated areas.
Paint vs. Stain Comparison (Quick Decision Guide)
- Cabinet painting: best for solid color change, hiding wear, and creating a uniform look across different cabinet materials.
- Kitchen cabinet staining: best when you want wood character and can ensure the surface is properly prepped for even absorption.
If you’re unsure, we usually start by matching the finish to your kitchen lifestyle: painted cabinets tend to be more forgiving for heavy use and color consistency, while staining demands more uniformity and attention to wood condition.
FAQ
How long does cabinet painting take in real life?
Most projects take about a week to schedule properly, but the “active work” is only part of the timeline. The rest is prep, coat timing, and—most importantly—cure time before you reinstall hardware and use the cabinets normally. If you want a finish that resists chips and fingerprints, curing is non-negotiable.
Should I sand all the way down to bare wood?
Not always. In many cases, you don’t need to remove everything, but you do need to degloss and smooth consistently. If there are failing areas, deep damage, or incompatible coatings, more removal may be necessary to achieve adhesion.
What sheen is best for kitchen cabinets?
Satin is a common sweet spot: it’s cleanable, looks smooth, and hides minor surface imperfections better than high gloss. Semi-gloss can look more crisp but will show small flaws and brush/roller texture more clearly.
Can cabinet refacing get the same “fresh paint” look?
Refacing can look great, especially when you’re changing doors and face style. But if your existing boxes are worn or have uneven surfaces, refinishing with a proper coating system is often the better path to achieve a truly uniform finish.
Why do my cabinets look fine at first but wear quickly?
The usual causes are insufficient degreasing, incomplete deglossing, wrong primer, or rushing cure time. Kitchen residue and adhesion failure show up fast around high-contact areas—edges, corners, and hardware zones.
Ready to Refresh or Protect Your Home’s Surfaces?
If you want cabinet painting that looks professionally finished—and stays that way through daily kitchen use—the process has to be built around adhesion, repair quality, and cure timing. MJ Workforce Solutions focuses on craftsmanship-first refinishing so your cabinets look consistent, feel smooth, and hold up to real life in a North Texas home.
About MJ Workforce Solutions
MJ Workforce Solutions provides interior painting, cabinet refinishing, drywall repair, exterior painting, floor coatings, wallpaper removal, and decorative finishing services throughout Allen, TX and surrounding North Texas communities. The company focuses on detailed craftsmanship, long-lasting finishes, proper surface preparation, and helping homeowners improve and protect their properties through professional painting and refinishing solutions.