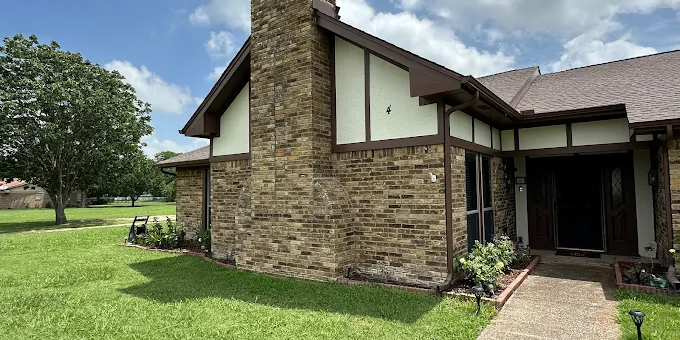
Exterior Painting for a Fresh Look Every Season
A lot of homeowners in Allen, TX notice the same thing at the wrong time: the front of the house looks “fine” from the street, but up close you start seeing hairline cracks in the trim paint, chalky residue on the siding, or that washed-out look where the sun hits hardest. After a couple of seasons, small issues turn into bigger ones—especially when moisture gets behind failing caulk or when old paint was never properly prepped for the next coat.
We handle exterior projects across North Texas, and the biggest difference between a paint job that looks great for years versus one that fails early is what happens before the first roller pass. Exterior painting isn’t just color—it’s surface preparation, correct materials, and timing around Texas weather.
Quick Answer
For long-lasting exterior results in Allen and North Texas, plan around sun exposure and moisture. Repaint when you see peeling, flaking, bubbling, chalking, or failing caulk. The real key is prep: pressure washing (done correctly), scraping loose paint, repairing cracks, addressing moisture sources, priming bare or repaired areas, and using the right exterior primer and topcoat system for your siding and trim.
What Actually Drives a “Fresh Look” Outdoors
When homeowners call us, they usually describe the symptoms:
- Trim paint looks rough near corners and window/door edges
- Siding color looks faded unevenly
- Caulk lines look shrunken or separated
- Small bubbles show up after storms
Here’s a contractor observation we see often: the exterior paint system is only as strong as the weakest layer. If prep misses even one problem area—like a damp spot behind a board or old caulk that’s breaking down—new paint may still look good briefly, but it won’t “bond” the way it should.
A realistic homeowner scenario (and what we’d do)
A family in an Allen neighborhood had planned to repaint “just the front.” They waited until late spring because the weather looked good. When we inspected, we found:
- old peeling paint at the eaves and window trim
- caulk failure around two garage door trim sections
- chalky surface residue on the siding from UV exposure
The fix wasn’t just repainting. We scraped loose material back to solid edges, cleaned the surface thoroughly, repaired the caulk joints, and primed the bare sections before applying the finish coats. The result looked uniform—not blotchy—and it held up through the next hot stretch because the foundation was sound.
Why Some Exterior Paint Jobs Fail Early
Paint failure usually traces back to a few repeat causes:
1) Moisture trapped under old paint
In North Texas, rain and humidity can get into cracks and behind trim. If the surface stays damp, paint can’t cure properly and may blister or peel.
2) Skipping primer on bare or repaired areas
A common misconception is that “the topcoat will cover everything.” In reality, bare wood, patched drywall-like cementitious areas, and scraped metal/trim spots often need priming services and correct adhesion before the finish coat goes on.
3) Pressure washing that’s too aggressive (or done too close to the paint)
We’ve seen siding damaged by overly powerful pressure or by holding the nozzle too close. That creates fresh texture and can force water deeper into seams. Proper cleaning matters—enough to remove chalk and grime, not enough to harm the substrate.
4) Caulk and sealant not matched to the joint
Exterior joints move with temperature swings. If the caulk is the wrong type or applied over dirty surfaces, it will fail again quickly—then paint is left to take the blame.
Common Mistakes Homeowners Make
Mistake: Painting over chalky residue
Chalky buildup is common when exterior paint has been hit hard by sun and weathering. If you paint right over it, the new coat may not adhere.
What to do instead: clean the surface and verify adhesion—especially on railings, fascia, and areas that get direct sun.
Mistake: Waiting for “perfect weather” without checking humidity and surface temperature
In Allen, daytime sun can heat siding quickly while evenings stay cooler and damp. If surfaces are too hot or too wet, coatings can dry incorrectly, affecting film formation.
What to do instead: painters check both weather forecasts and surface conditions, not just the air temperature.
Mistake: Ignoring trim and edges
Most wear starts at edges—trim corners, window frames, door casings, and vents. Homeowners often repaint the “big surfaces” first and leave the details for later. By the time details are addressed, the surrounding paint may already be breaking down.
Mistake: DIY patching without feathering
Patches that are too thick or not sanded/feathered properly show through under a glossy or semi-gloss finish.
Surface Preparation Checklist (What We Follow Before Coating)
If you want the short version, good exterior painting is mostly preparation and only partly painting. Here’s a practical checklist homeowners can use to understand the process:
Surface Prep Checklist
- Inspect for failure points: peeling, blistering, cracks, soft wood, loose trim, failing caulk lines
- Scrape loose paint down to sound edges
- Clean thoroughly (pressure wash when appropriate; avoid damaging siding)
- Repair cracks and gaps:
- re-caulk joints and seams
- patch damaged areas
- address any moisture-related issues visible during inspection
- Dry time verification: ensure surfaces are dry before priming and painting
- Prime correctly:
- bare wood and repaired areas
- stained/problem areas (as needed)
- any surface where old paint was removed
- Sand and smooth transitions so repaired areas blend naturally
- Caulking and Sealing as part of the system (not as an afterthought)
- Apply finish coats with the right coverage and consistent technique
Material/finish recommendation that matters
For exterior trim and doors, we often recommend a durable exterior enamel finish (or an exterior-grade product designed for trim) rather than trying to use the same sheen and formula as siding. Trim takes more impact from weather and gets more frequent sun exposure at angles, so matching the finish to the surface is a big deal.
Also, if your home has noticeable weathering, consider a system approach: clean → prime bare/repaired areas → topcoat rather than “spot paint” only.
Quick Comparison: Paint vs. Stain Outdoors
| Factor | Exterior Paint | Exterior Stain |
|---|---|---|
| Best for | Most siding types, trim, painted surfaces | Wood surfaces where you want visible grain |
| Coverage | Better at hiding older color and uniforming appearance | More translucent; color can vary based on wood |
| Weather protection | Strong barrier when prepped and primed correctly | Protects but needs proper surface maintenance |
| Maintenance feel | Repaint on a cycle when failure shows | Recoat/stain periodically to avoid fading and erosion |
| Common risk | Poor prep leads to peeling/adhesion failure | Skipping cleaning and prep leads to blotchiness and early wear |
If your home is currently painted, switching to stain usually requires careful evaluation and prep. We can walk you through what’s realistic for your siding and trim.
What We Commonly See in North Texas Homes
North Texas homes often have a few exterior realities that influence coating performance:
- UV exposure is relentless. Sun bleaching makes color look uneven and can accelerate chalking.
- Seasonal expansion and contraction stresses trim joints. Caulk failure often shows up first.
- Storm-driven moisture finds weak points around penetrations: vents, gutters, corners, and window/door frames.
- Garage doors and shaded eaves can stay cooler and damp longer, which affects drying and adhesion.
In practice, we plan for these conditions by prioritizing joint repair, primer selection, and proper timing between coats.
Our Experience With Painting Projects in Texas Homes (A Case Example)
One common scenario: a homeowner wants to “match the existing color,” but the existing finish is already breaking down. In an anonymized project we handled in the Allen area, the siding had:
- chalking and minor surface roughness
- localized peeling near an upper corner
- caulk separation around a window trim seam
The homeowner chose to keep the same color family. We still recommended a complete prep and priming strategy rather than relying on touch-up. After we stabilized the failing areas (scraping + priming), the final color looked consistent because the substrate was uniform again. That’s the difference between a cosmetic refresh and a lasting exterior system.
Signs It’s Time to Repaint
If you’re unsure, look for these practical indicators:
- Peeling or flaking paint
- Blistering (bubbles or raised areas)
- Cracks that open up along trim lines
- Chalky residue when you rub a clean cloth on the surface
- Caulk gaps or separation around windows/doors
- Noticeable fading that looks patchy rather than evenly sun-bleached
What Homeowners Should Know About Timing in Allen, TX
Texas weather can be deceptive. Even when the forecast looks dry, coating performance depends on surface temperature, humidity, and how quickly moisture cycles through materials. We typically plan around:
- avoiding late-day application when surfaces cool too fast
- allowing adequate drying time between coats
- making sure repaired and primed sections are fully ready before finish coats go on
That “attention to timing” is one reason professionally painted exteriors hold up longer.
Surface Preparation vs. Just Touch-Ups
A quick reality check: touch-ups are fine for small cosmetic blemishes, but not when the failure is widespread or the substrate is compromised.
If the exterior is already chalky or peeling in multiple areas, a full prep approach is usually the safer route. It’s also more cost-effective over time—because you’re not paying for repeated short-term repairs.
Preparation or Maintenance Checklist for the Next Season
After the job is done, a little homeowner maintenance helps protect the finish:
- Keep gutters clear to reduce water overflow at fascia and corners
- Inspect caulk lines every season or after major storms
- Watch for wood softness near trim and door frames
- Touch up minor chips promptly (after cleaning and spot priming)
- Avoid blasting the surface with high-pressure tools near edges
References & industry context (why prep is emphasized)
Coatings industry guidance consistently highlights that surface preparation drives coating adhesion and durability. For example:
- The U.S. EPA discusses how proper surface preparation improves coating performance and reduces environmental risks associated with poorly managed coatings.
- ASTM standards and coating manufacturer application guides emphasize cleaning, proper substrate condition, and priming for adhesion.
- Industry publications on exterior coatings repeatedly note that premature failure is commonly linked to inadequate surface preparation and moisture-related issues.
Allen or North Texas Relevance: Why Local Conditions Matter
In Allen, the combination of intense sun, seasonal temperature swings, and storm-driven moisture means exterior paint systems experience real movement and UV stress. That’s why “same color, same layer count” isn’t enough—your exterior needs to be treated as a system: cleaning, repairs, caulking and sealing, priming, then finish coats.
A well-prepped exterior doesn’t just look better in one season—it resists the early failures that show up first in Texas: chalking, peeling at edges, and caulk-related breakdown around openings.
FAQ
How often should exterior paint be redone in Texas?
Most homeowners see repaint needs every several years, but the timeline depends on sun exposure, material type, and how well the surface was prepped. If you notice chalking, peeling, or failing caulk, it’s usually time sooner rather than later. A professional inspection can separate “cosmetic fading” from “substrate failure.”
Is pressure washing always required before exterior painting?
Cleaning is essential, but pressure washing isn’t always the answer in the same way everywhere. We choose the right method based on siding type and current condition. Over-aggressive pressure can damage surfaces, so the goal is removal of chalk and grime without harming the substrate.
What’s the biggest cause of peeling paint on trim?
Peeling at trim lines is commonly caused by moisture intrusion and joint failure—often around caulk seams, corners, or window/door edges—combined with incomplete prep of peeling material. If the underlying issue isn’t addressed, new paint won’t last.
Can we paint over old paint that’s not peeling?
Sometimes, but not blindly. If the surface is chalky, dirty, or poorly bonded, coating adhesion can fail. We evaluate adhesion and surface condition and may recommend cleaning, sanding, spot priming, or more extensive prep.
Ready to Refresh or Protect Your Home’s Surfaces?
If you’re seeing fading, cracking, or caulk separation on your exterior, it’s usually worth addressing the prep and repair work now—before moisture and movement start lifting paint again. MJ Workforce Solutions focuses on craftsmanship details that protect your investment season after season.
About MJ Workforce Solutions
MJ Workforce Solutions provides interior painting, cabinet refinishing, drywall repair, exterior painting, floor coatings, wallpaper removal, and decorative finishing services throughout Allen, TX and surrounding North Texas communities. We’re known for detailed craftsmanship, correct surface preparation, and helping homeowners protect and upgrade their properties with finishes designed to last.