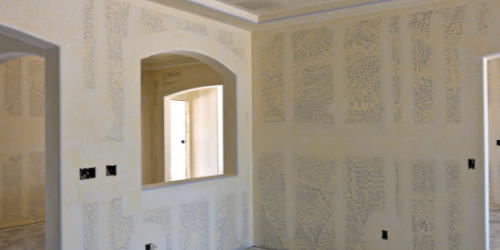
Seamless Drywall Installation for Smooth, Modern Walls
You can do everything “right” with paint—pick a great color, buy the nicer roller sleeves, even tape edges carefully—and still end up disappointed if the drywall underneath isn’t installed and finished to match the way your home moves.
In Allen, TX, we see this most often after renovations: a new wall goes up, the paint looks fine for a few months, and then hairline cracks or slight ridges start to show along seams and corners. That’s not just a paint problem. It’s usually a drywall installation and finishing issue—especially around butt joints, corners, and any area that’s been patched or reworked.
Quick Answer
Seamless drywall comes from three things done in the right order:
- Accurate framing/flatness before board goes up
- Proper joint treatment (tape type, embedment, and number of coats)
- Correct drywall finishing (feathering, sanding control, and primer timing)
If you want modern, smooth walls that stay smooth, don’t rush the curing and don’t skip surface prep—especially in North Texas temperature swings.
What Seamless Drywall Finishing Really Requires (Not Just “Putting Up Board”)
When homeowners say, “We want the seams to disappear,” they’re asking for a level of surface uniformity that only happens when the drywall system is treated as a process—not a single step.
The contractor workflow that prevents ridges and flashing
From experience, the most common causes of visible seams are easy to trace back to installation and finish details:
1. Frame flatness and support spacing
- If studs aren’t in plane, the drywall will “telegraph” those dips once paint goes on.
- We check for bowing and soft spots before we hang sheets. Even a small twist can show under raking light.
2. Board handling and joint layout
- Sheet ends shouldn’t be overly damaged or buckled.
- Staggering joints and planning where seams land reduces weak points and helps the joint compound feather out more cleanly.
3. Tape embedment and joint thickness control
- For a smooth finish, the tape has to be fully embedded without bumps.
- We aim for a consistent base layer, then build thickness gradually instead of trying to “hide” a ridge with one heavy coat.
4. Feathering technique
- Seam work isn’t about covering—it’s about blending.
- Each coat should get wider and thinner, so the transition becomes invisible.
Material and finish recommendation for a modern “smooth” look
For smooth, modern walls (especially if you plan to use eggshell or satin interior paint), we usually recommend:
- Joint compound suited to the job (fast-setting for certain steps, but not rushed)
- A quality primer/sealer before final topcoat
- A finish level that matches your lighting (walls with strong overhead fixtures or large windows show imperfections more quickly)
If your goal is a truly seamless feel, ask your finisher what drywall finish level they’re targeting and how they plan to control sanding dust and surface uniformity.
A Real Home Scenario We’ve Seen in North Texas
A homeowner in Allen asked for a refreshed living room after moving furniture around and noticing that their old wall had a patch near an outlet. The renovation plan was simple: new drywall where needed, then paint in a clean neutral.
Here’s what happened after the first paint coat:
- The patched section looked fine up close.
- Under the living room’s recessed lighting, the seam line showed as a faint shadow.
The root cause wasn’t the paint brand. It was the patch finishing: the feathering wasn’t wide enough, and the sanding left a slight ridge. The solution was to correct the surface before repainting—adding compound where the transition needed smoothing, then priming to unify sheen and absorption across the repaired area.
That’s the difference between “patched” and “seamless.”
Common Mistakes That Lead to Premature Wear (and Visible Seams)
Homeowners often run into the same few problems when drywall work is DIY’d or rushed by schedule.
1) Skipping the flatness check
If the wall isn’t straight before board goes up, you can’t sand your way out of structural inconsistency. Paint will highlight it, especially with side lighting.
2) Overloading joint compound to “fill the gap”
Heavy mud creates shrinkage and can crack later. It also creates ridges that show under raking light.
3) Sanding aggressively too early
If compound isn’t ready, sanding can tear the surface and leave micro-edges that later telegraph as uneven texture.
4) Not priming after repair or new drywall
New drywall and patched areas absorb paint differently. That absorption difference can create a patch that’s “visible” even when it looks smooth.
5) Ignoring curing time in a North Texas home
Allen homes cycle through heat and cooler indoor temperatures. Joint compound and primer have to be allowed to cure properly for the finish to stabilize.
Surface Preparation & Finishing Checklist (Use This Before You Paint)
If you want a modern, seamless wall, run through this checklist with your installer or finisher.
Seamless drywall checklist
- Confirm wall flatness (use a long level or straightedge)
- Verify all seams and corners are properly taped
- Check for nail/screw pops and re-seat fasteners before finishing
- Allow joint compound to dry fully between coats
- Feather edges progressively (wider and thinner each coat)
- Sand only when ready and keep sanding consistent across the wall
- Vacuum dust thoroughly (a clean surface helps primer and topcoat bond evenly)
- Prime new and repaired drywall
- Perform a final “raking light” inspection before topcoat
Maintenance note that saves money later
After installation, avoid slamming doors or repeatedly bumping the same wall area right away. Fresh joints and compound need time to stabilize. That’s one reason we tell homeowners to keep high-impact behavior minimal during the first weeks after finishing.
What We Commonly See in North Texas Homes
North Texas doesn’t just bring heat—it brings rapid seasonal movement: warm days, cooler nights, and indoor humidity changes that affect how materials expand and contract.
A few local patterns we see:
- Older homes with framing that’s slightly out of plane get new walls or openings, and drywall seams become more visible during temperature swings.
- Sunlit rooms with large windows create raking light conditions that reveal even mild ridges.
- Renovations around outlets and doorframes often involve patches that need wider feathering and proper priming to avoid “halo” differences.
This is why seamless drywall isn’t only about the joint—it’s about the entire wall system behaving consistently.
Why Some Drywall Jobs Fail Early
Most early failures fall into a few categories:
- Tape not fully embedded → weak bond, seam cracks, or “ghost lines”
- Inconsistent coat thickness → shrinkage and uneven texture
- Inadequate feathering at transitions (corners, butt joints, patched areas)
- Insufficient primer coverage → uneven sheen and absorption that makes seams visible
- Rushing sanding and repainting → micro-damage that shows later
Industry research supports what we see in the field: joint compound shrinkage and cracking risk increase when application thickness and drying conditions aren’t managed well. The Gypsum Association notes that proper joint finishing depends on correct installation and finishing steps, including drying and finishing practices (see Gypsum Association guidelines). Additionally, the U.S. Environmental Protection Agency highlights that dust control and proper surface prep affect both performance and indoor air quality—both matter during sanding and finishing (EPA guidance on indoor air quality and dust).
Key Takeaway
If you want seamless, modern walls, the finish starts before paint. Flatness, correct joint treatment, proper curing, and priming are what make the seams disappear—and what keep them from coming back after the Texas seasons shift.
Quick Reference: Drywall Options That Affect the Final Look
| Goal | What to request | Why it matters |
|---|---|---|
| Disappearing seams | Proper tape embedment + multiple feather coats | Prevents ridges and “ghost seams” under light |
| Smooth modern walls | Controlled sanding + consistent primer | Unifies texture and sheen |
| Fast turnaround | Discuss schedule with curing needs | Rushing compound often leads to later cracking |
Allen, TX & North Texas Relevance: What Changes the Approach
In Allen, you’re dealing with UV exposure outdoors and indoor climate cycling that can reveal imperfections more quickly. Even indoors, temperature shifts can slightly change the way finishes behave. That’s why we take curing time seriously and why we don’t treat primer and topcoat as optional steps.
If you’re planning a full refresh—especially if you’re changing wall color, adding an accent wall, or upgrading lighting—plan for the drywall finishing to match your lighting conditions, not just your target color.
If your project also involves updating surfaces beyond drywall, you may want to coordinate finishes so everything looks intentional. For related prep and restoration work, homeowners often pair interior updates with other services like wallpaper work or paint touch-ups. For example, if you’re dealing with an older wall surface, you might need help with wallpaper removal assistance before drywall finishing can be truly smooth.
Ready for a Smoother Wall Finish? (Anonymized Project Case)
One of our recent jobs involved a partial wall replacement in a North Texas home where a plumbing repair had been opened and patched. The homeowner wanted a clean, modern look in a room with bright overhead lighting.
Our approach:
- We evaluated the framing for flatness around the patch area.
- We corrected joint thickness instead of trying to cover a ridge with paint.
- We used progressive feathering and controlled sanding for a consistent texture.
- We primed the entire repaired section before topcoat to unify absorption.
Result: the seam stopped being visible under raking light, and the finish stayed consistent after subsequent temperature changes. The homeowner didn’t just get “a paint job”—they got a wall surface that behaves like the rest of the room.
FAQ
How long should drywall finishing take before paint?
It depends on temperature, humidity, and joint compound type, but a common cause of later seam problems is finishing too quickly. In general, joint compound needs enough time to dry between coats and for sanding dust to be fully removed before priming. If you’re trying to meet a tight deadline, discuss the schedule early—proper curing is part of what keeps seams from reappearing.
Why do seams show after painting even if the wall feels smooth?
Paint can highlight subtle ridges, uneven texture, or differences in absorption between repaired and unrepaired areas. Primer is a major factor here. If the repair wasn’t feathered wide enough or wasn’t primed to unify absorption, the seam can “ghost” through the topcoat under certain lighting.
Is drywall repair cheaper than drywall installation?
Often, yes—if the damage is limited and the framing is sound. But if the drywall was poorly installed, has moisture damage, or the surrounding area is out of plane, a replacement section can prevent recurring issues. A quick inspection usually clarifies whether patching or installation will hold up longer.
What finish level should I ask for if I want modern smooth walls?
If you’re using lighting that creates shadows (recessed lights, ceiling fans, or large windows), ask for a smooth finish approach with controlled sanding and proper priming. The goal is uniform texture so the final topcoat reads as one surface, not as “taped areas” or “patch zones.”
Ready to Refresh or Protect Your Home’s Surfaces?
Seamless drywall is one of those projects where the details matter—flatness, joint treatment, curing, and priming. If you’re planning a renovation, a room update, or you’ve noticed seams or ridges showing up after paint, we can help you get the surface right the first time.
About MJ Workforce Solutions
MJ Workforce Solutions provides interior painting, cabinet refinishing, drywall repair, exterior painting, floor coatings, wallpaper removal, and decorative finishing services throughout Allen, TX and surrounding North Texas communities. We focus on detailed craftsmanship, long-lasting finishes, proper surface preparation, and helping homeowners improve and protect their properties through professional painting and refinishing solutions.