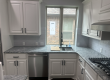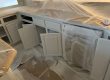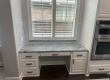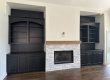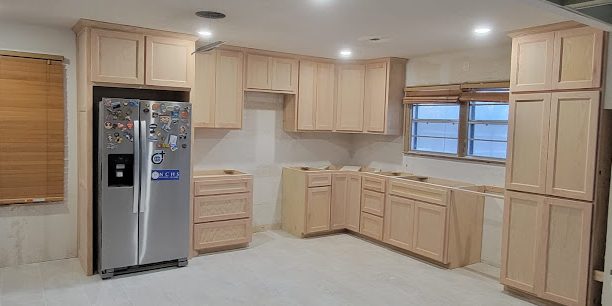
Cabinet Painting for Sleek, Durable Finishes
Your kitchen cabinets may look “fine” from a distance, but up close it’s usually the same story we hear in Allen homes: sticky doors after a few years, a dull finish that won’t clean well, or edges that start to look rough where hands and cleaning products hit most. Sometimes homeowners also notice the color no longer matches the rest of the kitchen—especially after flooring or backsplash updates—so the question becomes whether cabinet replacement is really necessary.
In North Texas, that decision matters. Heat, dry air, and daily kitchen humidity swings put real stress on coatings. If the prep isn’t right or the wrong finish is chosen, cabinet paint can chip around the hinges, wear through on the fronts, and peel in the corners. The good news? With the right process, cabinet painting can look factory-clean and stay that way.
Below is what we look for on real projects—and what helps cabinets keep a sleek, durable finish.
Quick Answer
Cabinet painting lasts best when surfaces are properly cleaned, sanded, and primed for adhesion, then finished with a durable coating system designed for frequent use (not just “interior wall paint”). For most kitchens, we recommend a two-stage approach: a quality bonding primer plus a smooth, hard topcoat (often sprayed or carefully rolled/trimmed) with proper curing time before heavy use.
What Actually Makes Cabinet Painting Look “Sleek” and Last
The contractor reality: adhesion beats appearance
The smoothest cabinet finish starts long before paint touches the doors. From experience, the biggest difference between a finish that looks great for a year and one that lasts 5–10+ years is the adhesion system and how thoroughly the old surface was prepped.
On older cabinets, we commonly find:
- Grease film from cooking that cleaning alone didn’t fully remove
- Glossy factory finishes that resist bonding
- Cabinet hardware wear that reveals tiny gaps where coatings lift later
When we prep correctly, the coating can “bite” into the surface. When we skip steps or rush drying/curing, the topcoat may look good at first—then fails at the hinge line or along the edges as cabinets expand and contract with indoor conditions.
A realistic homeowner scenario (and what we changed)
A homeowner in Allen wanted a cabinet color change without replacing boxes. The doors looked slightly dated, and the kitchen had been updated with new countertops. They’d already tried “a quick repaint” using a leftover can from a previous project.
After a few months:
- the finish felt rough in high-touch areas,
- the edges around panels looked worn,
- and the doors near the sink area started to show tiny lifting.
We pulled one door to inspect it. The surface still had a slick residue and wasn’t fully de-glossed. The primer didn’t have a solid bond, so the topcoat couldn’t hold up to daily cleaning and friction. Once we stripped back to a properly sanded surface, used the right primer, and re-coated with the correct system, the finish became smooth again—and cleaning stopped being a problem.
Choosing the right finish system (material and surface recommendation)
For cabinetry, you generally want a coating designed for wood and frequent-use surfaces, not a general-purpose wall paint. Many contractors prefer:
- Bonding primer formulated for slick surfaces (especially if cabinets were previously painted or have a factory sheen)
- A durable topcoat that levels well and cures hard enough for daily handling
In practical terms, we also look at:
- whether cabinets are painted vs. stained/wood veneer
- the current sheen level
- the presence of laminate or melamine surfaces
- how much the kitchen gets cleaned (and with what products)
If your cabinets are currently stained, or you’re considering a dramatic cabinet color change, you may also want to explore kitchen cabinet staining instead of paint—especially when you want wood character to remain while refreshing the look.
Common Mistakes That Lead to Premature Wear
Cabinet failures usually aren’t mysterious. They’re often predictable. Here are the issues we most commonly see when homeowners DIY or rush the job.
1) Skipping a proper degreasing step
Kitchen cabinets attract invisible residue. Even when the cabinets look clean, oils can interfere with adhesion. If you paint over grease film, the primer may bond at first—then lift later.
2) Not sanding enough (or sanding the wrong way)
We’re not talking about sanding for “scratches.” We mean sanding to:
- de-gloss the surface,
- create a consistent profile for primer,
- and remove softened or contaminated areas.
Too little sanding = poor bonding. Too aggressive sanding without addressing uneven spots = visible texture under the finish.
3) Using the wrong product or mixing systems
Cabinet coatings work as a system: primer + topcoat + correct application method. A common DIY mistake is switching brands midstream or using a wall paint topcoat because it “seems similar.” It rarely behaves the same on cabinetry.
4) Reinstalling doors before full cure
Even when paint feels dry to the touch, it may not be cured enough for friction and cleaning. In a kitchen, door slams, hardware movement, and early cleaning can shorten the lifespan of the finish.
5) Forgetting to prep for hardware and edges
Edges, hinge areas, and inside corners are wear zones. Paint tends to thin there if prep and application aren’t handled carefully.
Surface Preparation Checklist (This Is Where Durability Starts)
If you’re planning a cabinet refresh, here’s a practical checklist you can use to understand what a quality contractor will do—and what you should insist on.
Cabinet Painting Prep Checklist
- Remove doors and hardware (and label everything)
- Deep clean/degrease all surfaces (including frames and interiors)
- De-gloss/sand to create uniform adhesion (especially if glossy)
- Fill dents and imperfections with appropriate filler, then sand smooth
- Prime with a bonding primer compatible with your existing cabinet surface
- Lightly sand between coats if the topcoat manufacturer recommends it
- Apply topcoat evenly with attention to panels, edges, and corners
- Allow proper cure time before reinstalling and heavy use
- Re-caulk and touch up where needed for a clean, finished look
What Homeowners Should Know in Allen and North Texas
Allen homes live with a very particular indoor rhythm. Even indoors, temperature swings and humidity changes affect wood and coatings—especially near sinks, dishwashers, and vents.
Here’s what that means for cabinet finishes:
- Dry air can cause some finishes to cure faster, but it can also make certain primers/topcoats behave differently during application.
- Humidity spikes near cooking and washing can create conditions that expose weak adhesion at edges.
- Seasonal expansion and contraction stresses coatings around joints and hinge areas.
One firsthand observation: on many North Texas projects, we see more cabinet wear near the dishwasher and sink not just because of moisture exposure, but because that section gets cleaned more often. The more often a surface is scrubbed, the more important it is that the topcoat is tough and the prep created a strong bond.
Our Experience With Cabinet Painting Projects in Texas Homes
On typical kitchen cabinet refinishing jobs (especially older homes), we prioritize three outcomes:
1. Uniform adhesion so the finish doesn’t lift later
2. Smooth leveling so you don’t see brush marks or roller texture on flat panels
3. Edge durability so high-touch zones resist chipping and wear
We also plan for what happens after the job. Cabinet finishing is not just about the day we spray or brush. It’s about the days after: curing time, careful handling during the first week, and using the right cleaning approach.
A common “gotcha” is that homeowners expect cabinet paint to be fully tough immediately. In reality, the coating system needs time to harden. If you rush that window, the finish can mark—even if it looks fine the first few days.
If you’re considering more than just cabinets—trim, doors, and other woodwork often need matching—our team can help coordinate a cohesive look. For example, cabinet painting service areas in Allen are often paired with trim painting and door finishing so the kitchen hardware and surrounding millwork match in sheen and tone.
Preparation and Maintenance Checklist (After the Paint)
Even the best finish will wear if it’s treated like wall paint. Here’s how to protect your investment.
Maintenance Tips That Actually Help
- Use gentle cleaners (avoid harsh solvents and abrasive pads)
- Wipe spills quickly—especially around sink areas
- Avoid scraping with metal tools on painted surfaces
- Wait for full cure before deep cleaning (follow your coating’s guidance)
- Re-tighten hardware if doors start to rub during seasonal movement
Allen Homeowners Also Ask: “Should We Stain Instead of Paint?”
Sometimes the best “durable finish” isn’t paint. If your cabinets are wood and you want to keep grain character, or you want a softer, more natural look, staining may be a better fit.
If you’re unsure, we recommend comparing how you use your kitchen:
- Heavy daily cooking and frequent wipe-downs often benefit from a tougher painted system.
- If your cabinets have beautiful wood and you want to highlight it, staining can work well when surfaces are properly prepped.
For homeowners leaning toward a wood finish, reviewing drywall repair support can be useful too—because wall conditions near cabinets (nail pops, uneven patches, or rough transitions) affect the final look. A crisp cabinet line needs clean wall edges.
Quick Comparison: Cabinet Refinishing Options
| Option | Best For | Typical Tradeoff |
|---|---|---|
| Cabinet Painting | Color change, sleek uniform look | Requires proper prep + curing for durability |
| Cabinet Refinishing (full process) | Worn finishes needing restoration | More steps, longer timeline |
| Cabinet Refacing | Budget-friendly update | Less control over surface feel/quality vs full refinishing |
If you’re chasing a cabinet color change but want a high-end result, cabinet refinishing or professional cabinet painting is usually the best balance of cost and finish quality.
Signs It’s Time to Repaint (Before Wear Gets Worse)
If you notice any of these, it’s usually time to act:
- paint is chipping at edges or corners
- doors feel rough or sticky after cleaning
- you can see thin spots around hardware
- the finish doesn’t wipe clean the same way as before
- small peeling starts in corners or panel seams
One more clue: if the cabinets look fine but smell “oily” or feel coated, it can indicate contamination was never fully removed before the previous finish.
FAQ
How long does cabinet paint typically last in a kitchen?
With proper prep, a quality primer + topcoat system, and correct curing time, cabinet finishes can hold up for years. Kitchens see constant friction (door pulls, hinges) and frequent cleaning, so durability depends heavily on surface prep and maintenance—more than on the color itself.
Is cabinet refinishing better than replacing cabinets?
In many cases, yes. Refinishing or cabinet painting can deliver a modern look without the cost and disruption of replacement. It’s especially worth it when boxes and frames are structurally sound and you want a cabinet color change.
Can you paint cabinets that were previously stained or glossy?
Yes, but it’s not a “paint over it” situation. Glossy or stained surfaces need the right sanding and bonding primer. If the surface isn’t de-glossed and cleaned thoroughly, the coating can fail early.
What’s the biggest reason cabinet paint chips?
Most early chipping comes from weak adhesion—usually due to incomplete degreasing, insufficient sanding, incompatible products, or not allowing the coating to cure before heavy use.
Ready to Refresh or Protect Your Home’s Surfaces?
If your cabinets are dated, worn, or just not matching the rest of your kitchen anymore, you don’t have to live with a finish that won’t stay smooth. The key is treating cabinet painting like a finishing system—surface prep, bonding primer, durable topcoat, and realistic cure time.
About MJ Workforce Solutions
MJ Workforce Solutions provides interior painting, cabinet refinishing, drywall repair, exterior painting, floor coatings, wallpaper removal, and decorative finishing services throughout Allen, TX and surrounding North Texas communities. The company focuses on detailed craftsmanship, long-lasting finishes, proper surface preparation, and helping homeowners improve and protect their properties through professional painting and refinishing solutions.