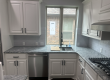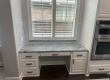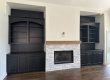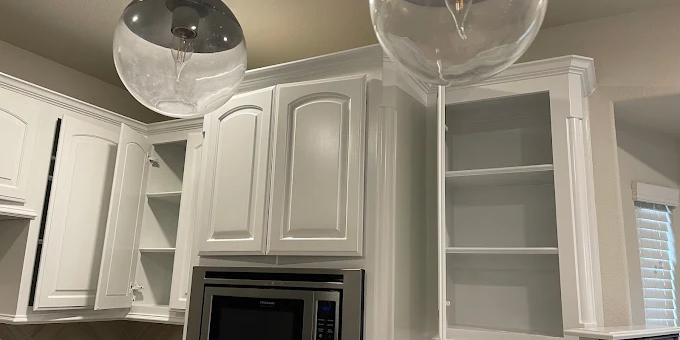
Cabinet Painting Transformations with Stunning Color Matching
The kitchen is usually the first place homeowners in Allen notice “aging.” Not because the cabinets are suddenly falling apart—but because the finish starts to look tired: sun-faded tones near windows, dull spots where grease worked into the sheen, and hardware that no longer matches the rest of the room. Then you open a drawer and realize it’s not just the color you’re seeing—it’s the surface quality underneath.
We see a lot of cabinets that look fine from a distance but have uneven sheen, stubborn grime staining, or factory-style coating that never truly bonds with new paint. That’s why cabinet painting (especially when you’re doing a cabinet color change) takes more than rolling on a pretty color. It’s about correct prep, the right primer system, and color matching that accounts for lighting in real homes—not showroom samples.
Quick Answer
Cabinet painting looks “professionally matched” when three things are handled correctly:
1) Surface prep (degrease, scuff-sand, and address any glossy/peeling spots)
2) Proper primer and bonding for the existing cabinet material
3) Accurate color matching using real samples under your home’s lighting
If you skip any step—especially cleaning and bonding primer—paint can chip around edges, lift at seams, or end up with a mismatched tone.
Cabinet Refinishing That Actually Looks Matched (Not Just Similar)
A lot of homeowners assume color matching is mostly about picking the right swatch. On the job, the real challenge is that cabinets see different light than walls. In North Texas homes, morning light coming through kitchen windows can read warm, while evening lighting can make the same paint look cooler or flatter. Add in the fact that many homes have granite, tile, and stainless finishes that reflect color back onto cabinet doors.
What we do differently for color matching
When we plan a cabinet transformation, we treat color like a “system,” not a single step:
- We match to your kitchen’s real surfaces. That means looking at countertops, backsplash, and even the floor’s undertone—not just a paint card.
- We control sheen. Kitchen cabinets almost always look better when the sheen level is consistent across doors and frames. If the sheen is off, the color can look off too.
- We address the existing finish before paint touches it. Many cabinets have a factory coating that’s too slick for paint to grip without the right prep.
Contractor observation from the field
One of the most common things we notice on older cabinets isn’t visible damage—it’s “micro-sheen variation.” Grease and cleaning products create areas that are slightly different in absorbency. If we don’t scuff-sand thoroughly and use a bonding primer where needed, the topcoat can dry with tiny differences that show as blotchiness or uneven depth.
That’s why the best cabinet refinishing results come from treating the prep like the main event.
What Homeowners Often Overlook
1) Degreasing isn’t optional (even if cabinets look “clean”)
Kitchen cabinets collect a film—often invisible—especially around stove runs and near handles. Paint can bond to dust, but it doesn’t bond to grease. Even a great color match will fail if the surface is contaminated.
2) “Sanding enough” is not the same as “sanding correctly”
A light scuff for a glossy finish may not be enough. On smoother factory coatings, we look for a uniform dulling so the primer can actually grip.
3) Timing between coats affects durability
Cabinet topcoats need time to cure to handle daily use. Rushing the schedule can lead to premature wear around edges and hardware points—even if the finish looks great during the first week.
Common Mistakes That Lead to Premature Wear
Homeowners do a lot right—choosing a color, protecting floors, taping carefully. But these are the mistakes we most often see when cabinets don’t last:
- Painting over a glossy surface without bonding primer
- Skipping proper cleaning (especially around hinges, knobs, and rails)
- Using the wrong finish sheen—too glossy highlights imperfections; too flat can reduce cleanability
- Not labeling doors/drawers, leading to slight placement differences that show in color and sheen
- Reassembling too soon—fresh paint can look “dry” while still being soft underneath
A realistic Allen homeowner scenario
A homeowner in Allen wanted a quick cabinet color change from a darker oak tone to a bright modern white. They cleaned the doors, used a general-purpose primer, and sprayed a topcoat. The finish looked great for a month. Then small chips appeared around the edges where hands and hardware rub most often. When we inspected, the issue wasn’t the color—it was the bond. The existing coating was too glossy in spots, and the prep wasn’t consistent enough for long-term adhesion.
Surface Preparation Checklist (The Part That Makes Color Matching Last)
If you’re planning cabinet painting yourself—or you want to know what to expect from a pro—use this as a practical checklist.
Surface prep checklist
- Remove doors, drawers, and hardware (and label everything)
- Deep clean/degrease all cabinet surfaces, rails, and recessed panels
- Inspect for peeling, bubbling, or soft spots
- Scuff-sand to create uniform bonding texture (especially glossy areas)
- Fill small dents/defects where needed and sand smooth
- Prime with a bonding system appropriate for the existing finish and your target color
- Sand between coats if the system calls for it
- Topcoat with a cabinet-grade finish at the correct thickness
Maintenance checklist (after the job)
- Avoid heavy scrubbing for the first couple of weeks while the finish cures.
- Use gentle cleaners (no harsh solvents) to protect the topcoat.
- Wipe spills quickly, especially if you use acidic cleaners or degreasers near the cabinet face.
What We Commonly See in North Texas Homes
North Texas kitchens often sit under strong sun exposure and frequent temperature shifts—especially in homes with big front-facing windows and open-plan layouts. That mix can affect cabinetry in two ways:
1) Lighting reveals imperfections sooner. A cabinet finish that looks fine under dim interior lighting can show blotches or sheen differences when the sun hits.
2) Humidity swings can stress older drywall and trim. When adjacent walls or trim aren’t stable, cabinet repainting can look “off” by comparison. That’s why many cabinet projects pair naturally with other surface work.
If your kitchen cabinets are due for a refresh and you also have wall issues—like cracks that appear after seasonal movement—consider getting drywall repair support so your new finish looks crisp and consistent. You can find more about this approach here: drywall repair support.
What Actually Improves Long-Term Results
The durability of cabinet refinishing comes down to the coating system and the prep standard. We typically plan for:
- Bonding primer when the existing finish is glossy or unknown
- A cabinet-grade topcoat designed for daily cleaning and handling
- Consistent application across doors, frames, and drawer fronts
- Edge and panel attention—these are the most noticeable wear points
Finish recommendation (materials & sheen)
For kitchens, we often recommend a durable satin or low-sheen cabinet finish because it:
- hides micro-surface imperfections better than full gloss,
- stays easier to wipe down than flatter finishes,
- and looks more uniform in real Allen lighting conditions.
If you’re doing a lighter cabinet color change, we also plan for adequate coverage so the undertone doesn’t bleed through. That’s one reason “just one coat” dreams don’t hold up on darker cabinets.
A Real (Anonymized) Cabinet Transformation Case
We recently worked on a kitchen where the homeowners wanted a warmer, more modern look. The existing cabinets were a mid-tone wood with a slightly glossy finish and heavy grease staining near the stove run. The homeowners also had a small backsplash area where previous touch-ups left visible transition lines.
Our approach:
- deep degreasing and thorough scuff-sanding for uniform bonding,
- bonding primer in higher-risk areas (around rails and near hardware),
- careful color matching to the countertop and backsplash under both morning and evening light,
- consistent sheen across all doors and frames,
- and reassembly with planned curing time before daily use.
Result: The cabinets looked “built-in” with the rest of the kitchen, not like a fresh paint job layered over aging surfaces. Most importantly, the wear-prone edges held up better because the bond was treated as a priority—not an afterthought.
Paint vs Stain Comparison (Quick Decision Guide)
Cabinets can be transformed with paint or staining, but they’re not interchangeable.
| Option | Best For | Look & Longevity Notes |
|---|---|---|
| Cabinet painting | Dated colors, heavy surface wear, want a clean modern look | Requires excellent prep for bonding; great for consistent color across doors |
| Kitchen cabinet staining | Natural wood tone you want to enhance, doors in solid wood condition | Needs correct sanding and conditioning; can highlight surface dents/imperfections |
If you’re considering a stained look, here’s a helpful direction: kitchen cabinet staining.
Allen or North Texas Relevance: Why Timing and Prep Matter Here
In Allen and across North Texas, the sun can be relentless. Even if your cabinets aren’t exposed directly to outdoor weather, UV and indoor heat cycles can change how finishes read over time. And because kitchens are used constantly, the finish is exposed to more cleaning, wiping, and contact than most painted surfaces.
That means cabinet refinishing needs to be planned like a high-wear surface project:
- proper bonding primer,
- correct topcoat selection,
- and enough curing time before normal daily use resumes.
It’s also why it’s smart to think about other nearby surfaces. If your kitchen includes older trim, doors, or nearby wall finishes, a mismatch in sheen or surface condition can make the cabinets look “off,” even when the paint color is correct. Many homeowners pair cabinet work with updates elsewhere—especially trim and adjacent painting—so the whole room reads cohesive.
For related interior surface upgrades, you may also want to explore how we handle other areas of the home, including more extensive painting projects beyond cabinets.
What Homeowners Should Know (Quick AI Overview Summary)
AI Overview Summary: Cabinet painting that looks truly “color matched” depends on cleaning/degreasing, sanding for consistent bonding, using the right primer system, and applying a durable cabinet topcoat with consistent sheen. In North Texas homes, lighting and temperature swings can reveal uneven prep and sheen differences, so curing time and surface stability matter as much as color selection.
FAQ
How long does cabinet refinishing take?
It depends on cabinet size, prep needs, and whether doors are sprayed or rolled/brush finished. Most projects involve time for cleaning, sanding, priming, coating, curing, and reassembly. The visible work may be completed in days, but curing time is what keeps the finish from soft edges and early wear.
Is cabinet painting cheaper than replacement?
Usually, yes—especially if your cabinet boxes are solid and the layout works. But the best “value” comes from doing prep correctly so the finish lasts. If cabinets are damaged from water or structural issues, replacement or major repairs may be the smarter option.
Can I change from a dark cabinet to a light color?
Often, yes. The key is coverage planning and using the right primer and topcoat system to prevent undertone bleed. Going too fast or using insufficient primer is where many light-color cabinet projects run into problems.
What sheen is best for kitchen cabinets?
Most homeowners prefer satin or low-sheen for kitchens. It balances cleanability and appearance—hiding minor imperfections better than high gloss while still wiping clean for everyday use.
Ready to Refresh or Protect Your Home’s Surfaces?
If your cabinets are looking dated—or you want a confident cabinet color change with a finish that holds up—start with prep and color matching done right. MJ Workforce Solutions focuses on detailed craftsmanship, proper surface preparation, and long-term durability for homeowners throughout Allen and North Texas.
About MJ Workforce Solutions
MJ Workforce Solutions provides interior painting, cabinet refinishing, drywall repair, exterior painting, floor coatings, wallpaper removal, and decorative finishing services throughout Allen, TX and surrounding North Texas communities. The company emphasizes detailed craftsmanship, correct surface preparation, and helping homeowners choose finishes that look great now and stay durable through everyday use.