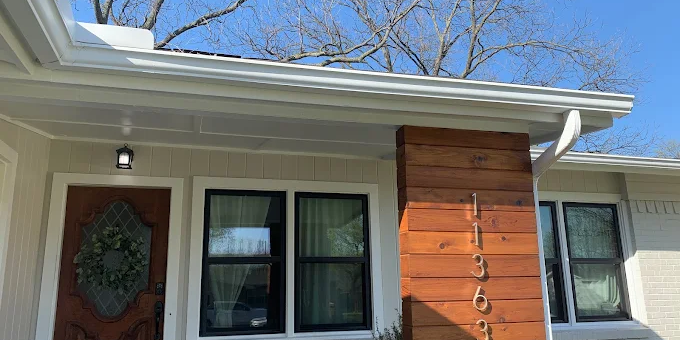
Exterior Painting With Premium Color Depth and Shine
If you’ve noticed your Allen-area home looking a little “washed out” around the trim—especially on south- and west-facing walls—you’re not imagining it. Texas UV exposure and temperature swings don’t just fade color; they also stress the finish layer over time. The result is often a chalky look, dull trim, and spots where the paint seems to “give up” sooner than expected.
A lot of homeowners assume the fix is simply choosing a new color. From what we see on real exterior jobs, the difference between flat, short-lived paint and that premium color depth with a clean shine comes down to surface prep, the right primer system, and how the finish is applied for durability—not just aesthetics.
Quick Answer
For a long-lasting exterior finish with richer color and a smoother, glossier look, focus on:
- proper cleaning (not just rinsing)
- paint removal where adhesion is failing
- moisture-safe repairs and sealing
- primer matched to the existing surface
- quality topcoat applied at the right thickness and conditions
When preparation is skipped, even expensive paint can turn dull, peel, or spotty within a season.
Exterior Painting With Premium Color Depth and Shine
What “premium” really means on the outside
When homeowners ask for “color depth and shine,” they’re usually describing two things:
1. Color that stays true longer
That requires UV-stable topcoats and a primer that bonds well to the substrate.
2. A finish that reflects light cleanly
Shine comes from the film build (how thick and even the coat is), correct dry time, and avoiding application problems like over-thinning or painting too late in the day.
On exteriors, we pay attention to where homeowners commonly see early failure—around window frames, door trim, soffit edges, and areas that trap moisture.
A contractor observation from the field
One of the most common “mysteries” we run into is when a home looks fine from the curb, but the trim dulls or feels rough up close after only a short period. That roughness often traces back to incomplete prep—especially when chalky residue remains on siding or old paint is only lightly scuffed. The new coating can still “look” like it’s covering, but adhesion and film integrity aren’t what they should be.
Material/finish recommendation that performs well
For the look homeowners want—rich color and a clean exterior sheen—we typically recommend a high-quality exterior latex paint system with:
- a primer designed for the existing surface condition (bare areas, patched spots, previously painted sections)
- a finish sheen selected by location:
- satin or low-sheen for most walls to balance durability and appearance
- semi-gloss or higher sheen for trim if you want that crisp, light-catching look
What Homeowners Often Overlook
The “it’s just faded” assumption
Fading is only the visible part. In North Texas, the paint system also has to survive:
- heat-driven expansion and contraction
- wind-blown dust that embeds in fresh coatings
- occasional moisture intrusion from caulk failure or minor leaks
When those issues go unaddressed, paint can look okay at first and then slowly lose uniformity.
Cleaning is not optional—and rinsing isn’t enough
We often see homes cleaned with a quick hose rinse. That can remove loose dirt, but it doesn’t always remove:
- chalky residue
- mildew at the edges
- oxidized paint on older surfaces
- oils or residue near garages and outdoor cooking areas
A proper cleaning step improves adhesion and helps the primer “bite” instead of sitting on top.
Primer choice can make or break the finish
A premium topcoat can’t compensate for primer that doesn’t match the surface. For example:
- patched areas need bonding primer
- bare or sanded areas need the right stain-blocking and adhesion properties
- glossy, intact paint surfaces may require the correct scuffing strategy to ensure bonding
If primer is skipped or simplified too far, you’ll often see early peeling, blistering, or a “halo” around repaired sections.
Common Mistakes That Lead to Premature Wear
Mistakes we commonly see homeowners make
1. Painting over failing areas
If paint is flaking or lifting, the new coat will eventually fail too.
2. Skipping paint removal where adhesion is compromised
Light sanding isn’t always enough. Sometimes you need full removal at specific trouble spots.
3. Relying on caulk alone for moisture control
Caulk is part of a system, but if the substrate is dirty or deteriorated, caulk won’t seal reliably.
4. Applying too late in the day
Late-day application can trap moisture and cause uneven drying, especially when humidity shifts.
5. Choosing sheen without thinking about maintenance
Higher sheen can look sharper, but it shows surface imperfections more clearly.
Where this shows up most
- around window frame edges
- near garage doors and trim lines
- on fences and decks that receive heavy sun and weather exposure
If you’re also dealing with exterior wood, it’s worth planning those surfaces as a system, not as separate afterthoughts.
Preparation and Coating Checklist (What We Actually Plan for)
Here’s the preparation approach we use to build that clean, premium exterior look that holds up.
Surface Preparation Checklist
- Inspect for failure points
- check for peeling, bubbling, soft spots, and loose caulk
- Clean thoroughly
- remove dirt, mildew, chalking, and contaminants
- Pressure wash (when appropriate)
- use the right pressure and technique so you don’t damage softer siding surfaces
- Scrape and remove failing paint
- feather edges so repairs blend without creating “ridges”
- Repair gaps and damaged areas
- replace or patch where needed; don’t just coat over defects
- Prime correctly
- spot prime bare areas and repaired sections
- use the right primer for adhesion and problem areas
- Caulk and seal
- apply caulk where joints need flexibility and moisture protection
- Protect landscaping and hardscape
- consistent masking prevents messy edges and helps you get that crisp trim line
- Apply topcoat with correct film build
- maintain even coverage; don’t over-thin
- Allow proper cure/dry time
- especially important before rain or heavy dew cycles
If you’re thinking about other exterior projects at the same time—like trim upgrades or wood staining—staging the work in the right order can prevent rework.
A realistic example (anonymized project case)
A homeowner with an older two-story home in Allen called us after noticing dull trim and small spots where paint looked “rough” near window corners. The walls weren’t peeling broadly, so we found that the key issue was adhesion on the trim edges and oxidized residue on older sections. We cleaned aggressively, removed failing paint around the trouble points, primed the repaired areas, and then sprayed/rolled with controlled film build on trim for a more uniform reflectivity. The homeowner’s goal wasn’t just fresh color—it was a crisp look that matched how the home appeared in morning sunlight. The final result held up better in the next seasonal shift because the system was built correctly, not just coated.
Why Some Paint Jobs Fail Early (and How to Avoid It)
The “thin coat” problem
Thin coverage can look fine for a few weeks, but it doesn’t provide enough film thickness for UV resistance and weather durability. On exteriors, film build matters more than most people think.
The “wrong primer” issue
If the primer is incompatible with the surface—especially on repaired or problem areas—topcoats can lose bond. That often leads to:
- scuffing
- premature chalking
- peeling at seams and edges
Moisture intrusion that wasn’t solved
Even the best exterior paint can’t fully compensate for water that keeps getting behind trim or into small cracks. That’s why we treat caulking and sealing as part of the prep, not as a final touch you do after painting.
Allen or North Texas Relevance: What Changes the Outcome Here
North Texas weather adds a few real-world variables that change how we prep and paint:
- UV intensity: South- and west-facing surfaces can fade and chalk faster, especially on light colors.
- Heat cycles: Expansion and contraction stresses paint film and joints.
- Seasonal humidity swings: Drying conditions affect how evenly coats cure and how smooth the finish looks.
- Outdoor living exposure: Patios, grills, and garage airflow can increase residue near exterior walls.
That’s why we plan drying time, protect surfaces from dust, and don’t rush the primer/topcoat schedule. The goal is a finish that still looks “premium” after the weather does what it always does here.
Quick Comparison: Exterior Painting vs. Touch-Ups
| Approach | Best For | Main Risk |
|---|---|---|
| Full exterior painting | Uniform appearance, long-term protection | Higher upfront cost, needs scheduling |
| Selective touch-ups | Small localized damage | Visible patching and uneven sheen |
| Spot repairs + repainting sections | Areas with peeling or failing caulk | If prep isn’t consistent, lines appear |
If your exterior has multiple trouble spots—especially around trim—full-system prep is usually the smarter route.
What Homeowners Should Know (Before You Pick a Color)
A richer, deeper look often comes from the combination of:
- correct primer bonding
- consistent topcoat thickness
- appropriate sheen for the surface
Color itself matters, but we’ve seen darker colors look dull quickly when the substrate and prep weren’t addressed. Conversely, a well-prepped surface can make even a standard neutral look more vibrant and “clean” in sunlight.
If you’d like help aligning your exterior color with existing trim and architectural details, consider a coordinated plan—especially if you’re also repainting interior spaces.
Ready to Refresh or Protect Your Home’s Surfaces?
If you want your Allen home to look sharp in full sun—without the early dulling, peeling, or uneven trim edges—start with preparation that’s built for North Texas conditions. We can assess your exterior, identify failure points, and recommend the right primer and finish sheen for the look you want.
About MJ Workforce Solutions
MJ Workforce Solutions provides interior painting, cabinet refinishing, drywall repair, exterior painting, floor coatings, wallpaper removal, and decorative finishing services throughout Allen, TX and surrounding North Texas communities. We focus on detailed craftsmanship, long-lasting finishes, proper surface preparation, and helping homeowners protect their properties with professional painting and refinishing solutions.
Related Services You May Need (Common Pairings)
Many exterior projects go hand-in-hand with other prep work. Homeowners often find these services help eliminate the “why is it failing again?” cycle:
- exterior house painting in Allen when you want a uniform system across walls and trim.
- paint removal and stripping in Allen for areas where adhesion has already failed.
- fence painting in Allen so your outdoor wood and siding don’t age at different rates visually.
- deck staining and sealing if outdoor wood is part of the same curb-appeal refresh plan.
Quick References (Trusted Industry Benchmarks)
- The U.S. Environmental Protection Agency (EPA) provides guidance on lead-safe practices and safe handling when surfaces require coatings removal (especially on older homes).
- The American Coatings Association (ACA) and related coating education resources emphasize matching primers and systems to substrate condition for adhesion and durability.
- Industry best practices consistently stress cleaning, surface preparation, and correct application conditions as key determinants of paint performance.
FAQ
How often should exterior paint be redone in Allen, TX?
Most homes fall somewhere around the 5–10 year range depending on sun exposure, surface condition, and whether prep and repairs were done correctly. Trim and areas near moisture sources often need attention sooner than field walls. If you’re seeing chalking, peeling edges, or recurring caulk failures, that’s a sign the system is already aging unevenly.
Why does exterior paint look dull after a season?
Dullness is often tied to chalking from UV exposure combined with insufficient primer bonding or incomplete cleaning. If residue or oxidized material was left behind, the topcoat may not form a strong, uniform film. Humidity and drying conditions can also affect how evenly coats cure.
Can I just do touch-ups instead of repainting?
Touch-ups can work for small, isolated issues, but they rarely produce a perfectly uniform sheen or color depth once UV fading has started. If multiple areas are failing—especially around trim seams—spot repairs plus a broader repaint often looks cleaner and lasts longer.
What sheen should I use for exterior trim?
Many homeowners choose satin or semi-gloss because it balances durability with a crisp look. Higher sheen shows surface imperfections more clearly, so it’s especially important to prep and feather repairs properly.
Do I need to remove old paint before repainting?
Not always, but if paint is loose, peeling, or bubbling, removal or proper scraping is typically required for adhesion. If the old surface is sound, scuffing and priming may be enough. The right approach depends on what you find during inspection—especially at edges and joints.