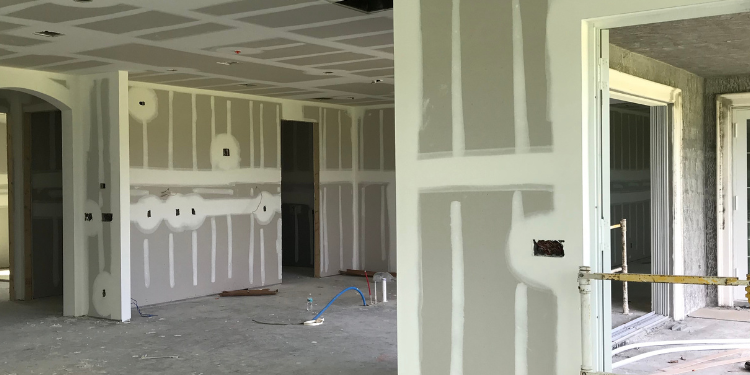
Drywall Installation for Clean Edges and Perfect Fit
If you’ve ever watched a ceiling or wall get patched—only for the “new” area to stand out weeks later—you already know the real problem isn’t just drywall. In Allen and across North Texas, homes move with seasonal temperature swings, and walls take a beating from daily life. The result is a lot of small gaps, misaligned edges, and visible seams that make a room look unfinished even after painting.
We often get called after homeowners spend time and money repainting, only to see the patch lines still telegraph through. That’s usually a drywall installation issue (and finishing technique) before it ever becomes a paint color problem.
Quick Answer
For clean edges and a perfect fit, drywall success starts before the first sheet goes up:
- correct framing and fastener placement
- tight seams with proper backing/support
- the right tape-and-joint method at every transition
- careful drywall finishing thickness so seams don’t “sink” or “ridge”
- primer and paint systems matched to the final texture level
When those steps are done right, paint lays out evenly and patch areas disappear instead of reappearing.
Drywall Installation That Holds Up (Not Just Looks Good Day One)
Drywall looks simple from the curb: sheets, screws, tape, mud, sand, paint. But in practice, clean seams depend on a handful of details that most homeowners never see—until they do.
What “perfect fit” really means
A perfect drywall fit isn’t “the sheet touches everywhere.” It’s:
- consistent gaps where needed (not random slivers)
- solid backing behind seams so tape doesn’t sag
- straight edges so the finished joint doesn’t become a ridge
- consistent sheet contact on studs for strength and flatness
On many North Texas projects, we see older framing that isn’t perfectly true. If the contractor installs drywall to “force it to fit” without addressing uneven framing, the joint compound has to bridge too much space. That’s how you end up with hairline cracks later.
Our firsthand contractor observation
One of the most common causes of visible seams isn’t the drywall sheet—it’s how the seam is supported. If two sheets meet without the proper stud/backing alignment, the joint compound ends up doing structural work. Joint compound is great for finishing, not for holding a seam that flexes.
In homes around Allen, seasonal movement is real. When the seam flexes even slightly, the tape can separate microscopically, and paint will reveal the failure line as a thin shadow.
The finishing matters as much as the installation
Even with great installation, drywall finishing quality decides whether the paint looks “factory smooth” or “patched.”
A clean system typically includes:
- tightening the seam with proper tape placement
- using joint compound in controlled coats (thin-to-medium, sandable layers)
- feathering edges so you don’t create a step
- spot-priming repaired areas if you’re switching from bare drywall to previously painted surfaces
If you skip priming or don’t let each compound coat dry fully, you can trap moisture unevenly. That leads to uneven absorption—paint then looks patchy or slightly dull in the repaired sections.
Common Mistakes Homeowners Make
1) “Sanding it until it disappears”
Sanding is part of the process, but chasing invisibility is where people get in trouble. If you sand too aggressively, you thin compound over the seam, then paint can highlight it anyway. If you sand too lightly, you leave a ridge that will show as a raised line under light.
The goal is a surface that’s flat and uniformly smooth—checked with the right lighting angle, not just by eye.
2) Using the wrong tape for the joint
Paper tape and mesh tape each have use cases. Mesh can be helpful in certain applications, but if the seam isn’t supported correctly, it won’t magically prevent flex-related cracking. Tape is not a substitute for backing and alignment.
3) Installing drywall without checking the framing first
We regularly see drywall installed after visible framing issues are ignored—studs that are bowed, nails/screws that stick out, or old repairs that weren’t stabilized. When drywall sits on a rough substrate, it telegraphs every bump through finishing.
4) Painting before the mud is truly cured
Joint compound can feel dry and still be curing. Painting too soon can cause shrinkage after the coat dries, which reopens tiny gaps. In Texas heat, drying can happen fast on the surface—while deeper moisture takes longer to equalize.
Surface Preparation Checklist (Before You Hang the Sheet)
Whether you’re hiring drywall services or doing the prep yourself, these steps prevent most seam problems.
Prep checklist
- Inspect framing: studs/joists straight, secure, no loose sections
- Remove protrusions: scrape off old compound ridges; drive any sticking fasteners flush
- Check moisture issues: look for leaks, damp drywall, or staining—fix causes before patching
- Plan seam locations: avoid seams landing over unsupported gaps
- Confirm insulation and backing where required (especially around doors, windows, and corners)
- Cut accurately for openings: outlets, switches, and vents need clean edges for caulking/trim transitions
- Use the right fasteners for the thickness and framing type
- Verify flatness with a straightedge before finishing begins
What We Commonly See in North Texas Homes (Allen-Specific)
North Texas homes experience noticeable temperature swings between summer heat and cooler seasons. That movement affects:
- drywall expansion/contraction
- trim and caulk joint performance (especially where walls meet doors/windows)
- how texture and paint reflect light
In Allen, we also see many homes with drywall that has been patched more than once—sometimes by different contractors over the years. Each repair adds thickness and sanding transitions. If prior layers weren’t feathered correctly or if primer wasn’t used before paint, the final surface ends up uneven in sheen and texture.
That’s why we treat drywall as part of the entire surface system—not just “getting sheets up.”
A Material/Finish Recommendation That Makes Seams Disappear
Choose the finish level intentionally
If you’re aiming for a smooth, modern look—especially on ceilings or in bright light—plan for a finish level that matches your paint choice.
In practical terms:
- For flat, low-sheen walls: a smooth sanding pass and consistent feathering are non-negotiable.
- For eggshell or satin: you’ll see less sheen variation if the drywall finishing is consistent.
- For textured walls: you need texture matching, or your repaired area will read as a different “surface.”
Even the best installation can look off if the finishing level doesn’t align with the rest of the room.
If you’re also working on surrounding surfaces, it helps to coordinate materials. For example, if you’re dealing with older walls that were once covered in wallpaper, the drywall conditions underneath can be uneven—so plan your surface prep accordingly with help from wallpaper installation expertise or, if you’re removing old coverings, wallpaper removal assistance to minimize damage and stabilize the substrate.
Realistic Example: An Allen Living Room That Kept “Reappearing”
Here’s a common scenario we’ve seen in North Texas, shared in an anonymized way:
A homeowner in Allen had a family-room wall patched after a prior plumbing line was moved. The drywall looked fine for a week, then a faint seam began showing after the room was painted. The homeowner repainted, expecting the new coat to hide it.
When we inspected the area, the issue was clear:
- the seam had been installed over a spot with insufficient backing
- the tape was fine initially, but the joint flexed slightly as the home cooled and warmed
- the compound coats were uneven in thickness, creating a subtle ridge that only showed under side lighting
The fix wasn’t just “more mud.” We reworked the joint with proper support, used controlled coats for feathering, and ensured primer was applied so the repaired drywall absorbed paint consistently. After final finishing, the seam stopped reading as a line under normal lighting—exactly what the homeowner expected.
Why Some Paint Jobs Fail Early (and It Starts Before Paint)
Paint doesn’t fail because the color is wrong. It fails because the surface system is mismatched.
Premature issues often come from:
- uneven absorption (missing primer or inconsistent sealing of bare drywall)
- micro-cracking at seams (tape unsupported by backing)
- ridges/steps from sanding inconsistently
- paint over curing moisture (mud still shrinking/settling)
Industry guidance consistently emphasizes that joint finishing and priming impact durability and appearance. The U.S. Gypsum Association’s finishing recommendations highlight proper joint compound application and drying times as key factors in long-term seam performance. Many coating manufacturers also specify that surface prep and substrate absorption control are required for predictable sheen and adhesion.
Quick Comparison: Repair vs. New Drywall Installation
| Situation | Repair/Patching Can Work | New Installation Usually Better |
|---|---|---|
| Multiple layers of old patchwork | Sometimes, but may require full rework | Often, if the area is uneven or unstable |
If you’re dealing with drywall repair beyond a small patch, it’s worth getting an inspection to prevent “painting over problems.” If you need additional help restoring damaged areas, explore drywall services that include repair, installation support, and finishing.
Signs It’s Time to Refinish or Repatch
If you notice any of the following, it’s usually not a paint-only problem:
- hairline cracks reappearing along seams
- visible ridges after sanding or painting
- patch areas looking different in sheen (dull vs. smooth)
- tape lines that “shadow” under light
Key Takeaway
If the drywall finishing isn’t flat and consistent, paint will reveal it—especially in rooms with bright overhead lighting.
Preparation Checklist (For Homeowners Planning the Project)
Before drywall installation, repair, or finishing begins, confirm these points with whoever’s doing the work:
- [ ] Moisture sources addressed (no active leaks)
- [ ] Framing secure and corrected for flatness
- [ ] Seams have proper backing/support
- [ ] Correct tape selected for the joint type
- [ ] Joint compound applied in controlled coats
- [ ] Adequate drying time between coats
- [ ] Sanding plan matches the desired finish level
- [ ] Primer applied before final paint (especially on repaired drywall)
- [ ] Lighting check for ridges/shadows before paint
FAQ
How do I know if my seam issue is a drywall problem or a paint problem?
If the line shows up as a shadow under angled light, it’s usually drywall finishing (ridging, uneven compound thickness, or tape movement). If the area looks blotchy but flat, it can be primer/absorption or paint application. A quick check with side lighting usually clarifies which issue you’re dealing with.
Can I just patch and paint without redoing the whole wall?
Often you can, but only if the patch area is stable, well-supported, and feathered to match the surrounding plane. If you’ve had multiple prior patches, the area may be uneven enough that a localized repair won’t blend cleanly.
Why do drywall patches crack again after painting?
Common causes include improper seam support, insufficient backing behind joints, rushing drying times, or thick compound layers that shrink. In North Texas, seasonal movement can also emphasize seams that weren’t finished with the right structure.
Does texture affect how drywall seams show?
Yes. Flat paint on a smooth wall will highlight ridges differently than a textured wall. If the original wall texture is inconsistent or the repair doesn’t match, the seam can remain visible even if the joint is technically strong.
Ready to Refresh or Protect Your Home’s Surfaces?
Clean drywall edges and a perfect fit are what make painting look professional—not the paint itself. If you’re dealing with a seam that keeps showing, a patch that won’t blend, or a room that needs drywall installation done correctly the first time, MJ Workforce Solutions can help you plan the right surface system and finishing approach for lasting results.
About MJ Workforce Solutions
MJ Workforce Solutions provides interior painting, cabinet refinishing, drywall repair, exterior painting, floor coatings, wallpaper removal, and decorative finishing services throughout Allen, TX and surrounding North Texas communities. We focus on detailed craftsmanship, proper surface preparation, accurate finishing techniques, and helping homeowners protect their properties with durable, clean-looking results.