Exterior Painting That Enhances Home Value Instantly
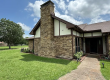
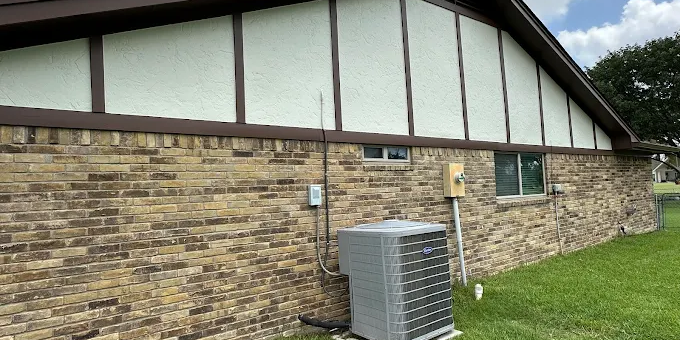
The first thing neighbors notice in Allen isn’t the color—it’s how clean and consistent the finish looks around the trim, windows, and garage. We’ll drive up to a home where the siding still feels solid, but the paint is uneven: sun-faded panels, hairline cracks at caulk lines, and chalking on the lower portions where sprinklers and irrigation tend to hit. Homeowners often assume the fix is “just a new coat,” but those early failures usually started with surface prep and moisture control.
When exterior paint is done correctly, it doesn’t only improve curb appeal. It helps protect the underlying materials from Texas sun, moisture swings, and the daily wear that happens around doors, shutters, and garage openings—areas that see the most expansion and contraction.
Quick Answer
Exterior painting adds value when it’s paired with proper cleaning, inspection, repairs, and the right primer/paint system for your siding and trim. In North Texas, the best results usually come from:
- removing failing paint and chalky residue
- fixing cracks and gaps with the right caulk and patching materials
- priming bare/spot-repaired areas
- using coatings designed for UV protection and temperature cycling
What actually improves long-term results (and why it looks “new”)
A lot of homes look “almost fine” until you get close enough to see what’s going on at the edges. As painters, we focus on the details that catch the eye in photos and on showings:
1) The finish is only as good as the surface prep
On exterior jobs, the prep is where the durability is won. We typically address three things before any topcoat:
- Chalking and oxidation: UV exposure turns older paint powdery. If you paint over it, the new coating can lose adhesion and fail early.
- Moisture pathways: Caulk lines, siding joints, and trim returns are common leak points. Even small gaps allow water intrusion that later shows as lifting paint or bubbling.
- Loose paint and weak edges: If the old coating is failing, feathering and removal need to be thorough—not rushed.
2) Primer isn’t optional—it’s part of the system
We often see homeowners skip primer on “small spots.” Those spots are exactly where adhesion and uniformity matter most. Bare wood, patched drywall-like repairs on exterior stucco areas, rusted metal, and cleaned-but-uneven sheen surfaces all need the correct primer so the topcoat can bond and cure evenly.
3) Trim and windows get the “showpiece” treatment
If you want that “instant value” look, trim work has to be crisp:
- clean caulk lines
- properly masked transitions around windows and doors
- even sheen across trim and siding
We’ll often recommend a slightly different approach for trim painting versus siding painting so you don’t end up with mismatched gloss or visible lap lines.
A realistic project scenario from a North Texas home
Last summer, we worked on a two-story home in the Allen area with siding that was still structurally fine—but the exterior looked tired. The homeowner’s sprinkler system had been hitting the lower siding for years, and the paint had started to lift near the bottom edges and around a couple of window frames.
What we did (the parts that homeowners usually don’t see):
- pressure washing with attention to seams and trim pockets
- scraping and feathering where paint was failing
- spot priming every bare or repaired area so the topcoat didn’t absorb unevenly
- re-caulking joints with a product designed for exterior movement
- painting in controlled passes to reduce lap marks and ensure consistent coverage
The homeowner told us the difference was immediate—especially around the windows and garage. But more importantly, the finish looked consistent because the underlying surface issues were addressed, not just covered.
Why some exterior paint jobs fail early
Most premature failures don’t happen because the homeowner “picked the wrong color.” They happen because one of the following gets overlooked:
Common failure points we see
- Painting over chalk without cleaning: New paint bonds poorly to oxidized surfaces.
- Rushing repairs: Caulk and patching materials need the right cure time before coating.
- Wrong product for the substrate: Stucco, wood, fiber cement, and trim materials often require different primers and topcoats.
- Skipping caulk where caulk is needed: Cracks at joints expand and contract constantly in Texas.
- Insufficient dry time after washing: If the surface is still damp inside pores or seams, trapped moisture can cause blistering later.
Key takeaway
The “value” look is real—but only if the coating system is built to handle local conditions and the specific materials on your home.
Mistakes that lead to premature wear (what homeowners do)
Here’s the common mistake we run into most often: spot painting without matching the surface condition.
Homeowners will see one faded panel, one area near a downspout, or one scuffed trim section and decide to paint just that area. But if the surrounding coating is chalked, glossy, or sun-oxidized, the repaired patch won’t wear the same. You end up with:
- visible “patch lines”
- faster fading in the repaired area
- peeling at the edges because adhesion wasn’t treated as a system
Another frequent issue is over-applying caulk or using the wrong type. Caulk that doesn’t flex properly can tear when the home moves, and that usually sends moisture right where you don’t want it.
Surface preparation checklist for a durable exterior finish
If you’re planning a repaint soon, this is the checklist we use to guide the work. It’s also a good way to evaluate whether a contractor is thinking about durability—not just coverage.
Exterior painting preparation checklist
- Inspect siding, trim, and joints
- identify loose paint, cracks, and moisture stains
- Clean the entire surface
- remove dirt, mildew, and chalking residue
- Scrape and feather failing areas
- blend edges so repairs don’t telegraph through
- Remove or address rust on metal
- treat any corrosion spots before priming
- Repair cracks and damaged sections
- use exterior-appropriate patching materials
- Prime bare and repaired areas
- ensure uniform adhesion and color consistency
- Caulk and seal joints
- apply where siding meets trim, around windows/doors, and at transitions
- Confirm weather conditions
- avoid painting when rain is likely or surfaces are too hot/cold for proper leveling
- Apply topcoat with consistent technique
- maintain proper coverage and avoid “thin spots” near edges
Material and finish recommendation (what tends to work best)
For most Allen and North Texas exterior repaint projects, the best long-term results usually come from a primer-plus-topcoat system matched to the substrate, with an exterior paint engineered for UV resistance and mildew control.
A practical way to think about it:
- Siding and large wall areas: choose an exterior acrylic or acrylic-urethane style system (based on your substrate and existing coatings).
- Trim painting (doors, window frames, fascia): prioritize a finish with good leveling and durability so you don’t end up with a rough, brushy appearance.
- High-wear zones: doors and garage-adjacent trim often need a coating that tolerates scuffs and frequent cleaning.
If you want, we can also help you plan other exterior surfaces that affect overall curb appeal—like trim details and specialty areas around the property.
For example, if your fence looks weathered, pairing exterior house painting with fence painting service areas in Allen can make the whole property read “maintained,” even before you notice siding improvements.
What we commonly see in North Texas homes
North Texas weather isn’t just “hot”—it’s a cycle. Sun drives thermal expansion in the siding and trim, while rain and humidity swell and soften surfaces. Then the heat dries everything again. That movement is why caulk lines and joint areas matter so much.
We also commonly see:
- UV-faded trim where edges were never properly primed after spot repairs
- chalkiness on older paint that wasn’t scrubbed before repainting
- moisture intrusion around windows and doors that creates repeating failures along the same edges
One firsthand observation we’ve learned the hard way: if the surface still feels slick or “greasy” after cleaning, adhesion problems usually follow. You can’t paint your way out of contamination.
Allen or North Texas relevance: why conditions change the “right” approach
In Allen, homes are exposed to intense sun and rapid temperature swings. That means:
- paint expands and contracts more aggressively than in milder climates
- caulking and sealing must handle movement without cracking
- coatings must resist UV breakdown so the finish doesn’t chalk and fade quickly
The homes that look best after repainting tend to have one thing in common: the coating system was built for local conditions, not just for appearance on day one.
Quick comparison: Paint vs. Stain for exterior surfaces
| Surface Type | Paint (Pros) | Paint (Cons) | Stain (Pros) | Stain (Cons) |
|---|---|---|---|---|
| Siding & trim | Strong UV barrier; consistent coverage | Can peel if prep is skipped | Enhances wood grain | Often requires more frequent re-coating |
| Wood decks/rails | Durable film build | Can hide grain | Penetrates better in some woods | Can fade unevenly in sun |
| Fences | Great color consistency | Needs proper sealing edges | Often looks natural | Less uniform protection if not maintained |
If your exterior includes a deck or outdoor wood surfaces, it’s worth thinking about that separately. Many homeowners repaint siding and forget the deck. When the deck is dull or faded, it pulls attention away from the rest of the home. If that’s your situation, you may want to plan deck staining and sealing in Allen alongside your exterior update.
Signs it’s time to repaint
If you notice any of these, don’t wait for total failure:
- visible cracking in caulk lines or around trim returns
- peeling, blistering, or lifting at edges
- chalky residue on your hands after touching the siding
- significant fading or uneven sheen between sections
- mildew streaking that returns quickly after cleaning
Common prep questions we get (and the practical answers)
FAQ: How often should exterior paint be redone in Texas?
Most homeowners see repainting every 5–10 years, depending on coating quality, siding material, sun exposure, and how much moisture reaches vulnerable areas. In North Texas, intense UV and irrigation patterns can shorten that timeline if prep and sealing weren’t handled correctly. If you’re seeing chalking, cracking caulk, or recurring mildew, it’s usually time to inspect and plan repairs even if the whole house doesn’t look “bad” yet.
FAQ: Should I pressure wash before painting?
Yes—cleaning is usually necessary—but it must be done correctly. Too much pressure or the wrong nozzle can damage siding or force water into seams. Also, surfaces need to dry fully after washing before priming and painting. The goal is clean adhesion, not “just making it look better.”
FAQ: Can I repaint over existing paint?
Often you can, but only if the existing coating is sound. If paint is peeling, flaking, or chalky/oxidized, it needs proper cleaning, scraping, and spot-priming—or full removal in localized areas—so the new system bonds reliably.
FAQ: What about areas with old wallpaper or textured surfaces near exterior entries?
If you have exterior-adjacent interior walls affected by moisture or previous finishes, it can impact paint adhesion inside the home. If you’re dealing with texture transitions or damaged surfaces due to removal work, it’s best to get the underlying issue corrected before repainting. For interior projects that pair with your exterior refresh, we can help with drywall services and repair so the whole project stays consistent.
Ready to Refresh or Protect Your Home’s Surfaces?
If your exterior is fading, cracking at the trim lines, or showing uneven wear, the fastest way to “enhance home value instantly” is to treat the job like a system—prep, repairs, priming, and coating matched to your materials and Texas conditions. With the right approach, you don’t just get better curb appeal; you get fewer repeat failures.
About MJ Workforce Solutions
MJ Workforce Solutions provides interior painting, cabinet refinishing, drywall repair, exterior painting, floor coatings, wallpaper removal, and decorative finishing services throughout Allen, TX and surrounding North Texas communities. We focus on detailed craftsmanship, long-lasting finishes, proper surface preparation, and helping homeowners improve and protect their properties through professional painting and refinishing solutions.