
The Right Tools for Effective Drywall Installation
On a new build in Allen, TX, it’s not unusual for drywall to go up on an entire house in a day or two. Yet the difference between walls that look flat, seamless, and ready for high-end Interior Painting—and walls that show every joint under sunlight—usually comes down to one thing: the tools and how they’re used.
In a fast-growing city like Allen, where new homes, remodels, and office build-outs are everywhere, drywall is the backbone of nearly every project. According to industry estimates, drywall makes up close to 15–20% of interior construction cost in many residential projects. But if installation is rushed or done with the wrong tools, you can easily spend that much again on Drywall Repair, repainting, or retexturing.
This guide walks you through the essential tools for effective drywall installation, what separates a professional result from a DIY struggle, and how the right setup leads to better finishes—whether you’re planning a full remodel, a new media room, or just patching a damaged ceiling in your Allen home.
Key Insight: Professional-grade tools don’t just make drywall work faster—they dramatically improve flatness, durability, and the final paint finish, saving money and headaches long term.
Understanding the Drywall “System”: Why Tools Matter More Than You Think
Drywall installation isn’t just hanging sheets and spreading mud. It’s a system: measuring, cutting, fastening, taping, finishing, and sanding—all of which depend on having the right tools for each step.
In Allen, we often see homeowners call us after trying DIY drywall on a small project—like closing in a niche or repairing a hole behind the fridge. They might have had a utility knife and a putty knife, but not the full tool set. The result: visible seams, uneven surfaces, and a lot of frustration.
Professional drywall installation typically relies on:
- Layout and measuring tools (T-squares, chalk lines, stud finders)
- Cutting tools (drywall knives, saws, routers)
- Fastening tools (drywall screw guns, impact drivers)
- Taping and finishing tools (taping knives, mud pans, hawks, corner tools)
- Sanding and dust-control tools (sanding poles, vacuum sanders, dust barriers)
“Drywall is only as good as its flattest joint and straightest corner.” — Veteran Finisher, 25+ Years Experience
In commercial spaces around Stacy Road or along US-75, you’ll rarely see pros working without automatic tapers, stilts, or dustless sanders. These are not luxuries; they’re what make surfaces smooth enough for high-end finishes like Faux Painting, accent walls, or flawless Drywall Finishing.
CALLOUT: If your goal is a premium paint finish or a smooth surface after Popcorn Texture Removal, the quality of the tools used on the drywall underneath is just as important as the paint itself.
Measuring, Cutting, and Handling: The Foundation of Flat Walls
Before a single screw is driven, the most important tools are the ones that help you measure, mark, and cut accurately. Poor cuts and sloppy layout are the first step toward visible seams and extra Drywall Patching later.
Core Layout and Cutting Tools
Professionals typically rely on:
- Drywall T-Square (48″) – Keeps cuts straight and square.
- Chalk Line – Snaps long, straight lines across studs and ceilings.
- Tape Measure & Laser Measure – For accurate dimensions and layout.
- Drywall Utility Knife – Scoring and snapping sheets cleanly.
- Keyhole/ Jab Saw – Cutting outlets, switches, and small openings.
- Drywall Rasp – Smoothing cut edges for tight seams.
In Allen, many homes have high ceilings and complex layouts—tray ceilings, niches, and custom built-ins. Accurate layout tools help minimize waste and reduce the number of seams across these details. For example, on a recent project near Twin Creeks, careful planning and measurement allowed our crew to run full sheets across a vaulted ceiling, reducing seams by nearly 30%. That meant less taping, faster finishing, and a flatter final ceiling for the homeowner.
Traditional vs. Modern Measuring and Cutting
| Approach | Pros | Cons | Typical Use in Allen, TX |
|---|---|---|---|
| Tape measure + T-square + knife | Low cost, widely available | Slower, more room for human error | Small repairs or DIY work |
| Laser measure + chalk line | Fast, accurate on larger spaces | Higher upfront cost | New construction, large remodels |
| Drywall router for cutouts | Very fast for outlets & fixtures | Needs practice; risk of over-cutting | Pros working on production installs |
When you’re aiming for a surface that will later receive detailed Cabinet Painting, Kitchen Cabinet Staining, or decorative wall finishes, the groundwork starts here. Straight cuts and tight fits mean fewer issues later.
Fastening Tools: Getting Sheets Tight, Secure, and Quiet
Once the boards are cut, they need to be fastened properly to the framing. The tools used here affect everything from sound transmission to crack resistance.
Why the Right Fastening Tools Matter
Using the wrong tool—or using the right tool the wrong way—can cause:
- Popped screws and nail heads showing through paint
- Cracks radiating from fasteners
- Loose panels that squeak or flex
- Uneven surfaces that telegraph through even the best Drywall Finishing
Professionals usually rely on:
- Drywall Screw Gun (with depth control) – Ensures each screw is set just below the paper surface without tearing it.
- Collated Screw System – Speeds up installation on large projects.
- Impact Driver (with care) – Useful in tight spots, but must be used carefully to avoid overdriving.
- Panel Lifts and T-Braces – Support ceiling sheets safely and reduce sagging.
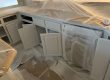
On a recent garage conversion in Allen, the homeowner initially tried to hang ceiling drywall alone with a standard drill. After struggling with sagging sheets and stripped screws, they called us in. Our crew used a panel lift and collated screw gun system to hang the remaining ceiling and walls in a single day, with properly spaced fasteners and consistent depth. That made the subsequent skim coating and Floor Coating prep much smoother.
“Fasteners are like the bones under the skin. You don’t see them—but if they’re wrong, you’ll feel it every day.” — Senior Installer, MJ Workforce Solutions
Taping and Finishing Tools: Where Good Walls Become Great
Hanging drywall is only half the job. The real art—and where tools make the biggest visible difference—is in taping and finishing.
Essential Hand Tools for Finishing
A professional finisher’s toolkit usually includes:
- Taping Knives (4″, 6″, 8″, 10″, 12″) – Different widths for each coat and stage.
- Mud Pan or Hawk – Holds joint compound and allows efficient application.
- Corner Trowels (inside and outside) – Create crisp, straight angles.
- Joint Tape (paper and/or fiberglass mesh) – Reinforces seams and corners.
- Setting-Type Compounds & Ready-Mix Mud – Used in combination for strength and smoothness.
In Allen, many homes have complex corners—archways, stairwells, and niches. The right corner tools make the difference between wavy, shadow-catching corners and sharp lines that look great under strong natural light or accent lighting.
For example, in a remodel near Watters Creek, the homeowner wanted an open-concept living area with smooth, modern walls to complement new Wallpaper Installation in the dining space. We used paper tape with setting-type compound for strength, then graduated to wider knives (up to 12″) for the final coats. The result was a smooth surface that made both the painted walls and the new wallpaper look high-end and intentional.
CALLOUT: The wider the knife, the flatter the finish—especially over butt joints and repairs.
Hand Tools vs. Automatic Taping Systems
| Tool Type | Best For | Pros | Cons |
|---|---|---|---|
| Hand knives & pans | Small jobs, repairs, tight spaces | Low cost, high control | Slower on large projects |
| Automatic tapers | Long runs of joints in new construction | Very fast, consistent tape & mud application | Higher cost, steeper learning |
| Corner boxes & rollers | Inside/outside corners | Uniform, clean corners | Typically used by pro crews only |
For homeowners, the key isn’t owning these tools—it’s hiring a team that uses them well. A properly finished wall is crucial if you later decide on Decorative Painting or bold accent colors. Imperfections become much more noticeable under darker paints or specialty finishes.
Sanding, Dust Control, and Surface Prep: The Hidden Heroes
Even with perfect taping, there’s always some sanding involved. How that sanding is done—and how dust is controlled—matters for your health, your HVAC system, and the final paint job.
Smart Sanding Tools and Techniques
Pro-grade setups often include:
- Sanding Poles and Blocks – For broad, even sanding over joints and corners.
- Dustless Power Sanders (with HEPA vacuums) – Capture dust at the source.
- Portable Air Scrubbers – Help keep dust from traveling through the house.
- Worksite Containment Systems – Plastic sheeting, zipper doors, and floor protection.
In Allen’s newer neighborhoods, many homes have open floor plans and shared HVAC zones. Without dust control, drywall sanding dust can travel from a single room into the entire house, coating surfaces and clogging filters. On a recent project in an Allen townhome, we used dustless sanding tools and sealed off the work area with temporary plastic walls. The homeowner was able to continue using the rest of the home with minimal disruption and almost no visible dust outside the work zone.
Proper sanding is also essential for surfaces that will later receive:
- Smooth wall finishes for modern interiors
- Paint Removal and refinishing projects
- High-sheen paints that highlight imperfections
- Wallpaper Removal followed by skim coating
“Drywall dust is the enemy of a clean, professional paint job.” — Lead Painter, MJ Workforce Solutions
Once sanding is complete, careful vacuuming, tack-cloth wiping, and priming set the stage for long-lasting Trim Painting, door and window frame finishes, and interior wall colors.
Matching Tools to Project Type: New Install, Repair, or Remodel
Not every drywall project in Allen requires the same tool arsenal. A full home build in a new subdivision is very different from repairing a ceiling leak in a single bedroom or prepping walls before Deck Staining and Sealing or exterior upgrades.
Typical Tool Sets by Project Type
| Project Type | Tool Focus | Why It Matters in Allen, TX |
|---|---|---|
| New home / full remodel | Automatic tapers, panel lifts, collated guns | Speed and consistency on large surfaces |
| Single-room renovation | Hand taping tools, dustless sanders | Minimizing disruption to occupied spaces |
| Water damage / patch repair | Cut-out tools, setting compounds, small knives, texture tools | Blending seamlessly with existing finishes |
| Ceiling work / popcorn removal | Scrapers, skim-coat tools, poles, dust control | Smooth modern ceilings, less mess |
On a recent job off Exchange Parkway, a client needed a combination of services: Popcorn Texture Removal, ceiling Drywall Repair, and new lighting. We brought in specialized scraping tools, wide knives for skim coating, and a dustless sanding system to create a smooth, modern ceiling ready for fresh paint and new fixtures. The homeowner was surprised that, with the right tools, the mess and downtime were far less than expected.
CALLOUT: The best drywall crews adjust their tools and methods to match the project—not the other way around.
If you’re planning other upgrades like Fence Painting, Exterior House Painting, or Garage Floor Painting, coordinating interior drywall work at the same time can be more efficient. The right contractor will have the tools and crews to handle both interior and exterior surface preparation in an organized sequence.
What This Means for Businesses and Homeowners in Allen, TX
In a community like Allen—where property values are strong and neighborhoods are relatively new—details matter. Whether you’re a homeowner in Watters Crossing, a small business owner on McDermott Drive, or managing a rental property near the Allen Premium Outlets, the quality of your walls and ceilings directly affects how your space looks and feels.
Poor drywall work can:
- Lower the perceived value of your home or business
- Make even premium paints and finishes look “off”
- Lead to recurring cracks, nail pops, and repair costs
- Complicate future work like Cabinet Refinishing, Cabinet Color Change, or interior updates
On the flip side, investing in a team that uses the right tools and techniques for Drywall Installation and finishing gives you:
- Flatter, more durable walls
- Cleaner corners and transitions
- Better surfaces for Accent Wall Painting, wallpaper, or decorative finishes
- Less dust and disruption during the project
As Allen continues to grow and compete with nearby cities like McKinney, Plano, and Frisco, well-finished interiors are becoming a bigger part of how properties stand out—whether it’s a home hitting the resale market or a business trying to impress clients.
If you’re planning a project involving drywall—new walls, repairs after a leak, ceiling updates, or preparing for a full repaint—asking about tools is a smart way to gauge your contractor’s professionalism. A crew equipped with the right gear is far more likely to deliver the smooth, durable surfaces you want.
Frequently Asked Questions
Q: How do I know if my contractor is using the right tools for drywall installation?
A: You don’t have to know every tool by name, but you can ask smart questions. Ask if they use drywall screw guns with depth control, multiple taping knife sizes, and dustless sanding equipment. For larger projects, ask whether they use panel lifts for ceilings and any automatic taping tools. In Allen, where many homes have open floor plans and high ceilings, these tools make a big difference in safety and finish quality. If the contractor can clearly explain their process and the tools they use for each step—from hanging to finishing to priming—you’re more likely to get a professional result.
Q: Is it worth buying drywall tools for a DIY project, or should I hire a pro?
A: For a very small repair—like a nail hole or a single small patch—it may make sense to pick up a few basic tools. But once you’re dealing with larger repairs, multiple seams, or anything that will be highly visible, hiring a professional crew in Allen is usually more cost-effective. Pros already own specialized tools for Drywall Patching, finishing, and texture matching, and they know how to use them efficiently. Factor in your time, potential mistakes, and the cost of additional materials if something goes wrong, and you’ll often find that professional Drywall Services are a better investment.
Q: How do drywall tools affect the final paint or wallpaper finish?
A: The right tools help create smoother joints, flatter walls, and cleaner corners, which directly affect how paint and wallpaper look. If joints are poorly feathered or sanding is uneven, you’ll see ridges and shadows under Interior Painting, especially with semi-gloss or darker colors. For Wallpaper Installation, bumps or divots can cause bubbles and poor adhesion. Professional tools like wider taping knives, corner trowels, and dustless sanders allow a finisher to create a surface that’s truly ready for premium finishes, from decorative painting to smooth, modern walls.
Q: What’s different about drywall work in Allen compared to older cities?
A: Allen has a mix of newer homes and commercial spaces, many with modern layouts, higher ceilings, and open concepts. That means joints are more exposed to natural light, which highlights imperfections. Newer construction also often uses engineered lumber and truss systems that can move slightly over time, so fasteners and joint treatment need to be done correctly to minimize cracking. The tools used for hanging and finishing—like panel lifts, collated screw guns, and high-quality taping tools—help ensure the drywall can handle these conditions. In older homes or remodels, additional tools may be needed for framing adjustments and blending old textures with new.
Q: Can the right drywall tools reduce dust and mess in my home?
A: Yes, significantly. Modern drywall setups often include dustless sanding systems connected to HEPA vacuums, along with plastic containment barriers and floor protection. In Allen’s family neighborhoods, this is especially important—kids, pets, and HVAC systems are all affected by airborne dust. A contractor who invests in these tools can keep most of the dust contained to the work area and out of your living spaces. This is crucial if you’re living in the home during a project that includes Paint Stripping, Wallpaper Removal, or extensive ceiling work.
Q: How do drywall tools tie into other services like cabinet or floor refinishing?
A: Many projects in Allen combine drywall upgrades with other improvements, like Cabinet Painting, Kitchen Cabinet Staining, or Epoxy Floor Coating. The tools used for drywall—especially sanding and dust control—help protect newly finished cabinets, floors, and trim. For example, dustless sanding and proper masking keep drywall dust off freshly refinished wood or new Wood Staining outside. A contractor who understands the full scope and has the tools to manage each phase can sequence the work to avoid damage and rework.
Q: How important is texture matching, and what tools are needed for that?
A: In Allen, many homes have specific wall and ceiling textures—orange peel, knockdown, or custom finishes. When you repair or add drywall, matching that existing texture is critical to making the work disappear. Texture matching often requires specialized sprayers, different nozzles, and a range of knives and trowels. For small areas, hand-applied techniques with the right knives can blend perfectly; for larger areas, hopper guns or airless sprayers with texture attachments are common. If your contractor has dedicated tools for Texture Matching and can show examples of past work, you’re more likely to get a seamless result.
Ready to Get Started?
If you’re planning drywall work in Allen—whether it’s a small repair, a full-room remodel, or prepping for a whole-home repaint—this is the ideal time to make sure it’s done right. Construction schedules in Collin County tend to fill up quickly, especially around spring and fall when many homeowners schedule Exterior Painting, Fence Staining, or Deck Painting at the same time as interior upgrades.
Choosing a team that brings the right tools—and knows how to use them—means:
- Straighter, smoother walls and ceilings
- Less dust, disruption, and cleanup
- Better long-term performance with fewer cracks and callbacks
- Surfaces that are truly ready for paint, wallpaper, or decorative finishes
MJ Workforce Solutions can walk you through your options, explain our tool and process setup for your specific project, and coordinate related services like priming, Priming Services, caulking, and final Surface Preparation.
If you’re in Allen and want drywall that looks as good in five years as it does on day one, reach out, share your plans, and we’ll help you map out a clean, efficient path from bare framing to beautifully finished walls.
About MJ Workforce Solutions
MJ Workforce Solutions is a locally focused painting and drywall company serving homeowners and businesses in Allen, TX and the surrounding area. Our team combines years of hands-on experience with professional-grade tools for Drywall Installation, repair, painting, staining, and specialty finishes. From smooth modern interiors to detailed trim and exterior surfaces, we follow industry best practices and local building standards to deliver durable, high-quality results on every project.