
Unsightly holes and cracks in your Allen, TX drywall can detract from the beauty and value of your home. Whether caused by accidents, nail pops, settling, or plumbing mishaps, these imperfections require attention to restore your walls to their former glory. The good news is that fixing minor to moderate holes and cracks in drywall is a manageable DIY project for most homeowners. This comprehensive guide will equip you with the knowledge and steps to tackle these drywall repairs with confidence, transforming your Allen, TX home into a smooth and polished space.
By following this step-by-step guide and using the recommended tools and materials, you can effectively fix holes and cracks in your Allen, TX drywall, achieving a seamless and professional-looking finish.
Gathering Your Arsenal: Essential Tools and Materials
Before diving into the repair process, ensure you have all the necessary tools and materials on hand. A trip to your local Allen, TX hardware store should provide everything you need:
Safety First:
Protect your eyes with safety glasses and wear a dust mask to minimize dust inhalation.
Sharp Tools:
A utility knife is essential for cutting drywall patches and scraping away loose material. A putty knife will come in handy for applying joint compound and smoothing the repaired area. For larger holes, you might need a drywall saw for clean cuts.
Patching Materials:
Depending on the size of the hole, you’ll need either drywall patch material (mesh or fiberglass) or joint compound (also known as drywall mud). Mesh or fiberglass patches are ideal for larger holes, while joint compound is sufficient for smaller cracks and imperfections.
Sanding Essentials:
Sandpaper in various grits (around 80-grit for rough shaping and 120-grit for final smoothing) is necessary for sanding down the joint compound and achieving a smooth finish. A sanding sponge can help conform to uneven surfaces.
Fastening Power:
Depending on the repair size, you might need drywall screws to secure the patch in place. For smaller repairs, applying joint compound directly over the hole or crack might suffice.
Finishing Touches:
A primer suitable for drywall and your intended paint color is essential for creating a uniform painting surface. Don’t forget high-quality paint to match your existing wall color for the final touch.
Preparing the Battlefield: The Art of Proper Hole and Crack Preparation
Once you’ve assembled your tools and materials, it’s time to prepare the damaged area for repair. Here’s a breakdown of the crucial preparation steps:
Safety First, Always:
Turn off the power to any electrical outlets or wires near the repair area to avoid electrical hazards.
Clear the Canvas:
Remove any furniture or wall hangings that might obstruct your workspace. Cover the surrounding area with drop cloths to protect your floors and furniture from dust and debris.
Enlarging the Hole:
For holes larger than a few inches, use your utility knife to create a clean, square opening. This ensures a better fit for the drywall patch and minimizes the amount of joint compound needed.
Sharpening the Crack:
For cracks, use your utility knife to widen the crack slightly in a V-shape. This creates a better key for the joint compound to adhere to and prevents the crack from reappearing later.
Clearing Debris:
Use your utility knife or a putty knife to remove any loose drywall paper, debris, or paint around the damaged area. A clean and debris-free surface ensures a strong bond between the patch or joint compound and the existing drywall.
Addressing Underlying Issues:
If the hole or crack stems from a plumbing leak or structural settlement, address the underlying cause before patching the drywall. Ignoring the root problem can lead to the repair failing and the issue recurring.
Patching Up the Past: Applying Mesh/Fiberglass Patches or Joint Compound
Depending on the size of the hole, you’ll employ either a mesh/fiberglass patch or joint compound:
Mesh/Fiberglass Patch for Larger Holes:
- Cut a piece of mesh/fiberglass patch slightly larger than the hole.
- Place the patch over the opening, ensuring it lays flat against the surrounding drywall.
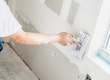
- Using a putty knife, apply a thin layer of joint compound over the patch, completely covering the mesh and edges.
- Apply additional thin layers of joint compound, allowing each layer to dry completely before adding the next. Sand lightly between coats for a smooth finish.
Joint Compound for Smaller Cracks and Imperfections:
- Using your putty knife, apply joint compound directly over the crack, filling the entire V-shaped opening.
- Apply multiple thin layers of joint compound, allowing each layer to dry completely before adding the next. For larger cracks, use a wider putty knife for better coverage.
- Use a damp sponge to smooth out the joint compound while it’s still wet. This helps achieve a more even surface.
The Art of Sanding: Achieving a Seamless Finish
Once the joint compound has dried completely (refer to the drying times on the product packaging), it’s time for sanding:
Start Rough, Finish Smooth:
Begin with a coarser sandpaper (around 80-grit) to remove any bumps or ridges left by the joint compound. Use light, even strokes and sand the entire repaired area, including the surrounding drywall for a seamless transition.
Progress to a Finer Grit:
Once the initial shaping is complete, switch to a finer sandpaper (around 120-grit) for a final smoothing. Sand lightly and pay attention to the edges of the repair to ensure a perfect match with the existing wall surface.
Dust Down and Inspect:
After sanding, use a damp cloth to remove any sanding dust. Hold the area up to light to check for any imperfections that might require additional sanding or a touch-up coat of joint compound.
Priming for Perfection: Creating a Uniform Painting Surface
Proper priming is crucial for a flawless paint finish:
Choose the Right Primer:
Select a high-quality primer suitable for drywall and compatible with your chosen paint. A primer specifically designed for drywall helps create a uniform painting surface and promotes better paint adhesion.
Apply the Primer:
Using a paint roller or a brush, apply a thin layer of primer over the entire repaired area, extending slightly onto the surrounding drywall. Ensure even coverage and avoid leaving any drips.
Allow the primer to dry completely before moving on to the painting stage (refer to the drying time recommendations on the primer packaging).
Painting Perfection: The Finishing Touch
With the repair prepped and primed, it’s time for the final step – painting:
Match Your Masterpiece:
Ensure you have paint that matches the existing wall color. If unsure, consult with the paint department at your local hardware store for assistance with color matching.
Protect the Surrounding Area:
Use painter’s tape to cover any trim, baseboards, or electrical outlets near the repaired area to prevent paint splatter.
Apply the Paint:
Using a paint brush for edges and corners, followed by a paint roller for larger areas, apply a thin, even coat of paint over the repaired area and a small section of the surrounding wall for a seamless blend.
Apply Additional Coats (if necessary):
Depending on the paint’s opacity and the severity of the repair, you might need to apply a second coat of paint for complete coverage. Allow the first coat to dry completely before applying the second.
Step Back and Admire Your Work!
By following these steps diligently, you’ve successfully addressed those unsightly holes and cracks in your Allen, TX drywall. Take a moment to admire your handiwork and enjoy the satisfaction of a job well done. Your Allen, TX home will boast smooth, flawless walls that enhance its overall aesthetics and value.
If you’re tackling a larger repair project or lack the confidence to fix extensive drywall damage, don’t hesitate to contact a professional drywall repair service in Allen, TX. MJ Workforce Solutions specializes in drywall installation and repair services in Allen, TX. Our team of experienced, insured, and meticulous professionals can handle any drywall repair project, from minor touch-ups to extensive wall damage restoration. We utilize high-quality materials and prioritize customer satisfaction throughout the project.
Here are some of the benefits of partnering with MJ Workforce Solutions for your drywall repair needs in Allen, TX:
- Expertise and Experience: Our drywall specialists possess the knowledge and skills to handle any drywall repair, ensuring a long-lasting and professional-looking result.
- Quality Materials: We use only the highest-quality drywall patches, joint compounds, sanding tools, and primers to guarantee a flawless repair.
- Efficiency and Cleanliness: Our team works efficiently to minimize disruption in your home and meticulously cleans the work area upon completion.
- Safety Matters: We prioritize safety by adhering to all industry standards and using proper safety equipment during the repair process.
- Peace of Mind: With MJ Workforce Solutions handling your drywall repairs, you can relax and enjoy the peace of mind that comes with knowing the job is done right.
Contact MJ Workforce Solutions Today!
We offer a free consultation to assess your drywall repair needs in Allen, TX. Our experts will evaluate the damage, recommend the most suitable repair approach, and provide you with a competitive quote. Whether you require a minor touch-up or a comprehensive drywall restoration, MJ Workforce Solutions is your one-stop shop for all your Allen, TX drywall repair needs.
Don’t let those holes and cracks in your drywall detract from the beauty of your home. Contact MJ Workforce Solutions today and transform your Allen, TX walls into a smooth and polished canvas!