
Staining your cabinets can significantly enhance the aesthetic appeal of your kitchen or bathroom, giving the wood a rich and polished look. However, achieving a flawless finish requires meticulous preparation. Properly preparing your cabinets for staining not only ensures an even and long-lasting application but also highlights the natural beauty of the wood. In this comprehensive guide, we’ll walk you through each step of the preparation process, ensuring your cabinets are ready for a professional-grade stain.
Proper preparation of cabinets before staining involves cleaning, sanding, repairing, and conditioning the wood. These steps are crucial for ensuring an even stain application and a professional finish.
Cleaning and Degreasing the Cabinets
Cleaning your cabinets is the first crucial step in the preparation process. Dust, grease, and grime can hinder the staining process, leading to uneven application and poor adhesion.
Removing Surface Dirt and Dust
Begin by removing all the contents from your cabinets. Use a vacuum cleaner with a brush attachment to remove loose dust and debris from the surfaces. Pay special attention to corners and edges where dirt tends to accumulate.
Degreasing the Surfaces
Kitchen cabinets are particularly prone to grease buildup. Use a degreasing agent or a mixture of warm water and dish soap to clean the surfaces. Apply the solution with a sponge or cloth, scrubbing gently but thoroughly. For stubborn grease spots, you may need to use a stronger cleaner or a dedicated degreaser.
Final Rinse and Drying
After degreasing, wipe down the cabinets with a cloth dampened with clean water to remove any soap residue. Allow the cabinets to dry completely before proceeding to the next step. This ensures that no moisture is trapped in the wood, which could affect the staining process.
Sanding the Cabinets
Sanding is a critical step that smooths out the wood surface, removes any old finish, and opens up the wood grain for better stain absorption.
Choosing the Right Sandpaper
Start with a medium-grit sandpaper (around 120-grit) to remove old finish and surface imperfections. Progress to a finer grit (220-grit or higher) to achieve a smooth finish. Sanding blocks or electric sanders can make the job easier and more consistent.
Sanding Techniques
Always sand in the direction of the wood grain to avoid scratches that will show up under the stain. Use even pressure and check your progress frequently. Pay special attention to corners and edges, where the finish tends to be thicker and harder to remove.
Cleaning Up After Sanding
Once sanding is complete, use a vacuum and a tack cloth to remove all the dust from the surface. Any remaining dust can interfere with the stain application, leading to an uneven finish.
Repairing and Filling Imperfections
Inspecting your cabinets for any damage and making necessary repairs ensures a smooth and flawless finish.
Identifying Damage
Look for dents, scratches, and holes that need to be filled. Small imperfections can be repaired with wood filler, while larger damages may require more extensive repairs or even replacement parts.
Applying Wood Filler
Choose a wood filler that matches the color of your wood as closely as possible. Apply the filler with a putty knife, pressing it into the imperfections and smoothing it out. Allow it to dry completely according to the manufacturer’s instructions.
Sanding the Filled Areas
Once the filler is dry, sand the filled areas with fine-grit sandpaper until they are smooth and level with the surrounding surface. Wipe away the dust with a tack cloth before moving on to the next step.
Conditioning the Wood
Wood conditioner helps to prepare the wood for staining, ensuring an even application and preventing blotchiness.
Choosing the Right Wood Conditioner
Select a wood conditioner that is compatible with the type of stain you plan to use. Oil-based conditioners are generally more versatile and work well with a variety of stains.
Applying the Conditioner
Using a clean, lint-free cloth or a brush, apply the wood conditioner evenly over the surface of the cabinets. Follow the grain of the wood and make sure to cover all areas thoroughly. Allow the conditioner to penetrate the wood for the time specified by the manufacturer, usually about 15 minutes.
Wiping Off Excess Conditioner
After the conditioner has soaked in, wipe off any excess with a clean cloth. This step ensures that the conditioner is evenly distributed and that there are no puddles or wet spots that could affect the staining process.
Choosing and Testing Your Stain
Selecting the right stain and testing it on your cabinets ensures that you achieve the desired color and finish.
Types of Stains
There are various types of stains to choose from, including oil-based, water-based, gel stains, and varnish stains. Each type has its own benefits and application methods. Oil-based stains are known for their durability and rich color, while water-based stains are easier to clean up and have less odor.
Testing the Stain
Before applying the stain to your entire cabinet, test it on a small, inconspicuous area or a scrap piece of wood. This allows you to see how the stain will look on your cabinets and make any necessary adjustments to your application technique.
Adjusting the Stain Color
If the test area does not achieve the desired color, you can adjust the stain by applying additional coats or mixing it with a lighter or darker shade. Always allow each coat to dry completely before adding another layer.
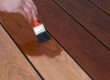
Applying the Stain
Applying the stain correctly is crucial for achieving a professional and long-lasting finish.
Tools and Materials
Gather all the necessary tools and materials, including brushes, rags, gloves, and your chosen stain. Having everything ready before you start will make the process smoother and more efficient.
Application Techniques
Apply the stain using a brush or a cloth, following the direction of the wood grain. Work in small sections to ensure even coverage and avoid lap marks. Wipe off any excess stain with a clean cloth to prevent uneven coloring.
Drying and Curing
Allow the stain to dry according to the manufacturer’s instructions. This usually takes several hours overnight. For a more durable finish, consider applying a clear topcoat or sealer once the stain is fully dry.
Conclusion
Properly preparing your cabinets for staining involves several meticulous steps, but the results are well worth the effort. By following this step-by-step guide, you’ll ensure a smooth, even, and professional finish that enhances the beauty of your wood cabinets. Imagine transforming your kitchen from tired and outdated to a warm and inviting space that reflects your personal style. Staining allows you to highlight the natural wood grain and breathe new life into your cabinets.
However, be aware that this DIY project requires patience and attention to detail. Mistakes during preparation, like uneven sanding or improper cleaning, can lead to a blotchy or uneven stain. If you’re unsure about tackling this yourself, consider enlisting the help of a professional like MJ Workforce Solutions in Allen, TX. Their experience can ensure a flawless finish that you’ll enjoy for years to come.