
Most homeowners know the feeling: you pick a paint color that looked perfect on a tiny sample, spend a weekend rolling it onto the walls, and then step back only to realize the room feels darker, smaller, or just “off.” Interior painting is one of the easiest ways to refresh a home, yet it’s also one of the most common DIY frustrations. Streaky coverage, patchy walls, visible roller lines, and colors that clash with your furniture can quickly turn an exciting project into an exhausting redo.
The good news is that those problems aren’t random; they usually come from a few predictable mistakes that can be avoided with the right approach. When you understand how lighting, preparation, tools, and paint quality all work together, you can transform a room with confidence instead of guesswork. Whether you live in a newer home in Allen, Texas or an older property with plenty of character, simple interior painting tips can make the difference between “good enough” and “professionally polished.”
MJ Workforce Solutions works with homeowners across Allen who want their interiors to look intentional, cohesive, and long-lasting. The following guide breaks down practical, real-world tips that homeowners can actually use – from choosing colors that won’t disappoint to avoiding the hidden pitfalls that cause chipping, peeling, and uneven finishes. If you’re planning to pick up a roller soon, these strategies will help you paint smarter, not harder.
Plan Your Color Strategy
Before you buy the first gallon of paint, spend time planning the overall color strategy for your home. Many people start by choosing colors in isolation, but thinking in terms of how rooms connect makes a huge difference. Consider the sightlines in your home: what do you see from the front door, from the living room into the kitchen, or down the hallway? In Allen’s open-concept homes, colors need to flow smoothly from one space to the next to avoid a choppy, disconnected feel.
Lighting is another crucial factor. Natural light in North Texas can be intense and warm during the day but cooler in the mornings and evenings. A color that feels airy in full sun might look dull at night under warm bulbs. Always test at least two or three paint samples on multiple walls in the same room. Paint larger swatches, about poster-size if possible, and look at them at different times of day. This simple step eliminates a lot of color regret later on.
Think about the mood you want each room to create. Soft neutrals and off-whites work well for living rooms and open areas because they adapt to changing decor. Bedrooms often benefit from calmer tones like muted blues, greens, or warm grays. Bold accent walls can add personality, but use them thoughtfully. In compact Allen homes or townhouses, too many dark accent walls can unintentionally make spaces feel smaller. A professional team like MJ Workforce Solutions can help you balance character and cohesion so the overall palette feels intentional.
Prep Work: The Unseen Hero
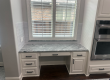
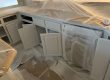
Most painting disasters don’t come from the paint itself; they come from rushing the prep. Walls that aren’t cleaned, repaired, or properly primed will reveal every flaw once the new color goes on. Start by giving your walls a thorough cleaning, especially in kitchens and bathrooms where grease, steam, and residues build up. A mild detergent and warm water are usually sufficient, but stubborn grime may need a degreaser. Let surfaces dry completely before moving on.
Next, address imperfections. Fill nail holes, small dents, and hairline cracks with a quality spackle or joint compound. For larger cracks or damaged areas, you may need to apply multiple layers of compound and sand between coats. Use a sanding sponge or fine-grit sandpaper to smooth patched areas so they blend seamlessly with the surrounding wall. This step may feel tedious, but it’s what gives your finished walls that smooth, professional look homeowners in Allen admire in model homes.
Priming is another part of prep that people often underestimate. If you’re painting over dark colors, new drywall, or stained surfaces, a primer is essential for even coverage and long-term adhesion. Primer helps the paint grip properly and reduces the number of topcoats you need. For problem areas like water stains, smoke damage, or heavy marks, a stain-blocking primer is worth the investment. MJ Workforce Solutions frequently sees DIY projects fail because primer was skipped, leading to bleed-through and uneven sheen later on.
Choose Quality Paints And Tools
Not all paints are created equal, and the difference becomes obvious as soon as you start rolling. Higher-quality paints tend to have better pigments and binders, which translate into richer color, better coverage, and more durability. For busy Allen households with pets, kids, and frequent guests, investing in a premium interior paint can save you from constant touch-ups and repainting. Look for washable or scrubbable finishes in high-traffic zones like hallways, entryways, and family rooms.
Finish matters just as much as color. Flat and matte finishes are great at hiding wall imperfections, but they’re less durable in areas that get bumped or touched often. Eggshell and satin finishes strike a balance between appearance and cleanability, making them popular choices for living rooms, bedrooms, and dining rooms. Semi-gloss and gloss finishes are best for trim, doors, and sometimes bathrooms or kitchens, where moisture and frequent cleaning are common. Matching the sheen to the room’s function is a subtle but important interior painting tip every homeowner should keep in mind.
The tools you use can either make your life easier or create extra work. Cheap brushes shed bristles, and low-quality rollers can leave lint on your walls. Choose angled sash brushes for cutting in around ceilings, trim, and corners. For rollers, match the nap (thickness of the roller cover) to the surface: shorter naps for smooth walls and longer naps for textured surfaces. In many Allen homes with light texture on the walls, a 3/8″ to 1/2″ nap roller often provides good coverage. Professionals like MJ Workforce Solutions rely on consistent, high-quality tools because they know they directly affect the final result.
Master Basic Painting Techniques
Even with the best paint and tools, technique determines how your finished walls will look. Start by “cutting in” – using a brush to paint a border around the edges of the wall, along ceilings, trim, and corners. Work in manageable sections so the brushed edges stay wet when you roll the main areas. This wet-on-wet approach helps the paint blend seamlessly and prevents noticeable lines where the brushwork meets the rolled surface.
When rolling, load your roller evenly and avoid submerging it completely in the paint tray. Roll the paint onto the wall in a “W” or “M” pattern, then fill in the gaps without pressing too hard. Overworking the paint or pressing excessively can cause streaks and uneven sheen. Work from top to bottom and maintain a consistent pace to keep a wet edge. This means you’re always rolling into paint that hasn’t fully dried yet, which helps eliminate lap marks and roller lines that are especially visible in rooms with strong natural light.
Plan for at least two coats of paint, sometimes three if you’re making a dramatic color change. It’s tempting to try to cover everything in a single heavy coat, but that often leads to drips, sagging, and an uneven finish. Allow the recommended drying time between coats, which can vary depending on humidity and temperature. In Allen’s climate, indoor air conditioning usually helps paint dry predictably, but it’s still wise to follow the manufacturer’s guidelines. Patience at this stage pays off in a smoother, more professional result.
Work Smart Room By Room
Instead of tackling your entire home at once, approach interior painting strategically, room by room. Start with a space that will give you a quick visual win, such as a small bedroom, office, or hallway. Completing one room fully builds momentum and gives you a clearer sense of how your chosen colors feel in real life. Many Allen homeowners find that once one room is finished, it becomes easier to make decisions about adjacent spaces and accent colors.
In each room, follow a consistent order: ceilings first, then walls, then trim and doors. Painting ceilings before walls prevents spatters from ruining freshly painted surfaces. When you move to the walls, protect baseboards and trim with painter’s tape, but don’t leave the tape on for too long after painting. Carefully remove it while the paint is still slightly tacky to avoid peeling. Finally, paint trim and doors with a smaller brush or foam roller, using a higher-sheen paint that can stand up to contact and cleaning.
Pay attention to how each room is used. In a kitchen, opt for paints that resist moisture and can be wiped down easily, especially near cooking areas. Bathrooms in Allen homes, where humidity can fluctuate, also benefit from moisture-resistant formulas. Children’s rooms may need more durable, washable finishes to handle fingerprints, markers, and play. Tailoring your paint choices and techniques to each room’s reality is one of the most practical interior painting tips any homeowner can apply.
Know When To Call The Pros
There’s real satisfaction in a well-executed DIY project, but some painting tasks are better handled by professionals. High ceilings, stairwells, and complex trim work pose safety and quality challenges that many homeowners underestimate. If you’re dealing with significant wall damage, water stains, or previous paint failures like peeling and flaking, a professional evaluation can prevent repeated problems. In older Allen homes, there may also be concerns like previous lead-based paint layers that require specialized handling.
Time is another critical factor. A whole-home repaint can stretch across many weekends if you’re working alone or with limited help. Professionals like MJ Workforce Solutions have the crew size, equipment, and experience to complete projects efficiently while maintaining quality. They also bring product knowledge, helping you choose paints and finishes that suit both your style and the specific conditions in your home. This can be especially valuable if you’re preparing to sell your property and want colors that appeal broadly to Allen buyers.
Even if you prefer to handle most of the painting yourself, you can combine DIY efforts with professional services. For example, you might paint bedrooms and low-traffic areas while hiring professionals for high-visibility spaces like living rooms, kitchens, and entryways. Or you may bring in experts for more intricate projects such as detailed trim work or specialty finishes. Services related to projects like Floor Painting and cabinetry can also complement a fresh wall color, creating a cohesive, updated interior without a full remodel.
Frequently Asked Questions
How do I know if my walls need primer before painting? Primer is recommended if you’re painting over very dark colors, raw drywall, patched areas, stains, or glossy finishes. If you can see uneven porosity on the wall (some areas look dull and others shinier), primer will help create a uniform surface so the topcoat looks consistent. In homes around Allen, Texas, where builders often use flat contractor-grade paint, applying primer or a paint-and-primer-in-one can also improve durability and washability.
What’s the best paint finish for high-traffic areas? For hallways, entryways, and family rooms, eggshell or satin finishes usually work best. They offer a slight sheen that is easier to clean than flat or matte paints, but they’re not so shiny that they highlight every wall imperfection. If you have kids or pets, choosing a high-quality washable eggshell or satin paint gives you the ability to wipe away scuffs and marks without constantly repainting.
How many coats of paint should I plan for? Most interior projects require at least two coats of paint for even coverage and accurate color. If you’re covering a strong or dark color with a much lighter shade, you may need a tinted primer plus two topcoats, or occasionally three coats of paint. Skipping coats to save time often leads to visible roller marks, uneven color, and the old color showing through, which ultimately means more work to correct.
Why does my painted wall look patchy after it dries? Patchiness usually comes from uneven application, inconsistent drying conditions, or differences in wall porosity. If some areas dry faster than others, or if you go back over partially dried paint with a roller, you can create lap marks and uneven sheen. Proper priming, maintaining a wet edge while rolling, and allowing full drying time between coats help avoid this. Using quality paint with good hiding power is also important for a smooth, uniform finish.
Is it worth hiring a professional painter instead of doing it myself? It depends on your time, comfort level, and the complexity of the project. For small rooms with straightforward walls, many Allen homeowners can achieve good results with careful prep and patience. However, if you’re facing high ceilings, detailed trim, damaged walls, or a tight schedule, hiring a professional like MJ Workforce Solutions can save you stress and deliver a more durable, polished outcome. Professionals bring the right tools, techniques, and product knowledge to ensure your interior paint job looks great and lasts for years.