
How do some walls look impossibly smooth, seamless, and luxurious, while others reveal every joint, ripple, and shadow the moment the light hits them? The secret is rarely the paint—it’s almost always the drywall work hiding underneath. Whether you’re renovating a single room or building a new home in Allen, Texas, understanding the hidden techniques behind professional drywall installation is the key to achieving truly stunning walls.
Drywall may seem simple: hang the sheets, tape the seams, mud the joints, sand, and paint. But the difference between “good enough” and “wow” lies in a series of small, meticulous decisions that start before the first sheet is even lifted. From choosing the right thickness and layout pattern, to managing light sources and controlling dust, every step either adds to or subtracts from the final look. MJ Workforce Solutions has built its reputation in Allen, Texas by paying attention to those details that most people never see—but always feel when they walk into a finished room.
If you’ve ever stared at a wall and noticed faint lines, nail pops, or uneven textures, you’ve already seen what happens when shortcuts are taken. This guide pulls back the curtain on the techniques, habits, and trade secrets that separate average drywall jobs from the kind of walls you see in model homes and design magazines. Whether you’re a homeowner looking to understand the process or planning to hire professionals like MJ Workforce Solutions, these drywall installation secrets will help you recognize quality work and insist on results that truly stand out.
Planning Before Hanging
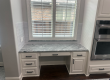
Stunning walls begin long before the first sheet of drywall is hung. Proper planning sets the stage for everything that follows. One crucial decision is selecting the correct drywall thickness and type for each space. In Allen, Texas homes, 1/2-inch drywall is common for interior walls, but 5/8-inch is often used in ceilings or areas where added sound control and rigidity are needed. Moisture-resistant board is essential in bathrooms and laundry rooms, while specialized fire-rated drywall may be required near garages or utility areas. Choosing the wrong type can lead to sagging, cracking, or premature damage that no amount of finishing can hide.
Layout planning is another often-overlooked factor. Instead of simply covering the studs with whatever fits, professionals map out where seams will fall in relation to doors, windows, and light sources. Vertical and horizontal joints are carefully staggered to reduce long, continuous seams that are more prone to cracking and telegraphing through the paint. In rooms with large windows or strong directional lighting, experienced installers like MJ Workforce Solutions consider how light will rake across the surface, minimizing joints in the most visible areas.
Stud preparation is also part of the planning phase. Before drywall goes up, pros check the framing for bowed or twisted studs, shimming or planing as needed. If the framing isn’t flat, the drywall will never be flat. This extra step pays off later when you want perfectly straight lines where walls meet ceilings or when installing trim and cabinetry. In older Allen homes where framing may have shifted over time, correcting these issues up front can be the difference between a wall that looks newly built and one that reveals every flaw.
Finally, planning includes anticipating future needs: reinforcing walls where heavy items like TVs or cabinets will be mounted, adding extra backing where towel bars and handrails will go, and marking stud locations for later reference. These practical considerations ensure your beautiful walls are not just cosmetic, but functional and durable as your lifestyle evolves.
Secrets Of Flawless Hanging
Once planning is complete, the way drywall is actually hung has a huge impact on the final look. A professional installer doesn’t simply “get the sheets up”; they aim for maximum stability and minimal visible joints. One important secret is hanging drywall horizontally on walls whenever possible. This reduces the number of seams, especially in typical 8- or 9-foot rooms, and creates tighter joints that are easier to finish. It also helps distribute stress, reducing the risk of cracks over time.
Fastener placement is another subtle but critical detail. Screws must be driven just below the surface of the paper without breaking it. Overdriven screws weaken the hold and create dimples that are hard to conceal, while underdriven screws cause bumps and require extra sanding. Professionals follow consistent spacing—often 12 inches on walls and 8 inches on ceilings—to prevent sagging or movement that can later show up as nail pops. MJ Workforce Solutions technicians in Allen pay close attention to this, especially in ceilings where gravity and Texas humidity can work together to cause sagging if fasteners are too far apart.
Cutting and fitting drywall around openings is another place where skill shows. Clean, tight cuts around windows, doors, outlets, and recessed lights reduce the need for excessive joint compound and patching later. Instead of hacking around boxes and fixtures, pros use proper tools and templates, leaving consistent gaps that can be easily filled and reinforced. This not only looks better but also reduces the risk of cracks forming at weak points, which are often near these openings.
The way corners are treated during hanging also matters. Inside corners are typically left with one sheet extending past the corner and the adjoining sheet butting into it. This approach creates a more stable joint for taping and helps prevent cracking as the home naturally shifts and settles. Outside corners are carefully aligned so that corner bead can be installed straight and true. When the hanging is done with precision, the finishing becomes an art, not a rescue mission.
Mastering Joints And Taping
The real magic of stunning walls happens during taping and mudding. This is where seams disappear and a flat surface emerges. One key secret is using the right joint compound for each step. A common strategy is to use a setting-type compound (often called “hot mud”) for the first coat, especially over joints and screw heads. It dries harder and faster, allowing subsequent coats to be applied sooner. For later coats, lightweight all-purpose or topping compounds are used because they are easier to sand and feather.
Proper taping technique is crucial. Paper tape is often preferred by professionals for its strength and ability to resist cracking, especially in corners. The trick is embedding the tape in a smooth, even coat of mud without bubbles or wrinkles. Bubbles that are left behind will show as raised areas after sanding and painting. Skilled installers at MJ Workforce Solutions take the time to press the tape firmly and remove excess compound, creating a solid, stable joint that won’t fail later.
Feathering the joints—spreading the compound wider with each coat—is another professional secret. Instead of trying to hide seams with a thick, narrow band of mud, pros apply multiple thin coats, each extending further out from the joint. On a typical wall, a final coat might span 10–12 inches across, so the transition between the joint and the flat sheet is nearly invisible. This technique is especially important on walls that will receive glossier paints or strong side lighting, both of which highlight even minor imperfections.
Inside and outside corners require special attention. For inside corners, a dedicated corner trowel helps create a crisp line while still filling both sides evenly. Outside corners rely on properly installed corner bead—either metal, vinyl, or paper-faced—that is fully embedded in compound without voids. When corners are done right, they provide clean visual lines that make a room feel well-built and carefully finished.
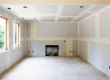
Sanding, Light, And Texture
Even with excellent taping, sanding is what ultimately reveals whether the job is truly high quality. One of the most important secrets is using light to your advantage. Professional drywall finishers in Allen often use raking light—either from a work light held close to the wall or from a strong side light—to cast shadows across the surface. This makes every ridge, scratch, and low spot visible so they can be corrected before painting. Relying on overhead room lighting alone almost guarantees that some flaws will only become visible after the paint goes on.
Another key is progressive sanding. Starting with a medium grit and moving to a finer grit allows the finisher to shape the compound without creating deep scratches. The goal is to sand just enough to blend edges and remove tool marks, not to grind away large amounts of material. Over-sanding can expose tape or create depressions that are hard to fix. MJ Workforce Solutions uses a mix of hand sanding and pole sanding to balance control with efficiency, especially on ceilings and tall walls.
Controlling dust is both a health and quality issue. Drywall dust gets everywhere if not managed properly, and it can settle back onto freshly sanded surfaces, contaminating primer and paint. Professionals often use vacuum-assisted sanding tools or strategic plastic sheeting to contain dust. Thorough vacuuming and wiping with a slightly damp cloth help ensure the walls are clean and ready for finishing. This extra care shows up in the final look—paint adheres better and dries more evenly on a clean, well-prepared surface.
Texture is another area where expertise makes a big difference. Some Allen, Texas homes favor smooth walls, while others incorporate subtle orange peel, knockdown, or custom textures. The secret is consistency: an uneven texture or mismatched repairs stand out immediately, especially under natural light. Pros test texture patterns on sample boards or inconspicuous areas first, adjusting spray pressure, mud thickness, and technique until the pattern is uniform. Matching existing textures during repairs is particularly challenging, and a key reason homeowners turn to specialists rather than attempting DIY fixes.
Preparing For Paint And Long-Term Beauty
Even the best drywall work can be undermined if the final steps before painting are rushed. One of the most important secrets is using a high-quality drywall primer rather than jumping straight to paint. Primer seals the porous surface of the joint compound and paper, creating a uniform base that prevents “flashing,” where joints and patches show through as different sheens or colors. In Allen’s bright Texas light, flashing is especially noticeable on large, open walls.
After priming, a careful inspection under good lighting is essential. Primer often reveals flaws that were invisible on bare drywall, such as hairline scratches, small ridges, or shallow dents. Professionals mark these areas with a pencil, spot-patch them with a thin layer of compound, and sand again once dry. This “check and correct” step separates a contractor who is satisfied with “good enough” from one, like MJ Workforce Solutions, who aims for truly stunning results.
Considering the long-term performance of your walls is also part of the secret. Proper humidity control during and after installation helps prevent cracking and nail pops. In Allen, where seasonal humidity can fluctuate, allowing the house to acclimate and maintaining reasonable indoor conditions during construction can make a big difference. Using quality fasteners, joint compounds, and tapes further reduces the risk of future issues that would mar the smooth finish you invested in.
Finally, integrating drywall work with other trades and finishes is crucial. Coordinating with electricians, plumbers, and cabinet installers helps avoid last-minute cuts and patches that compromise the finish. When drywall is treated as part of a larger, carefully choreographed process rather than an isolated task, the entire space benefits. Trim, paint, and even elements like Wallpaper Removal all look better when they sit on a flawless foundation.
Why Pros Matter In Allen
While it’s possible to tackle small drywall projects yourself, achieving the kind of walls that look truly high-end usually demands professional skill, tools, and experience. In Allen, Texas, homes range from older properties with quirky framing to new builds with expansive open-concept rooms and dramatic lighting. Each presents its own challenges. Professionals like MJ Workforce Solutions bring a deep understanding of how local conditions, building styles, and homeowner expectations intersect, tailoring their approach to each project.
Time and efficiency are another factor. What might take a homeowner weeks of evenings and weekends—often with mixed results—can be completed in a fraction of the time by a well-coordinated crew. Pros know how to sequence tasks so that drying times, inspections, and other trades line up smoothly. This efficiency doesn’t just save time; it reduces the chance of rushed steps and mistakes that compromise the final look.
Quality control is built into a professional process. From checking moisture levels in new construction to verifying that all screw heads are properly set before taping, each stage includes checkpoints that prevent small issues from becoming big problems. MJ Workforce Solutions emphasizes this systematic approach, ensuring that by the time paint is ready to go on, the walls meet a high internal standard—not just a quick visual once-over.
Perhaps most importantly, professional drywall work adds long-term value to your home. Smooth, well-finished walls not only look better but also stand up better to daily life, furniture moves, and minor impacts. When it comes time to repaint, change décor, or sell your home, the investment you made in high-quality drywall installation will still be paying off in the form of solid, attractive surfaces that don’t need major repairs or skim coating.
Frequently Asked Questions
How long does professional drywall installation typically take for a room? For an average-sized room in Allen, Texas, professional drywall installation usually spans several days to a week, depending on complexity. Hanging the drywall itself may only take a day, but each coat of joint compound needs time to dry before sanding and recoating. Factors like humidity, room size, ceiling height, and whether special features (arches, niches, detailed corners) are involved will influence the schedule. A quality-focused contractor will never rush drying times just to finish faster, because that often leads to cracking and visible seams later.
Why do my walls show lines and seams after painting? Visible lines and seams are almost always the result of inadequate drywall finishing or poor priming. If joints weren’t properly feathered, if tape bubbled, or if the compound was too thick and not sanded smoothly, paint will highlight those flaws—especially under strong or angled light. Skipping a dedicated drywall primer can also cause “flashing,” where joints and patches absorb paint differently than the surrounding paper. Correcting this often requires additional skim coating, sanding, and re-priming, which is why getting the drywall work right the first time is so important.
Is smooth or textured drywall better for my home? The choice between smooth and textured walls is a mix of style, practicality, and budget. Smooth walls offer a clean, modern, high-end look, but they are less forgiving—any imperfections in the drywall work will be more visible, especially with semi-gloss or satin paints. Textured finishes like orange peel or knockdown can help hide minor flaws and are common in many Allen homes, making repairs easier to blend. However, matching an existing texture during renovations can be challenging, so it’s wise to have a skilled professional handle any repairs or additions.
Can I repair damaged drywall myself, or should I call a professional? Small dings, nail holes, or very minor cracks can often be handled as DIY projects with spackle and light sanding. However, larger holes, recurring cracks, water damage, or issues that involve seams and corners typically benefit from professional attention. These repairs require proper cutting, backing, taping, feathering, and sometimes texturing to blend seamlessly with the surrounding wall. In many cases, homeowners attempt DIY fixes only to end up with visible patches that are more noticeable than the original damage, leading them to call in professionals like MJ Workforce Solutions to restore a uniform, attractive finish.
What should I look for when choosing a drywall contractor in Allen, Texas? When selecting a drywall contractor, look beyond price and ask detailed questions about their process. Ask how they handle framing irregularities, what types of joint compounds they use, how many coats they apply, and whether they use raking light to inspect surfaces before painting. Request references or photos of past work, particularly in rooms with strong natural light, where flaws are easiest to spot. A reputable company like MJ Workforce Solutions will be transparent about their methods, provide clear timelines, and emphasize preparation and finishing as much as the hanging itself, ensuring you end up with walls that truly look stunning.